It’s been almost a week since we did a post, but not because there is a lack of activity here at chezerbey. There’s just not a lot of visual difference to get excited about. So we thought it might be a good idea to start weekly progress posts – a summary of what we’ve done the previous week and what’s slated for the upcoming week. In addition, if there is anything that warrants its own post, we’ll do that too. Besides keeping up with the blog, we’re still getting in the groove of working full-time, working on our house, and squeezing in time to eat and do laundry (which seems to double during renovation projects!), but we’ll aim for a Sunday/Monday update from here on out. So let’s say the first progress report will cover April 5th-11th (since we already shared the thrill that was demo weekend).
As soon as the dust settled from demo, Kyle got to work on the basement stair. But first, a little history – the house was not built with a fancy interior stair to the basement, but one was added at some point. We’re not really sure what the logic was in this or the numerous other stair issues, but we knew the whole thing had to be re-done. During the great basement dig out of ’08, we rebuilt the stair per our new design. The only problem was that you had to duck under the new beam which was doable but pretty awkward.
Not anymore!

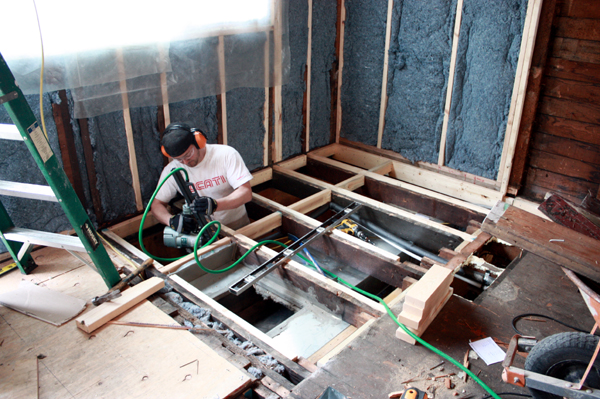
With the interior wall gone, Kyle was now able to cut out the piece of oak flooring and framing (after heading it off), allowing us to walk down to the basement minus the ol’ crouch and duck. As you can see though, there was some serious patching that needed to happen as well.

After a couple of days we were all patched up and ready to go. We’ll be adding another stair stringer and putting down new treads and risers that will span the full 36″ width.

As a side note, one day I was picking up debris and came across this – and it reminded us of home.

After the framing for the stair opening was complete, it was time to tackle a few other areas. On demo day, we discovered that the framing under the kitchen cabinets was pretty sub-standard…as in, there was no rim joist for the subfloor to bear on. So all that got ripped out, a new rim joist was added and new plywood went down. We also had the old back porch flooring to deal with. Since it was built as a porch, all the floor framing sloped away from the house. This meant setting up the laser level (Dad – best present ever!) and sistering on new joists, each one slightly angled to make up for the slope. Since our new kitchen cabinets will be going in here, it was extra important to make sure everything was level and plumb.

The complexity with these two areas is that most of our plumbing, electrical and ductwork happens in this area. So there was a lot of time spent re-routing (annoying, but necessary). At least there was a nice crawl space slab to stand on…

One of the challenges in creating one space from several small ones is that you have to compensate for different floor materials and thicknesses. Fortunately, the oak floor in the living/dining room flushed out with the old fir kitchen floors, which were hidden under two layers of linoleum (leading us to believe that the oak floors were original and not an upgrade). Much to our surprise and gratitude, the linoleum came up very easily (the black color is the glue residue). The patch at the back door is where part of our old bathroom used to be and was filled in over a year ago. The next step is to cover all the floor with 1/2″ plywood. This will add some extra rigidity and will even out any subtle changes in floor elevations (the 4×8 sheet in the corner is sheet #1).

So yes, at this point we’re planning on doing cork everywhere. Part of me wanted to re-finish (and maybe stain) the oak floors, but this would have meant an awkward threshold between the oak and cork which (in my experience) can be a toe-stubbing nightmare and would take away from the goal of creating a cohesive space.
We took tonight off, which is shaping up to be a good way to recover from the weekend blitz (especially when House MD is on and someone invites you over for a homemade meal! Thanks Aud!). This week we’ll focus on installing the 1/2″ plywood and some minor electrical work. And then, skylights? We could use more light…
I have a question. Is your remodel sponsored by Ducati? You would think so from all the pictures of Kyle. : ) Everything looks good so far! Good luck with everything you’re working on.
haha robyn, I loves me some Duc T’s.
Aww I love the little Oklahoma shaped piece of wood. 🙂
Love it! I can already see the plan taking shape. Your blog really displays the benefit of a professional architect: everything is not only well-planned and -designed but fully envisioned and modeled, so even when you claim there’s not a lot of “visual difference” I can imagine how amazing that stairway is going to look. Can’t wait for the next step!
Looks like everything is going great! Keep it up. We are going to need to do some similar floor leveling next year when we tear out our bedroom and bathrooms. So I know where to come for tips. ; )
not sure if you’ve purchased your skylights yet, but Velux offers a decent discount for architects…
meanwhile, i’m not sure how i happened upon the blog, but i’m loving it. it’ll be such a great record once you finish this and move on to the next project 😉
Thanks Mo,
We did buy Velux skylights with a discount…can’t wait to get them installed! Thanks for the comments, we love all the encouragement and will probably really need it in a few months. =)
Thanks Robin, we also considered doing self-leveling compound over the new subfloor but decided we didn’t need it. Might try it out in the basement though since the slab down there is all kinds of wonky!
Wow, thanks Nicole! I read your comment out loud to Kyle and it had us both smiling!
I too love the Oklahoma wood scrap! All is looking great!