It’s been four years since we finished our bathroom and about time for a good ol’ fashioned follow-up post (in fact, a draft version of this post was started nearly a year ago). We’ve had some crazy rain here the last few days, but this morning there was a fleeting moment of blue skies (and decent lighting) so I snapped some fresh photos for you.

Besides a few accessories, we really haven’t made any changes to this space since its completion. Our house is small so we opted for a modest yet efficient layout. However, since it is our only bathroom (yeah, the basement bathroom is still on the to-do list!) we wanted it to feel a tiny bit luxurious too (deep tub, radiant heat, etc.).

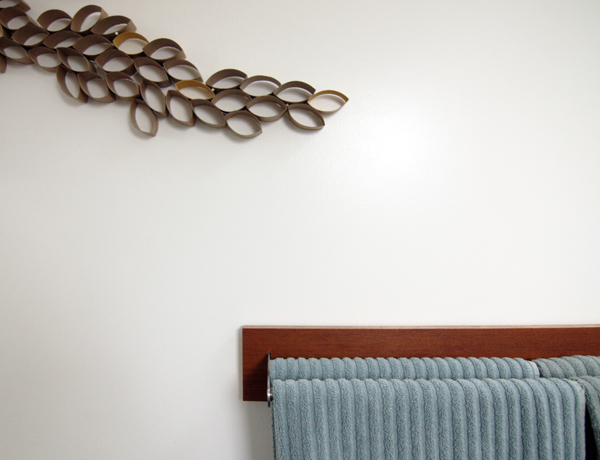
Despite the many doubtful comments I’ve received on the subject, my toilet paper roll art is still going strong! We used a clear acrylic spray on the pieces and our bathroom has a good exhaust fan, so moisture has never been an issue. I’ll probably grow tired of if at some point, but not yet.
The IKEA full-length mirror on the back of the door has been well worth that Liquid Nails experience. With only a small mirror above the sink, the full-length version also doubles as a make-up mirror on days when we’re both rushing to get out the door.

Back in 2008, IKEA didn’t have nearly the number of bathroom vanity options that they do today. Our solution was to attach a simple cabinet unit to a 3-drawer unit and wrap the top and side with teak plywood. (We like to put vanities on legs in small spaces, which makes them feel more like a piece of furniture and not so bulky.)
Our faucet and sink are from Kohler. No complaints. The only thing that slightly annoys my OCD side is that the faucet handles aren’t perfectly horizontal in the off position (we tried to adjust it but no luck so we’re not sure if it’s a flaw in the product of what). Another pro tip: if your sink is non-directional, install it backwards so you hide those ugly overflow holes. Genius, right?


We had a hard time sourcing simple, modern and inexpensive wall sconces, but finally found these from Restoration Hardware. Although they are pictured on the website with the shade facing up, they are designed to go either way. Or not. One of our sconces has failed twice in four years (with the shade separating from the housing as shown in the photo), so we’ll probably just replace both once we find a decent alternative. (Suggestions?)

Over the tub we vaulted the ceiling and installed a small skylight. With the small window above the toilet, there is typically enough natural daylight to avoid using any artificial lights. It’s a good way to start the day.
Opposite of the skylight is our exhaust fan. It’s a Panasonic Whisper Quiet and my only complaint is that sometimes it can be too quiet for guests. If you know what I mean.

One of the smartest moves we made in our bathroom was to add a 2×6 pony wall between our tub and the exterior wall. This allows for a small ledge that runs the length of the tub. It’s only 6″ but it makes a world of difference for storing items and avoids those ugly shower caddies. Better yet, the height means it’s easily accessible while showering or in the tub. Originally, we finished the solid teak ledge with teak oil but after a year switched to a spar varnish. It’s probably time for a fresh coat, but has held up remarkably well considering that it gets blasted with water on a daily basis. The white subway tile is affordable Dal-Tile. For the price I like this tile but every once in a while I have a pang of regret upon seeing higher quality tiles. (This was our first tile install job too so that might have something to do with it.)
We purchased our Kohler Tea-For-Two tub on Craigslist. It was barely used and we got it for about 1/3 of the list price. We love its depth and clean lines, but let’s be real – this is not a two person tub. Sorry Kohler. Although we only had space for a shower/tub combo, we’d definitely recommend going with a deep tub instead of the more standard hotel style. (Y’know, the kind that are so shallow that no one actually ever takes a bath in them.) Our shower fixtures are a combination of Kohler (Purist) with a Hansgrohe valve. Love it all. The valve controls both temperature and function and it’s nice not having a diverter on the tub spout.
The medicine cabinet was from the IKEA Molger line (though has since been discontinued). I like the design but sometimes I wish our more frequently used items weren’t on display. The back panel is a piece of masonite with a mirror attached, which I never really understood because it just multiplies the visual clutter. I’ve toyed with the idea of flipping the masonite and painting it a fun color, but it’s a low priority (obviously).

This IKEA hack was a spur of the moment idea, born from a desire to hide the exposed fasteners on the IKEA Grundtal towel rack. We had a scrap piece of teak plywood lying around so we just cut it to fit with two slits that go over the towel rack. Shortly after finishing the bathroom a friend commented that we should have made the teak plywood a bit longer and installed two hooks. Damn. That is a good idea. Oh well.

Ok, a serious topic – shower curtain rods. At first we reused our inexpensive IKEA rod, the kind that friction fits into place. Well, there is nothing more frustrating than your shower rod and curtain collapsing upon you during a shower and after a few times of this happening I turned to the interwebs for a better solution. Surprisingly, there wasn’t much. I finally found a Moen rod (through Amazon) that both screwed to the wall and had seamless cover plates. Victory. I also finally gave in and traded in my stainless steel shower rings for the kind with ball bearings. Go figure, they do work better (thanks physics!).

For our bedroom and bathroom, we experimented with a window and door reveal detail that involved installing (and painting white) a metal u-shaped reveal between the jamb trim and drywall. We like the look, but the install was a pain and there are some functional aspects that drive me crazy. Like, how do your terminate the reveal at the floor? Well…not this way. Basically we have a small dirt collector that can only be cleaned with a Q-tip. Word to the wise, don’t design stuff that requires a Q-tip to clean it. (Everywhere else in the house we axed the metal reveal and instead butted the drywall up to the wood jamb trim.) Those with a keen eye will also notice the abuse that the door jamb trim has received from the middle drawer. Despite our best efforts, I guess we can’t make a 102 year-old house perfect.
Ok, moving on. The floors! We chose a simple large-scale tile for the floors which we still love. But what we love even more is the electric mat radiant heat underneath. A small splurge but worth every penny. The system is on a timer so it kicks on early in the morning and then again in the early evening. If you do a system like this, you absolutely need it on a programmable timer. (We used to live in a rental house that had it but on a twist timer, which was frustrating because it takes a while to heat up.) The electric mat is only under the portion of tile that you walk on – the only part we goofed on was not running it under the vanity six inches or so (cold toes!).

We haven’t touched the teak plywood countertop yet and it’s starting to show some wear. The issues with using a plywood like this is that the teak is only the top ply so there’s only so much sanding that you can do before exposing the blond middle layers. So, another item on the to-do list. We’ll likely do a very light sand and then add a new layer of finish and cross our fingers.
Other miscellaneous items:
Paint: It’s not as apparent in the photos, but the space needs to be repainted. We must have been tired at the end of this project because for some reason we purchased pre-mixed white paint from a big box store. It looked ok, until we painted the rest of the house and realized it was quite a yellow white. Also, we bought cheapy foam rollers which shed in certain areas. Argh! NEVER BUY CHEAP ROLLERS. Felix also did some damage to the walls so a new paint job is needed. (See how we now need to redo rooms we’ve already done?)
Baseboards: We used a simple painted MDF for the base trim (held off the tile about 1/4″ and caulked between). It’s ok. Ideally I’d like a tile base but the MDF does the job.
Toilet: I never thought I could have such love for a toilet, but I do. We have the Toto Aquia and have never had a single issue (we don’t even own a plunger!). In fact, I’ll go as far to say that rarely do you even need the #2 flush. Best of all though, the streamlined design makes cleaning the thing SO easy. (No Q-tips needed!) We splurged on the soft close seat (which is awesome but does present awkward moments when you’re at a friend’s house and forget that not everyone has your same toilet). The finish on the seat is starting to fail but a new toilet seat every four years doesn’t seem too unreasonable.
Finally, several people have asked us about our sliding door and how we deal with privacy. Well, considering we didn’t have a proper door for the first two years we’re probably not the best advocates of privacy. However, it didn’t take long (ok, actually it did) for Bailey to figure out how to open the door with his nose. For this reason, we bought a door bolt to prevent people/dogs from creating awkward situations. Do we like it? I don’t know, we haven’t actually installed it yet. Furthermore, we’re not even really sure where it is. So here is a picture from the website we ordered it from:

Basically, we’ll need to router out part of the backside of the door (to the left of the mirror) to install the bolt flush. With the door in the closed position the bolt can be kicked out to prevent the door from sliding. It’s meant for a pocket door, but the idea is the same.
Ok…and this concludes a long-winded post about the smallest room in our house!
Want a comprehensive list of everything we’ve used. Here ya go. A play-by-play summary of how we remodeled this space? Boom!