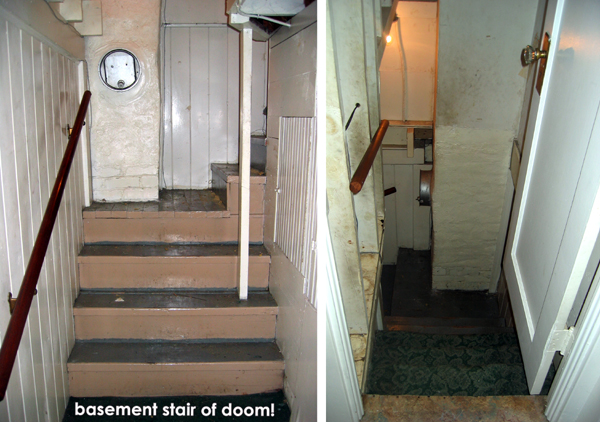
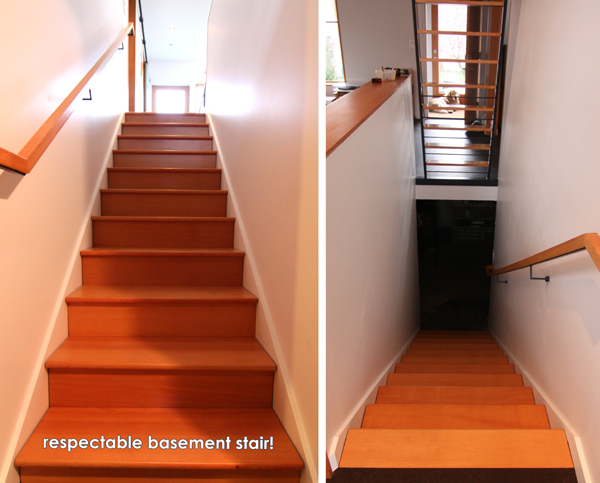
We finally (finally!) finished the basement stair. It’s a small portion of the big 2010 project, but looking back at what we started with, it’s come a long way! A couple of photos from 2006 (before we moved in):
Seriously, stair of doom! When our house was built in 1910, there was no interior stair connecting the two levels (access to the basement was through an exterior door). Sometime around, oh…1964 or so, part of the kitchen was given up for a funky L-shaped stair to get to the basement. (I can only imagine that the stair was halfway built when someone noticed that pesky chimney.) Needless to say, it all had to go. During our basement structural remodel in 2008, we tore out the chimney and the old stair and Kyle built a temporary stair that we’d been using since. But now we have a real stair with a handrail and everything…I can even carry a basket of laundry up without having to duck or turn sideways!
Even though the stair is more or less in the same location, we basically started from scratch. Since we plan on finishing the basement (someday!), we wanted the connection to be as open and inviting as possible. The new stair also needed to be code compliant (since the old one was obviously not!), which meant making it wider, the treads and risers bigger, and providing adequate head clearance as you come into the basement.
In terms of design, we wanted to keep things simple. We used vertical grain fir for the risers and treads (treated with OSMO hardwax oil) and Kyle made a custom handrail out of steel and fir. We’d like to do a big piece of art on the handrail side, and we’ve talked about doing something on the opposite wall (which is also the back side of the stair cabinet), but no brilliant ideas just yet.
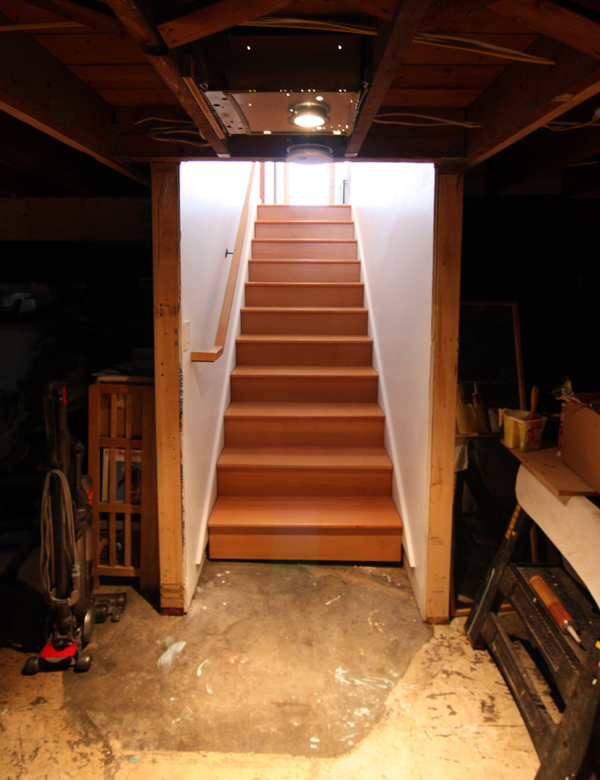
One of the challenges with taking out walls and making our house more open is that it was difficult to decide where to stop (which also explains why we couldn’t really do the rest of the main floor on a room-by-room basis). We decided that our goal would be to do enough so it looked finished from the main floor, while minimizing the line between “done” and “definitely not done”.
…and this is that line! Fortunately, we bought some inexpensive IKEA curtains and rods a few years back and they’ve been migrating around the house, serving as temporary doors, room dividers and window curtains depending on what the current project was. So we’ll just mount the rod to the underside of the beam at the bottom of the stair and hang a few curtain panels and boom! Instant hide-a-basement!
[We’ll put together a separate post with detail shots of the handrail and stair construction.]


