First of all, thank you for the encouraging comments from our last post. It’s nice to know there are still people reading the blog (though apparently no one in our families…ha!). As we continue to brainstorm new ways to use the blog as a platform for sharing about Studio Zerbey, it seemed appropriate for our next post to be something that blended our home and work lives.
So, I present to you – everything you maybe didn’t realize you needed to know about our new office and workshop! What normally would have been a series of blog posts, we compressed into one. (So pour yourself a cup of coffee and settle in!) I think we’d forgotten how long we’ve been mulling over what to do with the garage and then once we finally made a decision – just how long it took to complete construction!

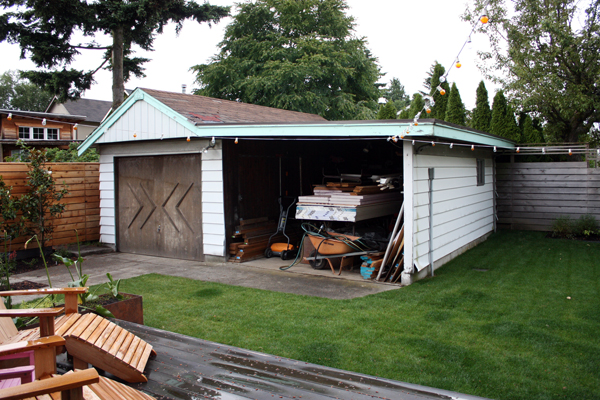
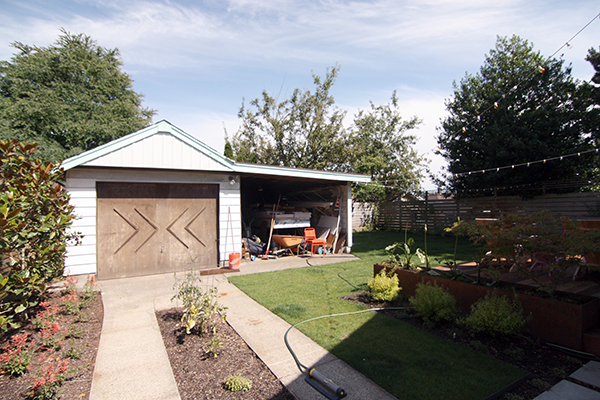
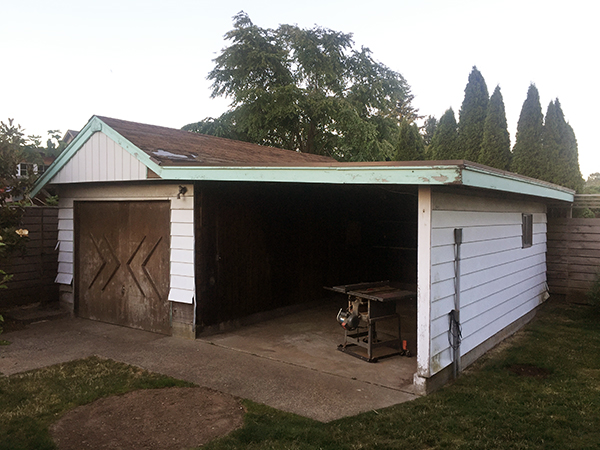
A bit of backstory first – when we bought our house in 2006, one of the major selling points was that it had a 2-car detached garage. (Ok, technically a garage and carport, but two covered parking spaces.) For Seattle, this is huge. If you have a driveway, let alone an actual garage, it’s considered a luxury. Although we had no actual plans to park a car in the garage, we were looking for a house with some sort of space to store the woodworking tools that Kyle inherited from his grandfather. The garage portion was built in 1910 (same year as the house) and the carport was added in 1965. At some point (presumably the same year), a foot or so was added to the garage length and the whole thing was covered in white aluminum siding and teal trim.
As you can see, things really didn’t change much between 1965 and 2017. We continued to use the garage as shop space and the carport quickly became a protected area for materials, lawn tools, miscellaneous crap, etc. (But daaang, look how nice that grass was!)
Although the house always seemed to be the priority, we knew we’d eventually need to do something with the garage. In 2013, we blogged about changing the roof form and converting the carport into a multipurpose space. Then, in 2015, we changed course and decided what we really wanted to do was convert the structure to a DADU (Detached Accessory Dwelling Unit). This scenario would have crossed a lot of “wants” off our list, but ultimately, it was too expensive. We often advise our clients that although a DADU can be a great solution, you are still building a small house in your backyard. And with new construction costs starting at around $300/SF in this area, it adds up quickly. And we weren’t even planning on renting it out. So, we hit the pause button again.
In 2016, we took the baby step of consolidating our offices within the house. Although it was nice having our own spaces, we soon realized that we weren’t collaborating as much as we would have liked. So I moved up to the loft and we shared that area for awhile. It was cozy and workable, but we knew it was time to get serious about our next step. The growth of our business was starting to feel constrained by our space. We needed somewhere for eventual employees, we needed a space to meet with clients that wasn’t our dining room table and most importantly, we needed better physical boundaries between work and home.
We looked at rental properties in our area, but a lease would be expensive and we knew we wouldn’t have the same creative control over the space and it wouldn’t necessarily be a long-term solution. Around this same time, we also briefly considered selling the house and doing something different, but it felt like it would have been a financial and psychological setback to do so without first improving the garage. We also considered just bulldozing that whole structure, but recognized that the building – as ugly as it was – was still valuable. And with current codes, we couldn’t just build something new in the exact same spot. So we went back to the idea of converting the carport into an office space and set about coming up with a design that was as simple, flexible and as cost-effective as possible.
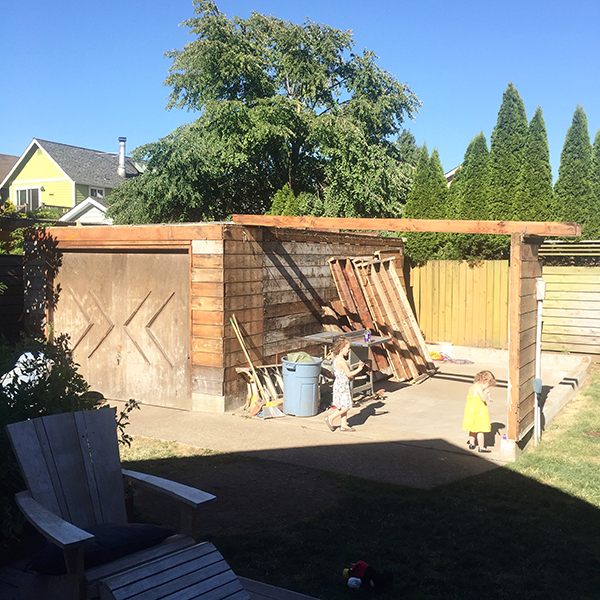
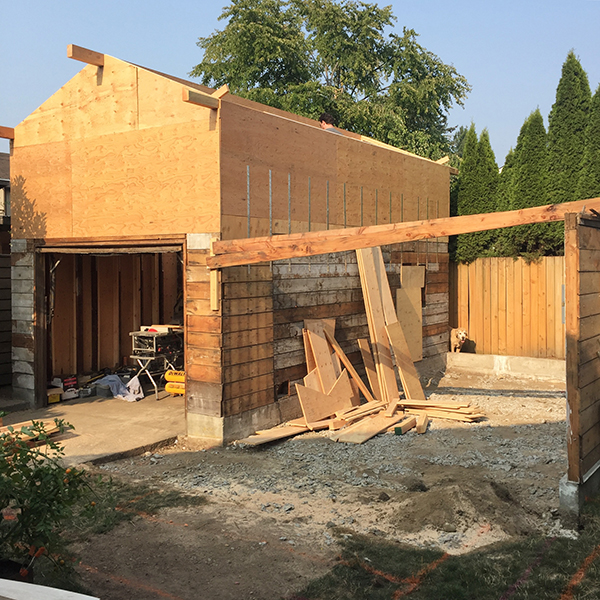
From a land use standpoint, the garage is what you would call an “existing non-conforming structure”. We could keep what was there, but we’d be limited to how we could expand the structure. There are rules about locating structures within certain distances from your property lines as well as how much of your rear yard a detached structure like this can occupy. I could dive into a lengthy land use code analysis, but here it is in a nutshell – the only way we could expand the footprint was to add on to the front of the carport. So that’s what we did. We kept a reasonable walking path between the deck and the new office wall, but we needed that extra square footage to create a functional office and conference room. In the garage, we re-framed the roof and raised the height to the maximum allowed for accessory structures. (If we were building this as a DADU, the height restrictions would be different.)
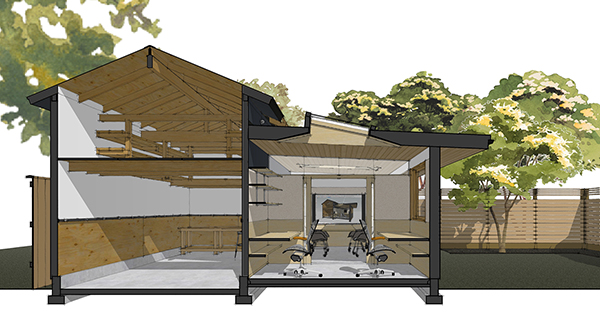
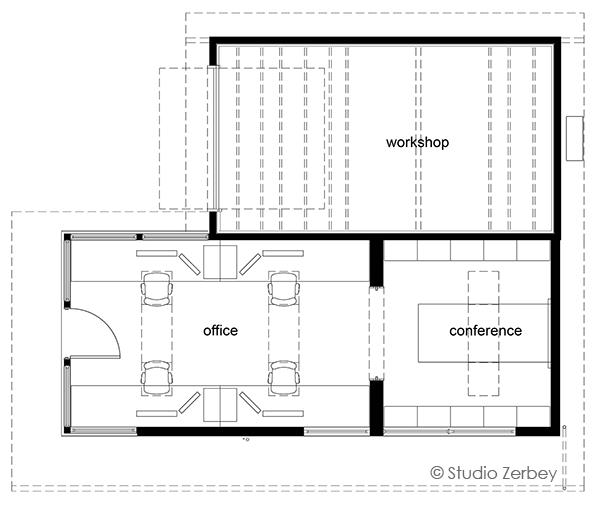
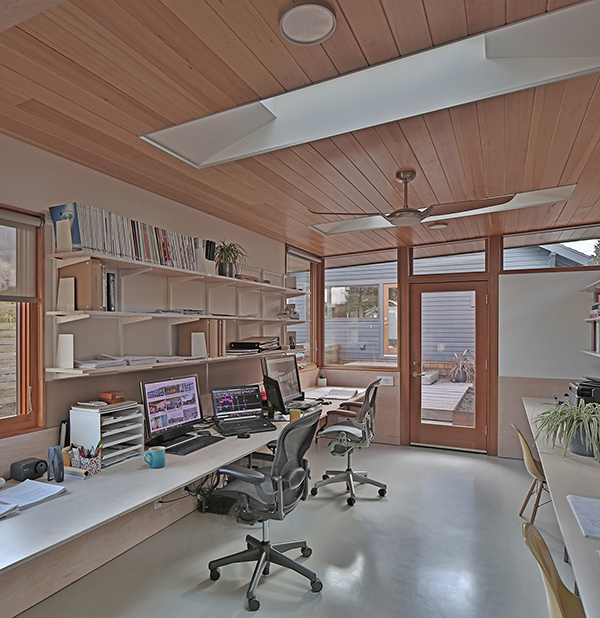
The layout itself is fairly simple. The office has desks on each side, with space for up to 4 workstations. The conference room beyond can be closed off a with a pair of pocket doors. The shop space is utilitarian with a storage loft above (making up for some of the displaced space in the carport). The rooms are also designed in a way where the structure could be converted to a DADU in the future. Basically, the office would become a living/dining area and the conference room a bedroom. We’d install a door from the office into the shop, which would become a small kitchen and bathroom. Although we have no plans to do this conversion anytime soon (if at all), we wanted there to be the option if our needs change down the road. We’ve found that people are surprised we didn’t include a small bathroom in the initial scope but extending our sewer line and running water would have been costly and our main bathroom is just inside the house. We also toyed with the idea of doing a mini fridge or small kitchenette and the need just wasn’t there when we’re literally a 5 second walk away from our kitchen.
Even though we moved away from the DADU concept, we still feel strongly that this type of space would be valuable to future owners as well – whether used as an office or simply a bonus space for hobbies, crafts or reclusive teenagers. (Wait, that might BE US one day!)

In the winter/spring of 2017 we finished the drawings, got the permit (thankfully it qualified for the over-the-counter kind!) and that summer demo began! I was about 6 months pregnant at this time. We thought the bulk of construction would be complete by my due date. It was not.
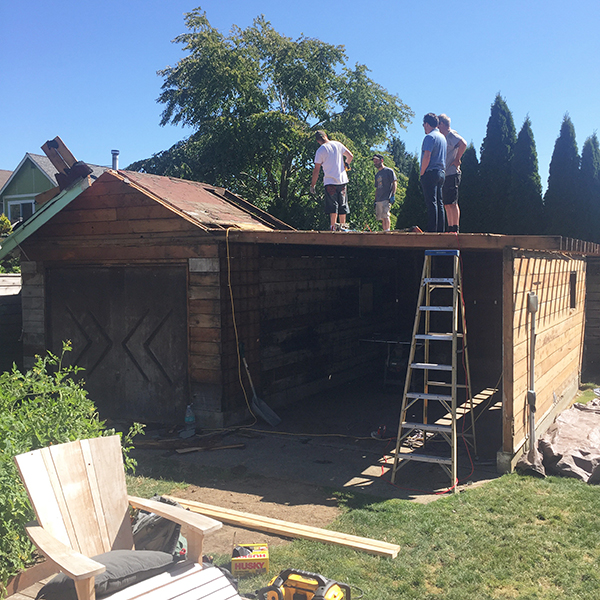
To save on costs, we took a hybrid approach to construction. We hired a contractor to do the shell of the building and then coordinated the HVAC installer, electrician, drywall company, floor finisher and painters ourselves. Kyle installed the hemlock ceiling, wainscot, doors and windows, interior trim, drawers and counters, work stations and shelving. Essentially, if it involved wood, Kyle did it. Did I mention we also had a newborn during this time?
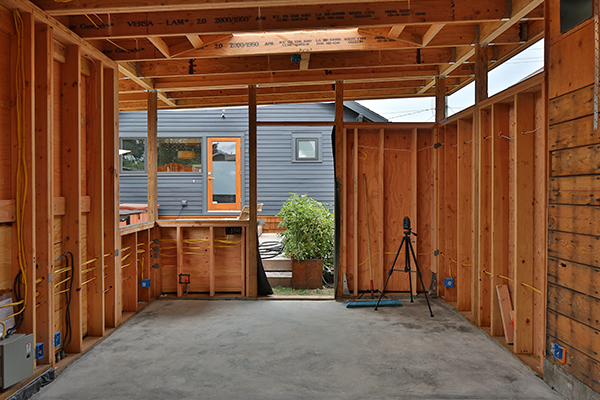
The concrete slab in the carport wasn’t in great shape and replacing it was the best option. This also allowed us to properly waterproof underneath and install an electric radiant floor system. A majority of the wall framing remained intact, but proved challenging in that it required a lot of extra work to get level and plumb.
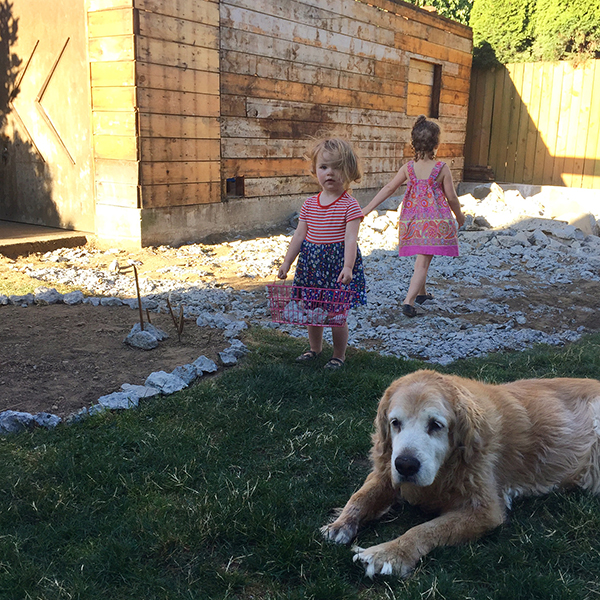
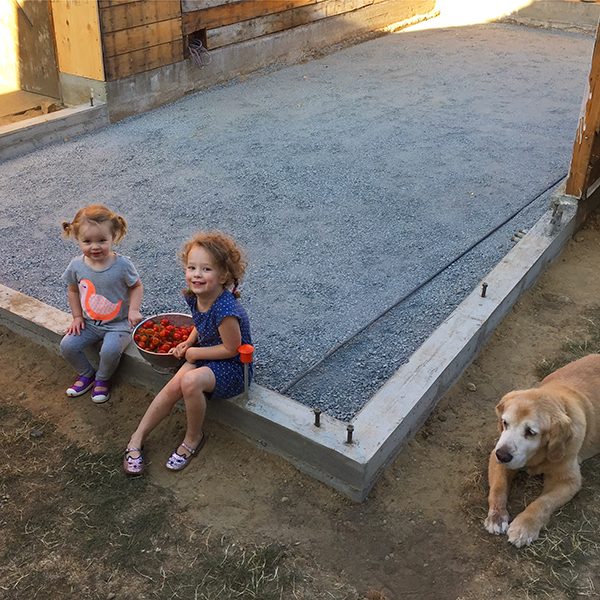
Can you spot Bailey?
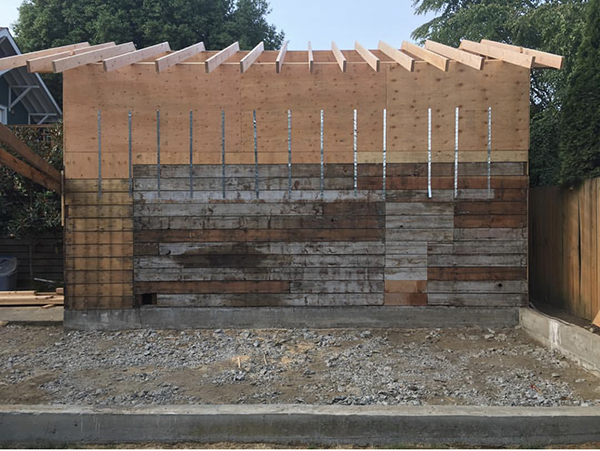
The photo above shows how the original garage was extended to the left at one point. This wall took a lot of nail pounding and many, MANY shims before we could drywall over it.
Our framing inspectors were pretty ruthless. 🙂

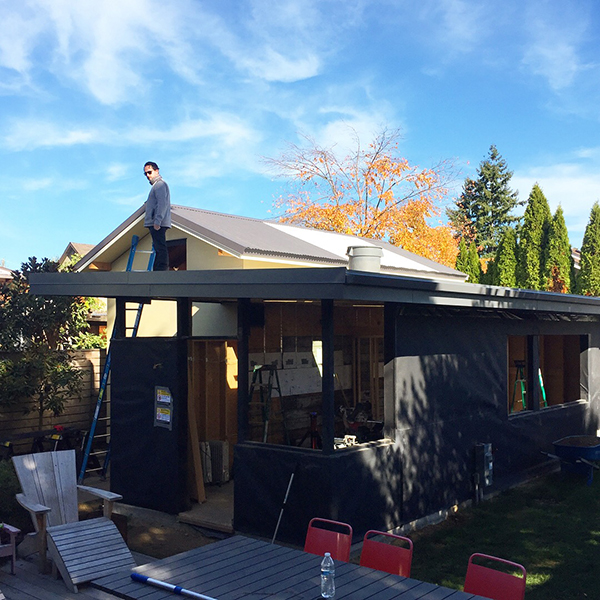
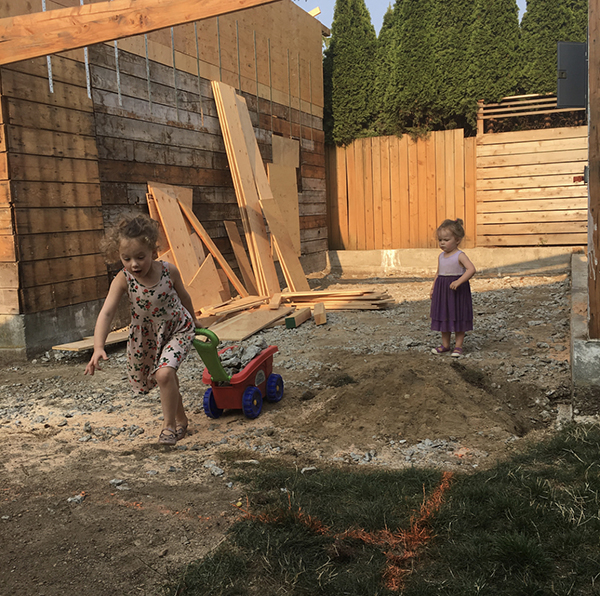
The baby came, Fall came, but we kept at it.
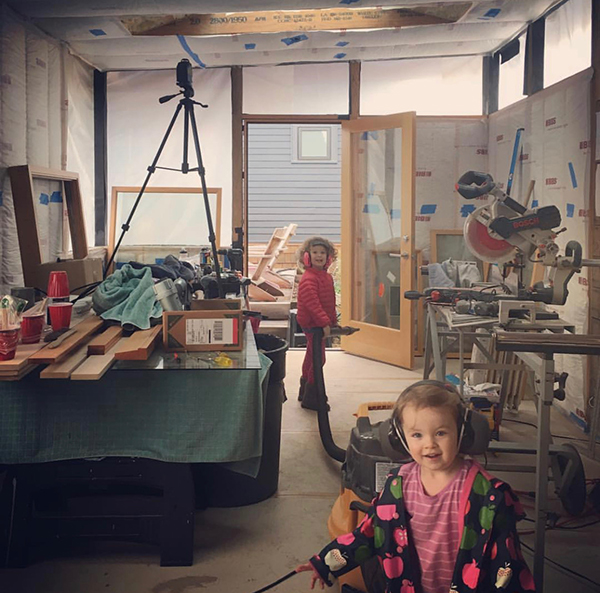
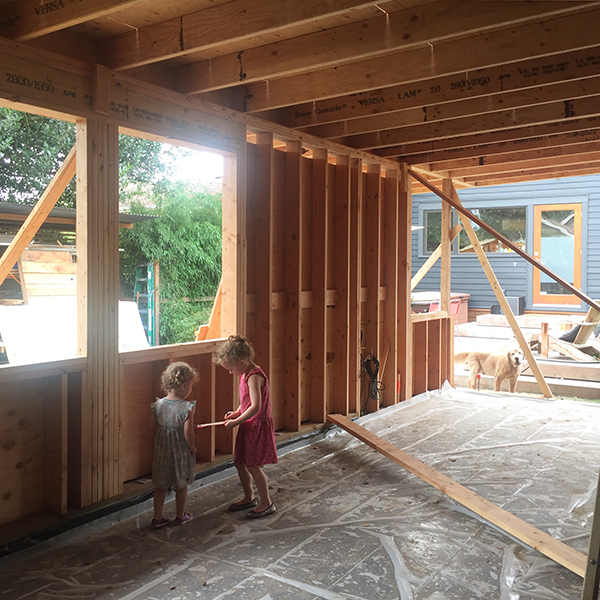
We even recruited some helpers!
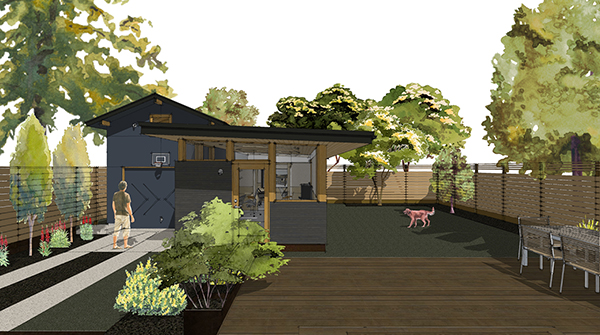
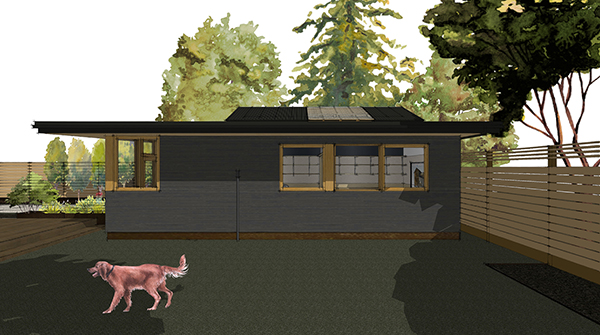
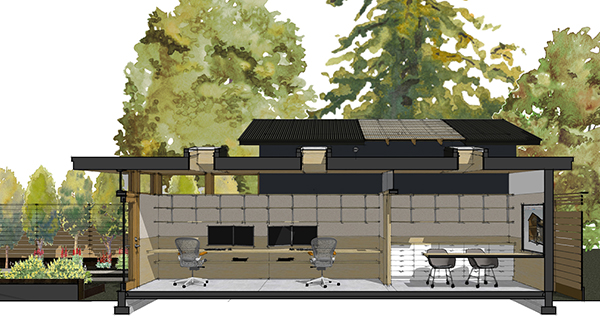
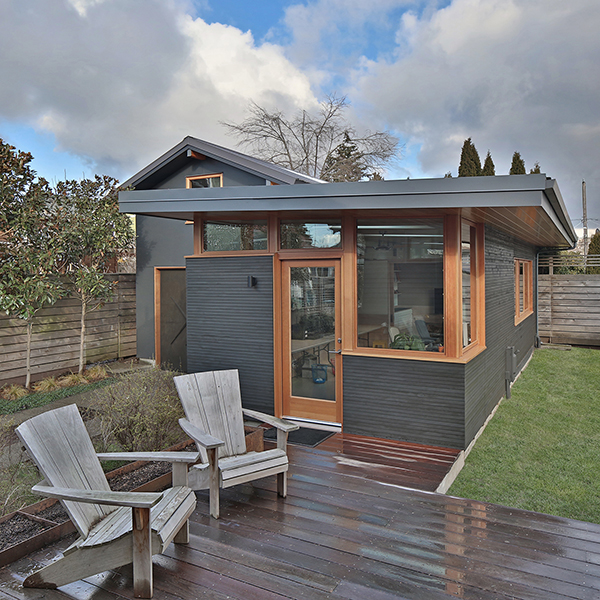
On the outside, we used hardipanel for the workshop siding. This was a cost-effective choice, especially since three of the four sides are barely visible and we were required to provide a 1-hour fire rated wall on the sides against the property lines. Although hardi gets a lot of flack for being ubiquitous, we were able to use it in a modern and limited way. The panels were then painted to match the house (Benjamin Moore “Iron Ore”). The roof on the shop is a corrugated polycarbonate product with a translucent version over the middle section to act as a homemade skylight. We kept the old garage door and applied a few coats of the same stain used for the wood siding. On the office side, we went with 1×2 clear cedar siding, stained a dark brown-gray and installed over a rainscreen system. The door and wood windows are clear fir and we did a membrane roof with gray metal fascia, gutters and downspout.
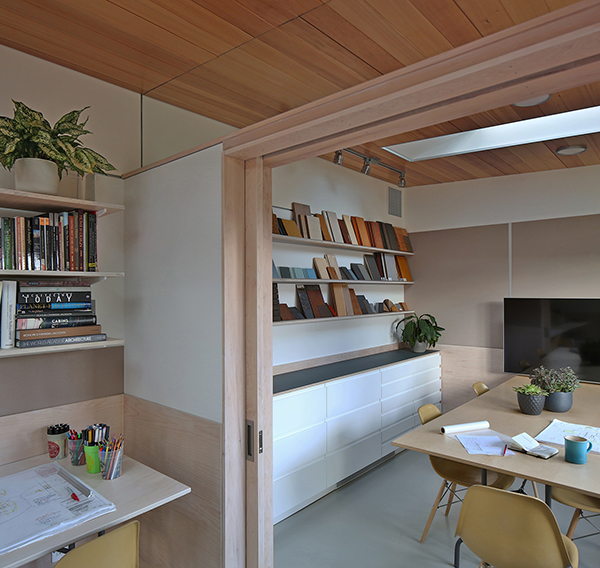
On the inside of the office, we did a concrete overlay for the floor, with a maple plywood wainscot for added wall protection. The cabinets in the conference room are IKEA kitchen cabinets. The smaller drawers hold our half size drawing sets while the larger ones hold office supplies and samples. The counters are maple plywood with Forbo furniture linoelum on top. The floating shelves are maple plywood and Rakks brackets. In the office space, we used an ELFA shelving system with maple plywood shelves. We used Forbo bulletin board in the conference room and behind the workstations for extra pin-up space and added acoustical properties.
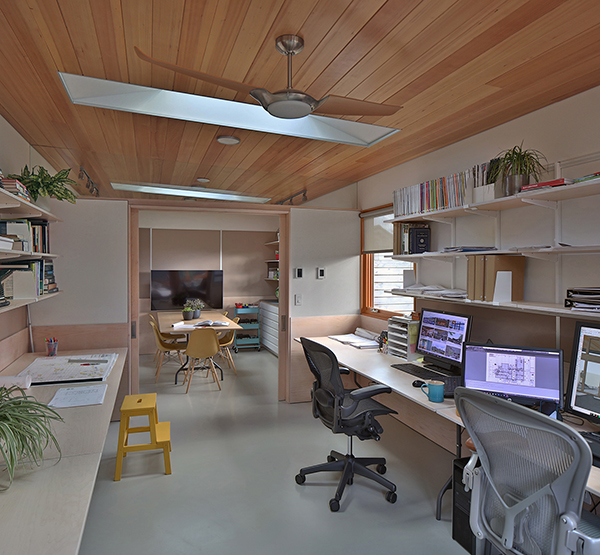
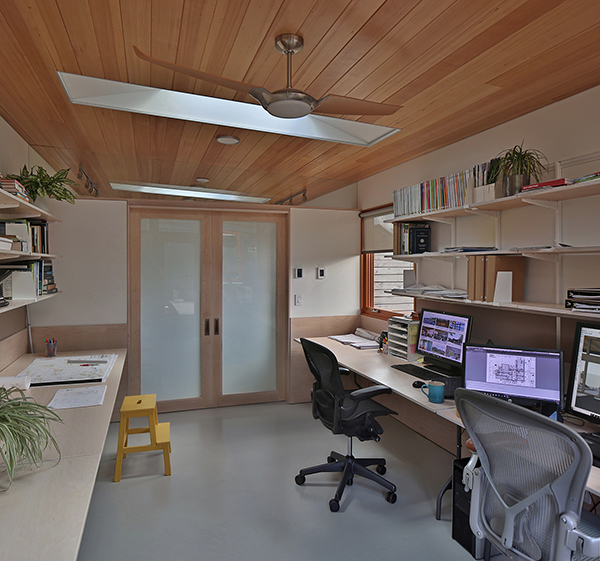
The desks and conference table are a temporary solution. We did maple plywood (with the same OSMO finish as everything else) over simple folding tables. We’ll eventually make upgrades but the reality is that we needed to get it done. We’re also using our vintage Eames chairs in the conference room and those will eventually get replaced or we might just get new dining chairs. Instead of a projector and screen, we opted for a wall-mounted TV to use during meetings. (Coincidentally, it also gets used a lot by our older kids during pockets of time when they’re out in the office before or after school.) When the pocket doors are in the closed position, the space is acoustically separate but still gets plenty of natural light through the frosted glass doors and clear transom glass above.
Before moving out into the space, we did a LOT of purging. We took a close look at exactly what we needed to keep and what could go (mostly old books, samples and office supplies). We’re still experimenting with how to fill all these glorious shelves, but I’m sure that will come with time. It just feels so much better to have more elbow room, head room(!) and room to grow.
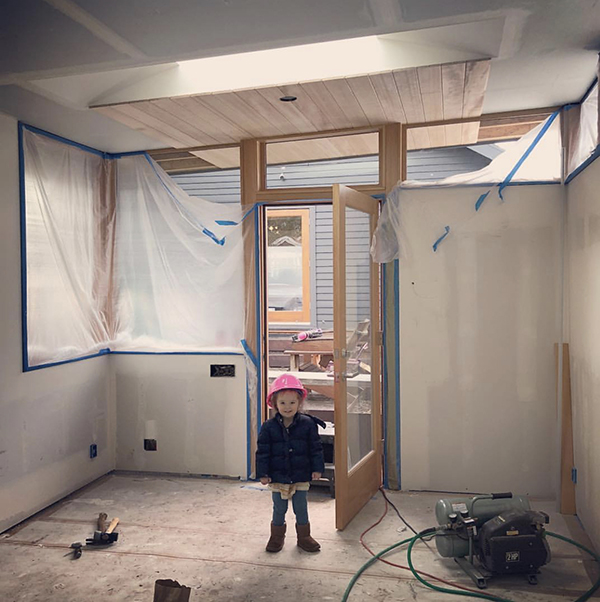
Can we pause for a moment to appreciate that acoustically sealed transom glass? Kyle even matched the hemlock ceiling boards around it for a seamless look.
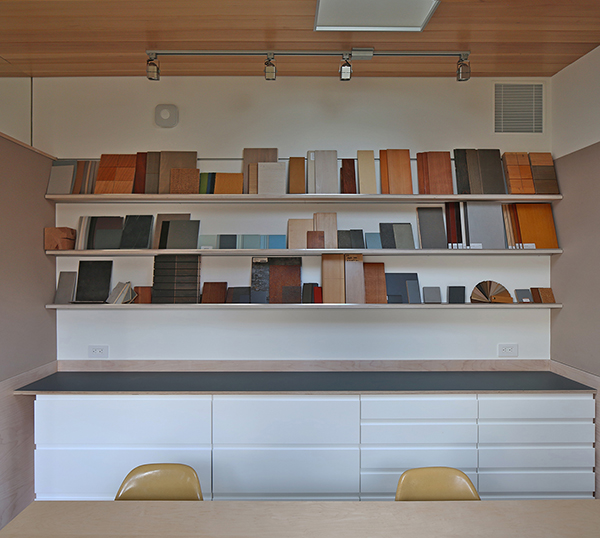
The shallow shelves in the conference room serve as display space for samples. Rather than having everything tucked away in drawers, we can now display our favorite materials in a way that is more conducive to sharing with our clients.
And that brings us to where we’re at today. Although we’ve been working out of this space for awhile now, we finally took the few remaining steps (and photos!) to get it done (enough…for now…y’know). This space truly is the best of both worlds in that we still work from home but our work is a separate building away rather then just a loft ladder. I think the biggest surprise has been just how QUIET it is. We’ve even used the office as an impromptu (kid-free!) gathering space on nights and weekends!
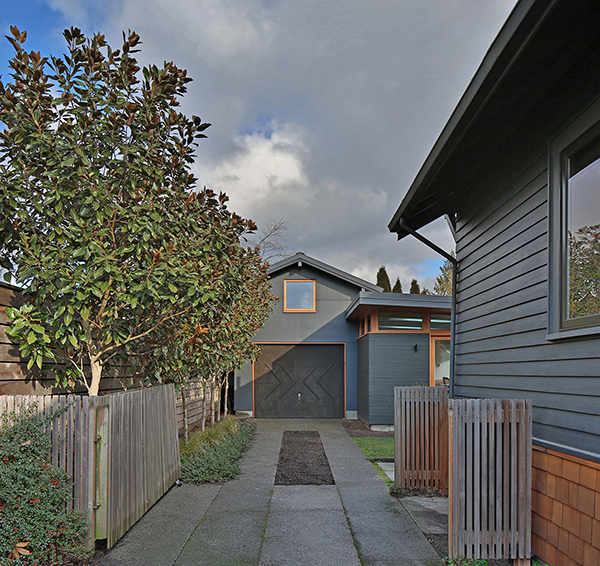
Architecturally, we like that the office + workshop relates to the house without mimicking it. Although we were constrained by the land use code and our budget, we were able to come up with a clever solution that meets our needs while also providing flexibility for future use. In Seattle, there is a real concern about the increasing population and what can be done to meet those needs while creating better density. Even though we decided not to do a rental unit at this time, providing useful work space on one’s property can be part of the solution. (Note: there are specific rules and regulations about what kind of work homeowners can conduct from their residential property.) In a similar vein to small space living, we’ve created a work space that requires no commute, reuses an existing structure, relies heavily on natural light and employs an efficient heating and cooling system. It may not work for everyone, but in an age where many people work from home at least part-time, we think there’s a real need for creating a nurturing space that isn’t the spare bedroom or the left side of the living room couch. True, most of us need little more than our laptops to work remotely, but having a dedicated space that’s not an afterthought can do wonders to create healthy boundaries between work and home. Society’s needs have clearly changed since our house and garage were built 109 years ago, but there’s excitement in re-imagining how these old houses can continue to thrive – not just in the energy efficiency upgrades and new paint, but in the very way we function in our day-to-day lives.