Most of our undertakings here at chezerbey follow a typical design process. First we brainstorm ideas and sketch things out on paper. Then we test out those ideas in SketchUp. When we’re happy with the design, we detail it out in AutoCad (not always necessary, but it was for a detailed assembly like the loft ladder).

Since we started out sending the design to local steel shops, the drawings were very detailed. After we decided to DIY, Kyle used the shop drawings to accurately measure and cut the various pieces (the design also changed a little bit in between). Unfortunately, I didn’t capture the total construction process. For one, cameras and molten steel don’t really go together. Second, while Kyle was welding, I was holed up in the basement trying to bring order back to the space. After six months as a storage unit and studio apartment it was stuffed to the gills. And then, it threw up on itself. Or at least that’s what it looked like. But that’s another post, back to the ladder!

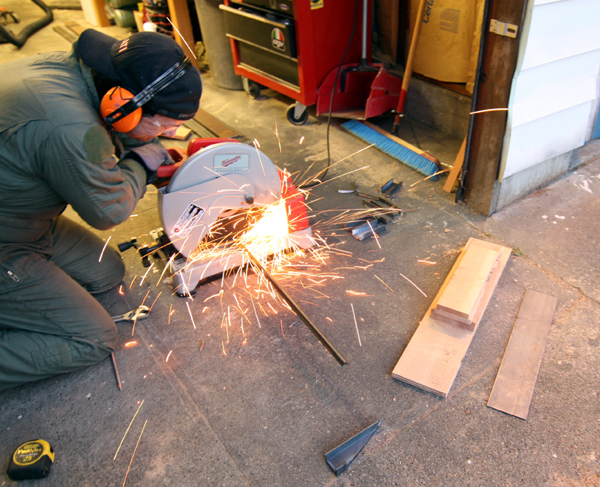
Kyle started off by cutting the various pieces to size. In the photo above, he’s using a metal cutting saw to cut the steel rods for the lower and upper portion of the ladder.

Next, he used a grinder to bevel the edges of the rods and his drill press to slightly pre-drill the side rails, that way when he clamped it all up for welding it stayed in position.


Once the pieces were cut, the basic frame was welded together. We ended up swapping out tube steel for channels for the side rails. This lightened the overall weight and well, channels are just sexy and cast more interesting shadows. Don’t you think? Next, the rods and treads were installed. The treads had to be a precise angle so when the ladder is in place they would be level with the floor. This was probably the trickiest part of the process.

Kyle also pre-drilled and pre-counter sunk holes in the steel plates so he could later screw the wood treads into place.

I knew the carport would come in handy someday! Here, Kyle is grinding his welds to get a smooth joint.

After the ladder frame was complete, he moved on to the handrail assembly, comprised of 3/8″ diameter rods and 3/4″ square tube steel.

More grinding!

But it really did make a difference…the above shows a good “after” and “before”.

After the ladder and handrail assembly were complete and welded together, it was time to paint. Originally, we were going to have the steel powder-coated. However, we decided that since it’s not exposed to the elements and the steel portions won’t be regularly touched, a simple and durable paint was more than sufficient(and it would save us a considerable amount of money). After trying a half-dozen paints we settled on a dark grey paint used in the auto industry for painting motors. It sprays like a fan instead of a cone (like typical spray paint) so it goes on much more even.

After the paint was dry, Kyle applied a clear coat in a satin finish for a little extra protection.

For the wood treads, Kyle cut 2′-2″ lengths from 5/4×6 vertical grain fir boards (actual size is 1″x 5 1/2″). He then beveled the outboard edge and notched the underside to fit over the steel treads (detailed photo below). Where needed, he chiseled out the underside of the board to fit snuggly over the welds at the joint between the steel channel and plate.


For the handrail, he ran 2×2 fir pieces through the table saw to create the notch. At the bottom of the handrail where the steel ends, he used a chisel and hammer to complete the notch.


Where the tube steel turns 90 degrees and connects back to the channel, he used a small saw and chisel to notch out the wood.

(The photo below shows the completed handrail detail.)

After the clear coat was dry, we moved the steel portion inside and secured it in place with lag screws at the bottom angle and top flat plate (both sets of screws go into structural members so this thing is solid). The angle at the base also covers the exposed edge of the cork flooring. The gap between the ladder and the wall meets code requirements while providing enough space for the future barn door to slide past.

Bailey still doesn’t get it.
All in all, the ladder took about 6 full days of work but we saved a ton of money (even after you factor in the cost of the welding machine). This weekend we’ll apply the finish to the wood. We’re planning on doing a hardwax oil floor finish for the treads and a thinner polyurethane application on the handrails. At the same time, we’ll put the finish on the basement treads and risers (which are partially installed).
The big 2010 project is definitely stretching into 2011, but that’s ok.
I really like the ladder. It makes me want to register for
a welding class at our local community college:)
love it, and i love that you share the process that leads to such a great end result.
The whole thing makes you sound like a bunch of architects! waaaait a minute… you are!
having always been intrigued by welding and the mixture it can have with woodworking, this just makes me want to take a class that much more.
going back to the fact that you both are architects, what firm do you work for? (I only ask cause I currently work for a firm in Las-dead-Vegas. (Woodworking is a side project of mine right now till we can move out of here, and ironically up to WA where the in-laws live)
Thanks Zero,
Kyle – http://www.balanceassociates.com
Lauren http://www.johnstonarchitects.com
I must say after only doing woodworking for several years, metal work is refreshing at the least, so far it actually seems safer and easier to work with, but more expensive;)
where are you headed in WA?
you had to name two firms that i just LOVE their work. I’ve seen some of Johnston’s work a little more then Balance Studios. LOVE the Schell-Wheeler Project from Johnston.
Inlaws live in Spokane, but Seattle isn’t ruled out just yet.
Nice work Kyle! The woodwork is fit up nicely! It looks like you painted the steel, sometimes when you get material with nice even mill scale you can just clear coat over that and get a nice
patina look.
I bought two more t.i.g. machines so I am scheduling T.i.g. welding as well as mig now. The Tig is a very small class and the lecture is actually shorter. I am designing it to work in a 5-8 or 6-9pm weeknight window. I may turn it into a two day minimum, but will ait to see how the first class goes.
I’m glad you were able to put the welding instruction to immediate use. You will now find that virtually everything requires a weld.
Thanks,
Rusty Oliver
The final product looks incredible. I’ve just stumbled on your blog and gone through all of the before & afters — I’m literally blown away. I’ll definitely be keeping an eye on your blog from now on!
Thanks Rusty, I thought about that but grinding wasn’t to pretty probably would have been more of an option with TIG.
By the way all Rusty is they guy who I took the welding class from, highly recommended.
I’m ordering more steel today for my next project! Custom sliding barn doors
Ah-may-zing! Seriously… Kyle just picked up welding and made the most beautiful ladder ever? Lauren, sink your claws into this one and never let go!
Do it!
Haha, thanks Jillian…I will!
Looks like good penetration on that weld in the pic — very nice all around! Great to see the process shots; they reinforce the hard work necessary to do a good job.
Well done, Kyle. Thanks for the continued inspiration sir!
-Chris
I keep saying one day I’m going to take up metal work, and now I’m going to have to. Thanks. 😉 The ladder looks great… I’d love to see how it looks “in” the room, so to speak.
I totally see the pictures of the ladder in the room are in the previous post that I missed in the RSS reader.
Ouch! how about you just wrap your arms around me;)
thanks chris
Haha, yeah we did things backwards this time.
Absolutely stunning and so impressive. Great job!
Awesome.