A few weeks ago, we showed you those two big reclaimed beams that we bought to build a work surface for the studio loft space. It would be easy – two beams turned on their side and connected together. Boom! Insta-desk!
But of course, it’s never that easy.
We had a rough idea of how we wanted to install the desktop, but before we made any cuts or bought any supplies we came up with some detailed hand sketches.
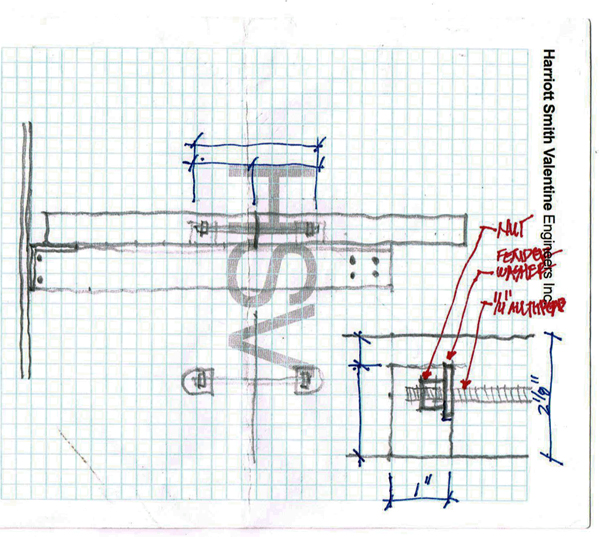
The sketch above is a section through the desktop. Originally we were just going to biscuit the hell out of the joint where the two pieces meet, but after a chance meeting with a woodworker named Burly, Kyle arrived at a better solution. (More on that later.)
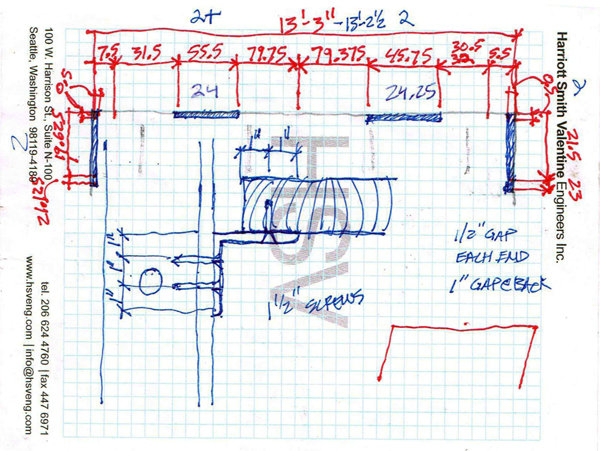
For the connection to the wall, we went with our original idea of using steel angles. The dimensioned portion of the sketch above shows a plan view of where the angles would go on the walls and the larger section detail in the middle shows how the angle will attach to the wall and wood. Once we had the design fully flushed out, it was time to take stock of our inventory, buy supplies and get on with our building business.
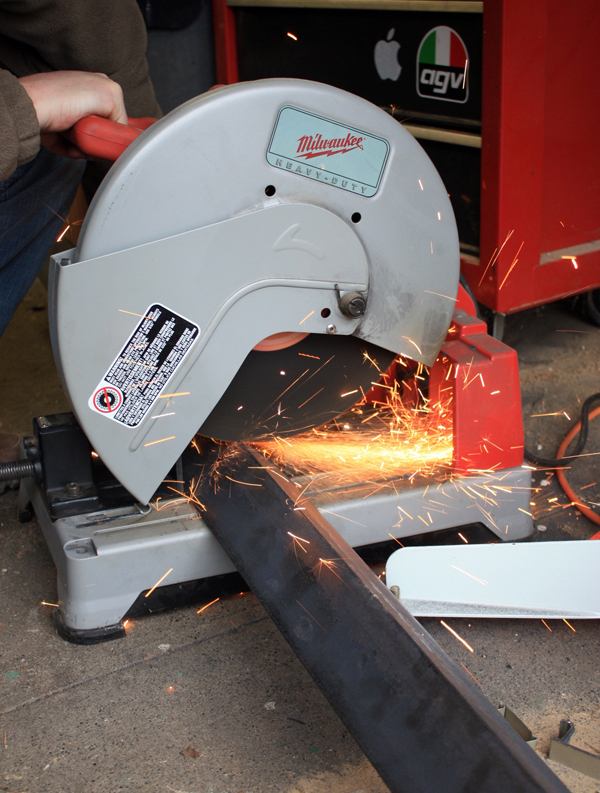
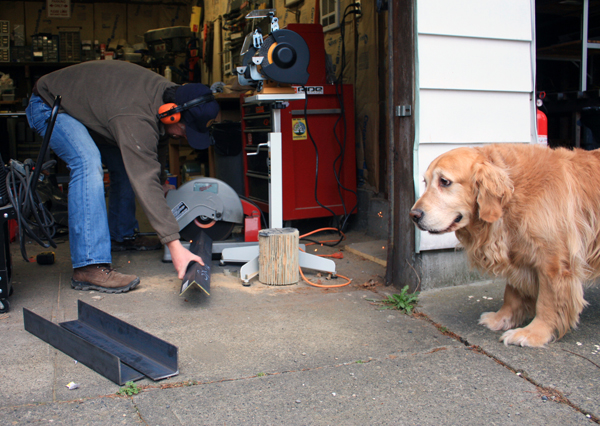
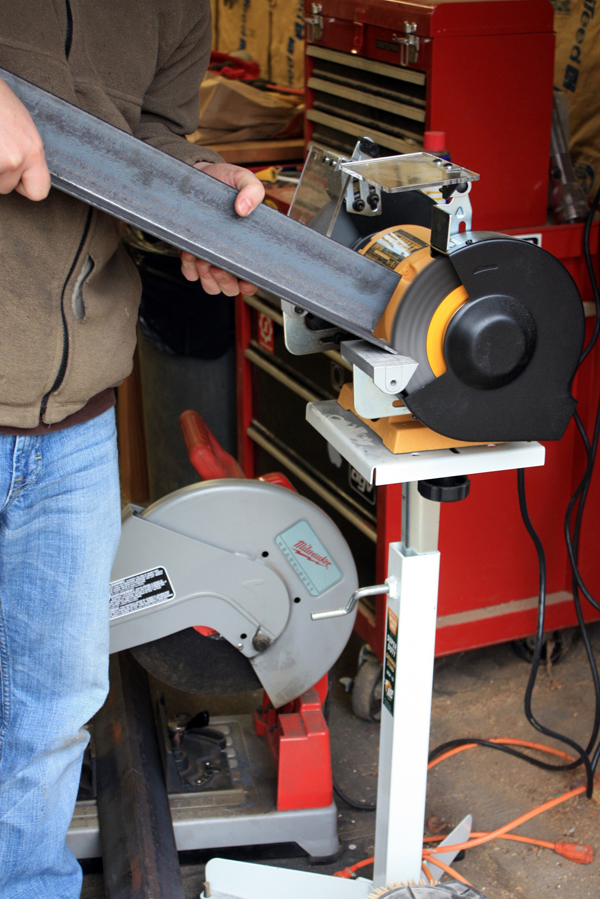
First, Kyle cut the steel angles to size and then grinded the edges smooth.
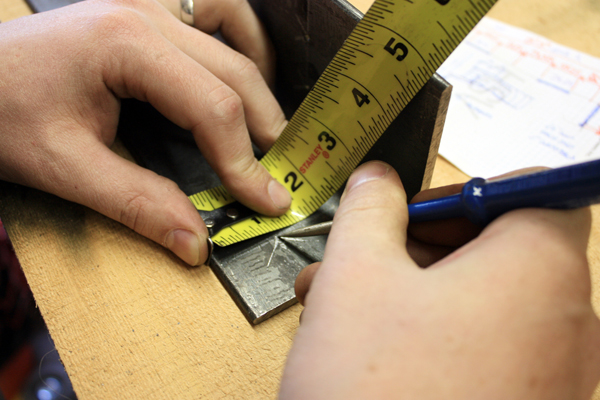
Next, he marked the locations of the holes…
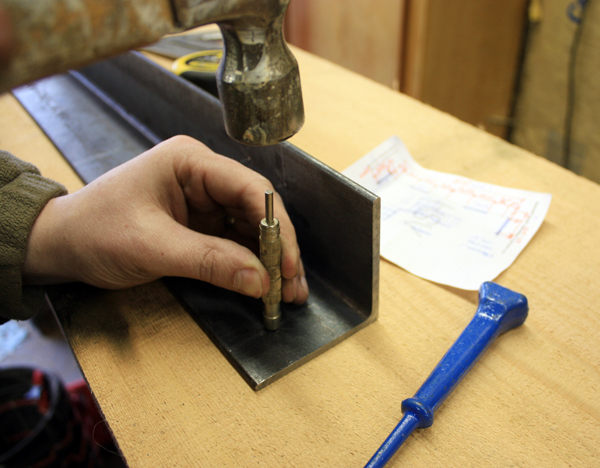
…and used a center punch to create a divot for the drill. Definitely don’t want your drill going all wonky on you y’know.
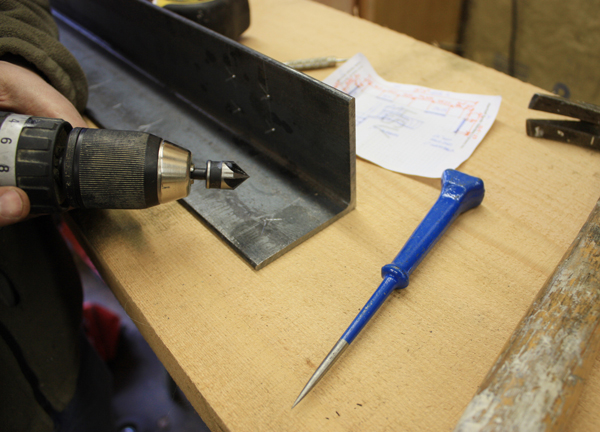
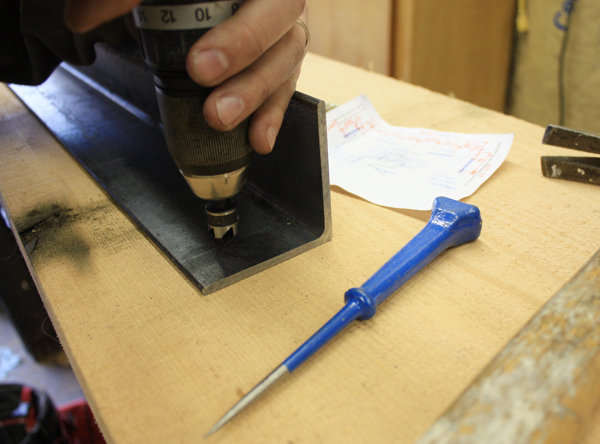
To set the holes even further he used a high speed steel countersink to create a bigger divot.
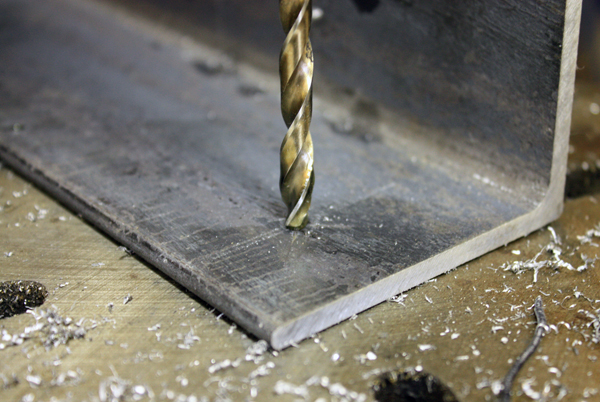
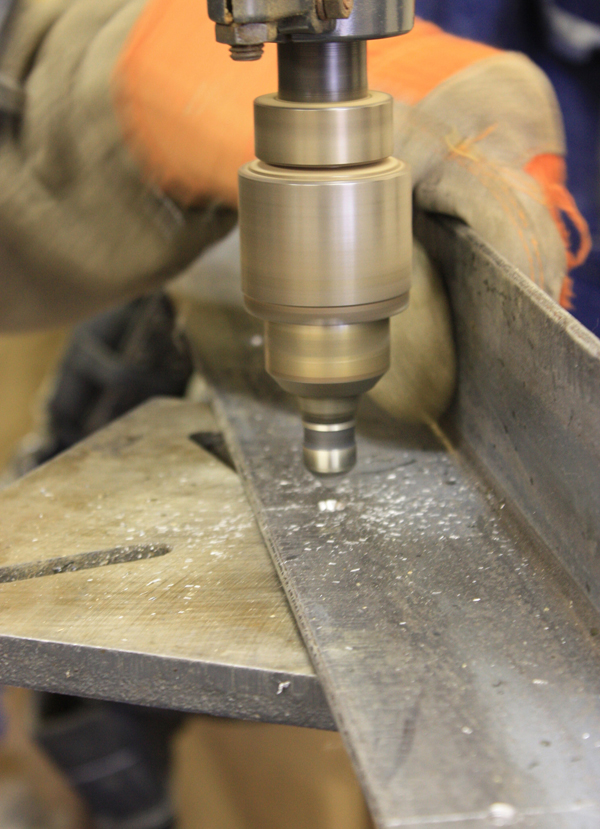
Next he loaded a high speed steel drill bit into his grandpa’s old drill press and occasionally dipped the bit in cutting oil the keep it from overheating. (If the bit gets too hot it dulls down really fast.)
After the holes were drilled, he then made a proper countersink so the screw heads flush out with the face of steel.
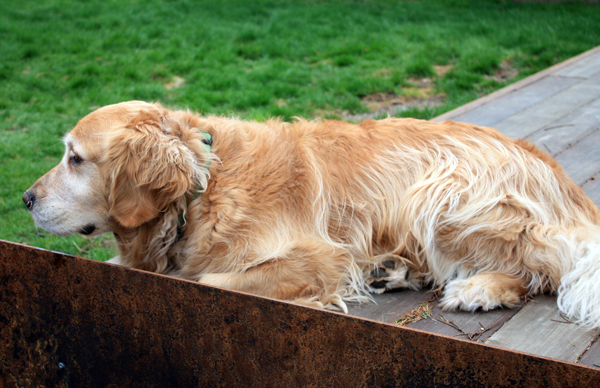
Meanwhile, superintendent Bailey keeps an eye on the operation.
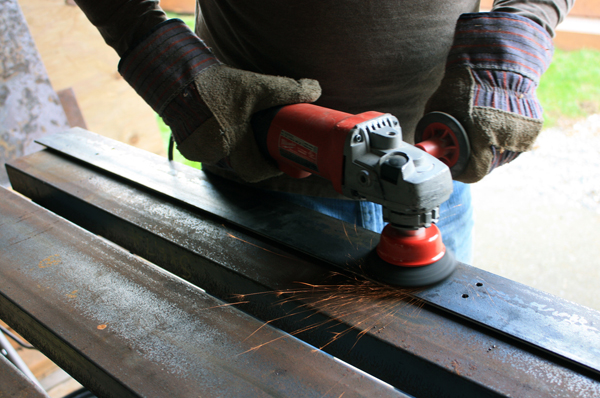
After all of the holes were drilled, Kyle used his angle grinder with steel brush attachment to smooth everything out and prep the steel for painting.
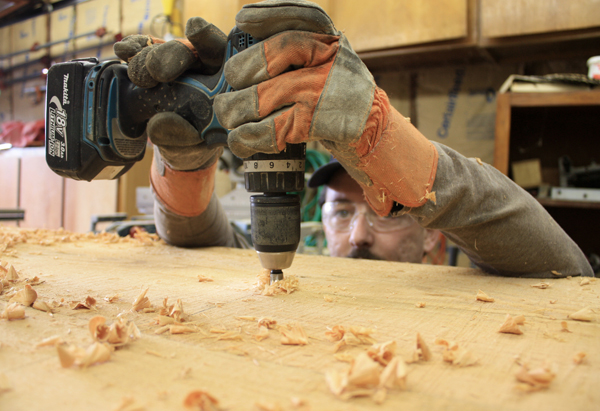
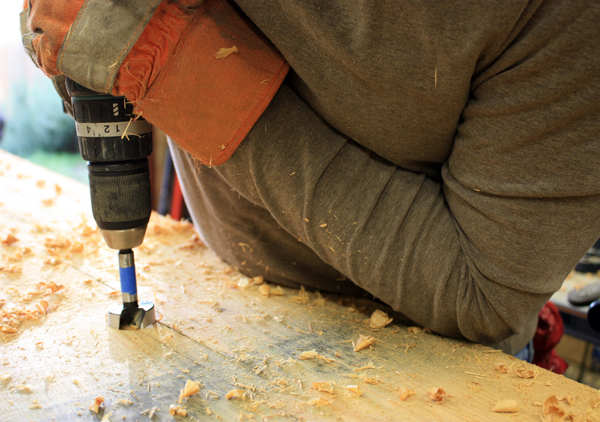
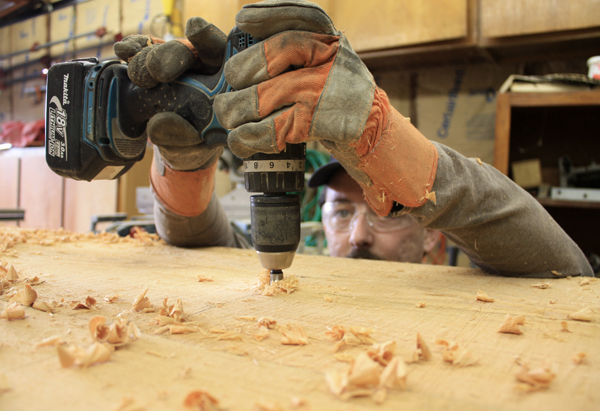
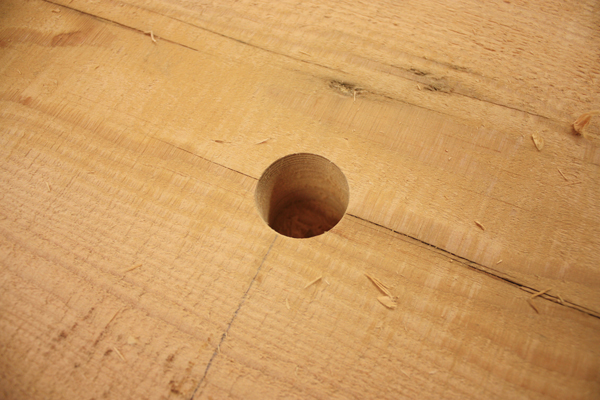
Enough with the steel, time for wood! In addition to biscuits and glue, Kyle decided to install four hidden pieces of 3/8″ all-thread that would literally tie the two pieces of wood together and create a stronger connection. To do this, he first had to drill a series of parallel 1-3/4″ deep holes using a 1-1/2″ diameter forstener bit. To ensure he wasn’t over drilling, he kept an eye level view as he went, stopping when the blue tape line on the drill bit was aligned with the top of the wood.
Ta-da!
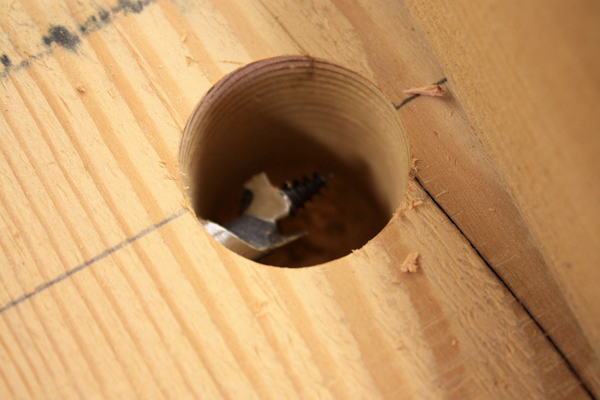
Next, he attached an auger bit and drilled through the side of the wood, in the same line as his previous top-drilled holes. See where we’re going with this?
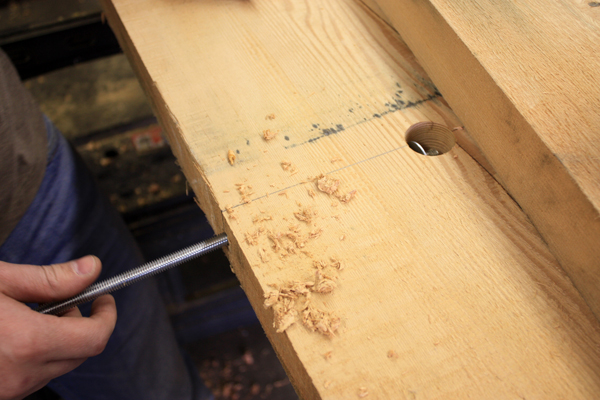
With a steady hand, he guided the drill until it connected with the other hole. We debated using the drill press for this but Kyle has a calibrated eyeball and mad drilling skills.
The long, skinny hole was sized to accept a piece of 12″ (3/8″ diameter) all-thread. Success. Phew!
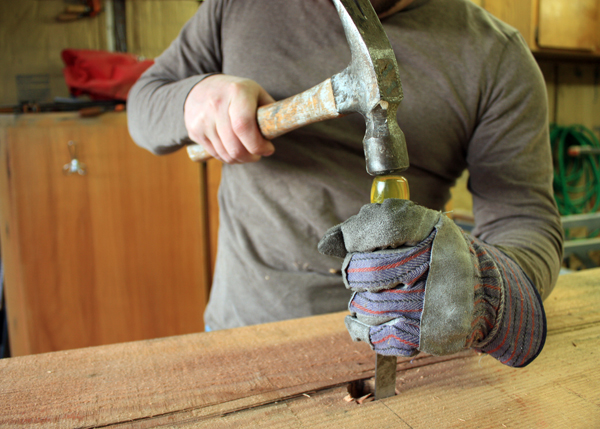
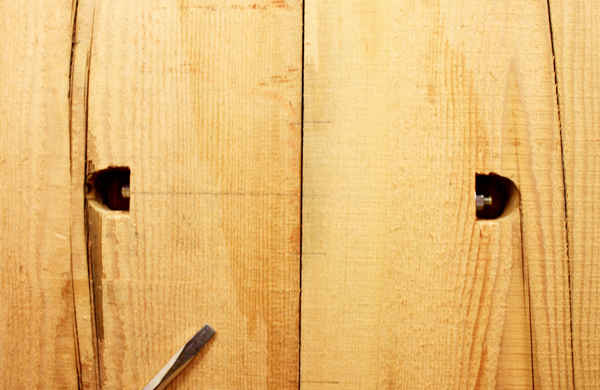
But before anyone gets too excited about fasteners, Kyle still needed to chisel out a portion of the round hole to make a flat surface for the fender washer and nut to bear on.
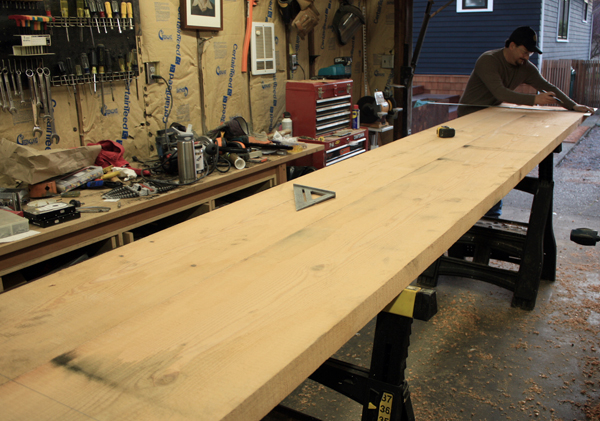
Once the holes were all cut, we realigned the boards so Kyle could mark biscuit locations. (Since biscuits are like a type of tongue and groove connection, you have to be precise that you get both sides perfect so everything fits together.)
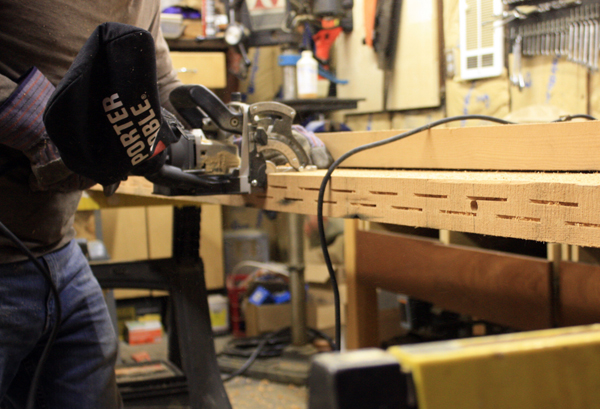
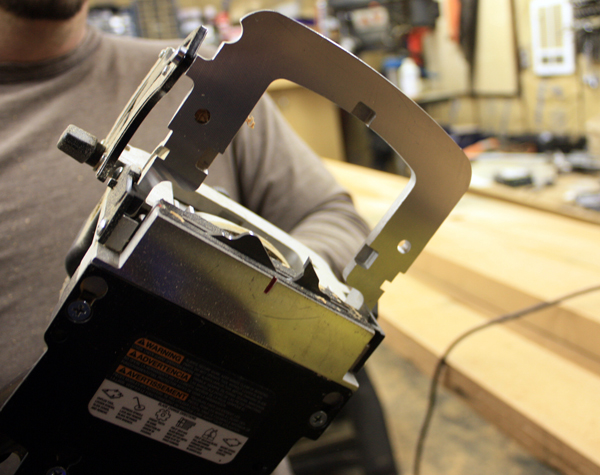
Then he used his biscuit joiner to cut thin, wafer-like slots along the entire length of each beam.
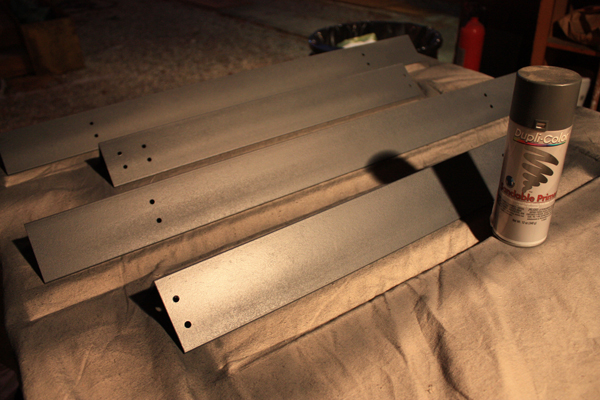
Taking a break from all that sawdust, Kyle set up the steel angles on his welding table (with an old canvas sheet on top) and gave everything a nice even coat our favorite automotive gray-black primer (same thing we used on the barn door track and loft ladder). As you can tell by the lack of sunlight, he’s officially been at it all day.
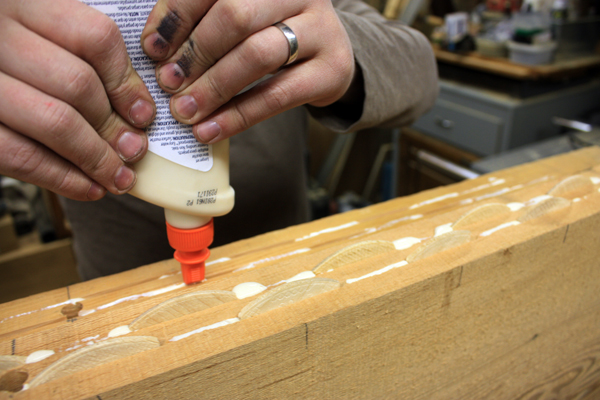
Back to the wood – Kyle calls this part “biscuits and gravy”. (Mmm…) Before inserting the football-shaped wood biscuits, he squirts a generous amount of wood glue into each slot. (Side note: we used this same process to join two pieces of lyptus for our kitchen island, saving a ton of money.)
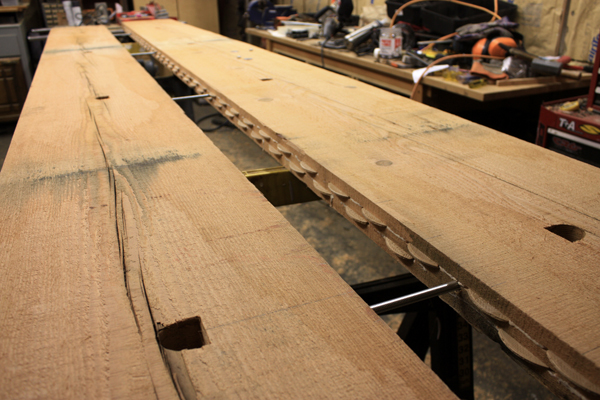
Once all of the biscuits were inserted, we slipped in the 4 pieces of all-thread and pushed the two slabs together.
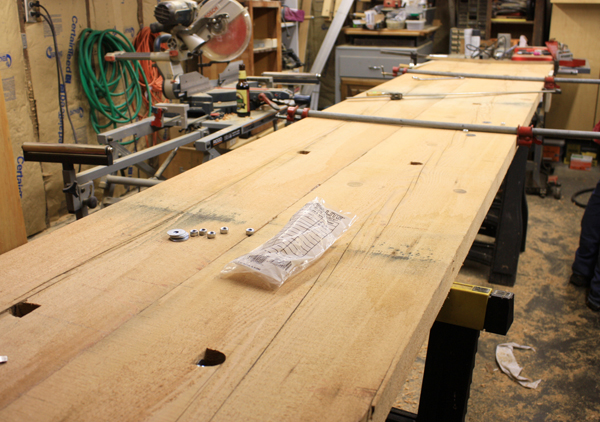
We needed the help of a few large clamps, but there she is, in all of her connected glory. (Note: we worked with the slab upside down so we could more easily install the hidden fasteners, so that’s why the wood looks a little less-than-perfect.)
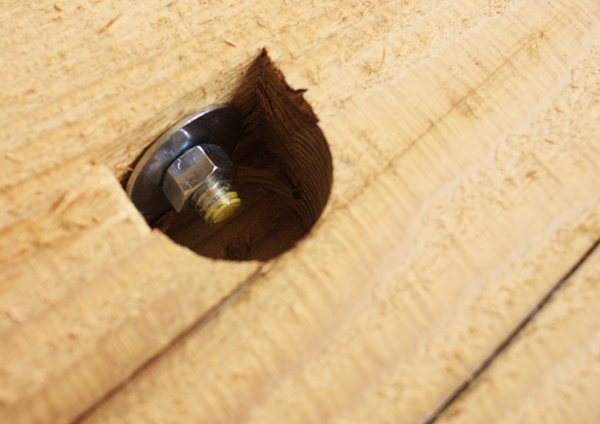
Finally, Kyle used his nimble fingers to install a fender washer and nut to each end of the all-thread. You’ll never see this connection unless you’re laying under the desk. And no one is going to do that. Except maybe for Felix. And we don’t make design exceptions for judgmental cats.
Here’s a top view of the all-thread connection. Pretty clever, huh? If you had x-ray vision you would see the piece of all-thread buried within the slab. But you don’t, so you’ll just have to trust us on this one.
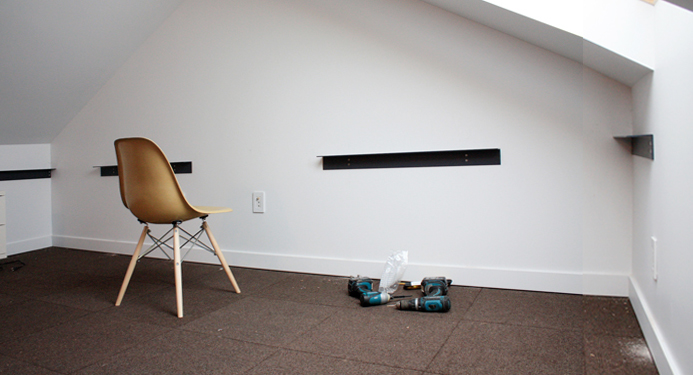
The last thing we did that night was to install the steel angles (the primer drives super fast).
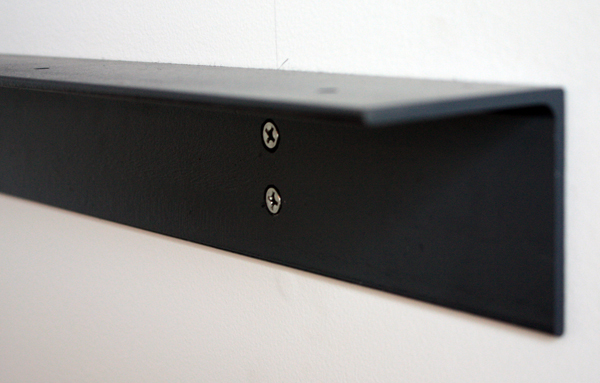
We used 3″x3″x3/8″ steel with fasteners at stud locations (which we figured out beforehand as seen on Kyle’s sketch). The wood desktop will be fastened from the underside through the screw holes in the top of the angle.
Structurally, we didn’t need continuous lengths of steel and this was also a much cheaper route to take. Additionally, the gaps between angles allows a slot for cords to go (since we’ll be holding the wood off the wall by an inch or so).
I can’t wait to get the big sexy slab up there. But first we have to finish the wood. (And when I say “we” I mean Kyle. No fumes for preggers.) In fact, Kyle is outside right now sanding it down. Then there’s epoxy filling, more sanding and applying a few coats of finish. Oh, and devising a way to get it into the loft (hint: strong and willing friends).
Still, not bad for a day’s work. (Who says Sundays are for relaxing and rejuvenating?)
Oh, I also thought some of you might be interested to know how Kyle and I tackle a project. For weekend tasks like this, Kyle usually does a majority of the manual labor (he’s detail-oriented and good at being “in the zone” for long periods of time) while I take care of all the other tasks that we don’t have time for during the week (laundry, bills, dishes, etc.). That’s not to say we’re not a team though. In fact, we’ve devised this high-tech messaging system for when Kyle needs a hand with something or wants me to take some photos:
Poor guy, I assumed “Elmo” was one final plea for help. Damn you auto-correct. (For the record, I tend to just act out charades (like putting food in my mouth) in front of the back door till Kyle sees me.)
So yeah, not an easy project, but that’s how we roll. If we’re lucky, in the end it will look elegant and effortless, masking all of the hard work, sawdust and time that went into it.




WOAH. This is going to be one epic desk. Can’t wait to see it all rigged up and put together! The steel supports look fantastic!
Love that post! Especially the part on the judgemental cats and supervising dogs. It’s also great that you guys view the dishes and bill paying thing as part of the project! I usually hate being stuck with those recurring things and left out of the creative, will-be-there-forever project. Your attitude sounds much healthier!
Swenja
You guys are putting my plywood faced with 1×2 desk to shame. Seriously impressive. I love seeing all these assembly and construction techniques, very inspiring.
And those texts cracked me up. It’s rare that I laugh out loud when reading, but “Elmo” did it.
Belated congrats on the bay.
And a couple of suggestions.
For future refernce, when joing two pieces like you were doing with long endge grain to long edge grain, the biscuits don’t add much in the way of strength to the joint. they are mainly useful to ensure proper alignment of the joint. The glue line between the two pieces will be stronger than the surrounding wood. So you don’t need to use so many biscuits.
You might want to consider allowing your connection between the steel angles and the slab to take seasonal movement of the slab into account. Even in conditioned spaces a piece of wood that big will expand and contract some.
You could make the screw hole over size for the screw shank and use a washer to hold it in place. The extra room in the hole would give it some space for movement.
Should be BABY. Jeez.
Ok, first of all, your project looks like it’s coming out great. Secondly, the texting is hilarious!
there is some serious metal and woodworking going on up there! don’t let bob vila see this post, he would feel woefully inadequate!
Dang. This will be one heck of a desk when you’re done. Can’t wait to see it!
As someone who’s renovating a mid-century modern I can only say that I appreciate your comments about the bills, dishes, laundry, etc. Your part in all of this is just as important because if the other stuff “goes undone” it put stress on the household. When you have full-time jobs It requires team work and you guys are a ROCKIN’ team. You’re never gonna want to leave that beautiful desk! Good job (both of you!) Looking forward to the final reveal. But not until the laundry is folded! Love the blog and congrats on the little one.
-Stacey
This is going to be fantastic! Thanks so much for sharing the details-Super Inspiring!
Thanks Ron. Good to know about the biscuits, might have been a bit overkill heh;) On a side not I also briefly considered using dowels for more strenght but I prefer the biscuits for alignment as opposed to doweling. The dowels don’t allow for adjustment in either direction. At least with the biscuits I have one direction to allow for movement. The thickness of the wood varied slightly down the 13ft lenght so I set the biscuit joiner from the top side if that makes sense. Good point on the seasonal movement after install. I’m going to give this some more thought.
looks awesome.
i have another piece of advice for your future project. to get the gap between the 2 boards as tight as possible, clamp them together lightly (just enough to keep them in place) and then run a flexable japanese hand saw down the gap. the saw will cut each board perfectly parallel to eachother only shaving off a micro fraction of each board. after a few passes retightening the clamps each time the boards will fit together incredibly tight.
here is the type of saw……..
http://www.woodcraft.com/Product/2003094/2715/Shinwa-421S095-Japanese-Kugihiki-Flush-Cutting-Hand-Saw-.aspx
last (and obvious) note, run the bar clapms under the slab so they dont get in your way. duh.
cheers from ballard
Oh…love and envy goin’ on here!!! I’m currently setting up a office/studio in my home. I’m getting some inspiration here. ( Bailey always looks like the loyal observer and a little bit Eeyore! So sweet!).
Looking good so far Zerbeys! Through my experience as manufacturer of metal bases for a couple different furniture companies, a 3/8″ diameter clearance hole in the angle with a #10 wood screw with a fender washer should accommodate any seasonal expansion and contraction. The countersunk holes could really cause some problems in the future. A flathead screw seated in the countersunk hole and the threads locked into the wood just doesn’t provide enough “give” for a solid wood slab like this. It sounds crazy, but the wood can literally tear itself apart. Good luck finishing it up. I’m looking forward to the reveal.
Wow. Just… wow. Great post.
This looks amazing. Thanks for sharing all of the details! I’m considering a woodworking project on this scale, which is larger than anything I’ve done before, and I appreciate your account of what goes into it.
thanks Prince, never would have thought of this one. dig your remixes too;)
Nate,
I think you and Ron and POB are saving this project! I’m going to remove the steel angles, re-drill them for bigger holes and repaint, then use the different screw with fender washer. I too have seen big pieces of fir like this move around a lot. I did leave a gap between the fir and the wall but hadn’t really thought about the wood to steel enough. Thanks again. I’d rather do it right the first time. I only want to move this piece of wood once;)
Kyle, you never cease to amaze me! Looks awesome!
We make a point to both be involved in the design and decision-making process, so I don’t mind missing out on the manual labor some of the time. =) Besides, it was cold outside!! (I’m also one of those freaks that doesn’t mind doing laundry or grocery shopping.)
Question for all y’all woodworking guru’s out there. It has long since been a dream of mine to fill a wall with desk, and I have even been considering the use of chunky reclaimed fir such as mr kyle and crew are with this project (unabashed idea thievery, I won’t apologize). In an application such as this where both ends will be out of sight due to their adjoining walls, would it not be a million times easier to simply dado both pieces of wood, slap in a spline, slather on the titebond, and bust out every clamp in my arsenal? Give me some pros and cons if you please. Thanks in advance!
P.S. I suppose my assumption of easiness rides largely on my owning a table saw and dado set, and assuming both pieces of wood have at least one reasonably flat side to push against a fence. So…. there’s that. Thanks again!
Hi Michael, I also considered the spline route but decided that the fence on my contractor saw wasn’t dependable enough!. also keeping a big heay piece of wood straight and pushing it straight without tilting side to side would be difficult to achieve. Luckily the edges on these pieces were already very straight with only about 1/8″ total camber between the two. Also don’t have that much infeed and outfeed tables for such a big heavy piece of wood. The other option you might consider would be getting a good router with router fence guide and just router the slot for the spline? Then you’re moving a small accurate relatively affordable tool and keeping the wood stationary. I did use about 6 clamps to do the initial set before tightening the internal bolts, however the clamps wanted to make the whole thing cup so I had to use a clamp on top and bottom at each clamping spot. I think the internal bolts will serve better over the life of the piece as they’re centered in the neutral axis of the wood, but I’m not a woodworking expert;) I went overkill but it really wasn’t that much time. All took about 6 hours including fabrication and painting of the steel. Working on the epoxy and finish now so there will be a follow up post. I think your spline idea could work.
thanks Dkanter
I read this out loud to lauren and she said “whenever I think of bob vila, I say to myself, is he still even alive” I still occasionaly watch that show, but only while wearing flannel
sometimes he’s like eeyore and other times like pooh bear himself;)
Martha, make sure and read some the of the comments above from some woodworking folk
Hello, I read your blog everyday, or I should say I check your blog everyday and read it when you post. My 10 year old son and his friends showed me this video, I will do what I can but you have a bigger voice then I. Please watch the video, thanks.
http://www.youtube.com/watch?v=Y4MnpzG5Sqc
another epic post, i love finding out how these things go together. thank you.
[…] been slow. Last month we scored two reclaimed fir beams and a few weeks ago we showed you how we turned them into a solid desk and fabbed up some steel angle supports. The last remaining step was to fill any voids and apply […]
just wanted to say thanks very much for all the details and pics. so generous and thoughtful of you both.
Looking good.
Did you use 3×3 Angle Iron that 3/8 in or 3/16 in thick?
Thanks!
I think it was 1/8″ thick actually:) totally depends on the loads that you have though to size the right piece of steel.