Electrical inspection…passed! Framing inspection…passed! Insulation inspection…passed!
Boom!
Lots to report on this week…so much in fact, that I decided to break up the weekly post into two parts. Kyle and I both took off on Friday and with inspections scheduled and a looming drywall start date, we got a lot done. And it feels so good.
Hello light at the end of the tunnel…is that you?
1. We (finally) wrapped up the electrical work and Kyle got a big gold star from the inspector (ok, not really…but I would have given him one).

2. For our doors and windows, we’re doing a simple casing around the frame that the drywall will then butt into. This meant trim had to go up pre-drywall. When we did the bedroom and bathroom two years ago, we used MDF that we then painted white. This time around we decided to go VG fir (with a coat of benite and a few coats of clear finish).

We even found FSC (Forest Stewardship Council) fir at our local lumber yard. For consistency, we redid the bathroom and bedroom door casing too. I’m really pleased with how it turned out – it really pops against the white walls. We also decided to install the boards a bit proud of the drywall (that just means it sticks out further). It’s a nice touch.
To properly undercut the jamb pieces, we used one of our cork flooring samples. So exciting to visualize the final product…we’re getting there!

I really love the fir sill at the kitchen window and couldn’t resist transferring the lavender from the bathroom for a quick photo. Actually, I think this image is a good metaphor for our current situation – focus on the end goal, not the big pile of crap in the background.

3. As mentioned last week, one of our “before drywall” tasks was to rough in for the stair guard rail/cabinet. The base of the cabinet is composed of four IKEA upper cabinets (we chose those since they’re shallower than the base cabinets). The cabinet boxes are designed so that the top and bottom pieces extend about a 1/2″ out to provide clearance for the mounting rail. Since we weren’t going to use a mounting rail here, Kyle installed a piece of 1/2″ plywood within this recess which provided extra rigidity.

Quick side note – Kyle loves basset hounds. Each Christmas, as a sorta joke I used to get him a day-by-day basset hound calender…which really is a great way to start the day because they’re just so funny. Anyhow, a few years worth of bassets and we had a nice stock pile of scrap paper that we use for dimensions, notes, etc. During a remodel, a little comic relief can go a long way.

Here’s the semi-completed unit. After the boxes were structurally tied together, we mounted them on a plinth made of 2x4s and then installed another layer of 3/4″ plywood to the back as a substrate for drywall. Kyle then installed another layer of plywood above the cabinet boxes to serve as a substrate for the open shelving. (More on the design of this unit later.)

Here’s a glimpse of the backside that will be sheetrocked over. Since we had some concern about lateral forces on this guy (i.e. – people leaning against it) we thoroughly fastened the assembly to the floor to resist an overturning moment. Literally. No one wants that kind of party foul.

One of the challenges of a small, open house is figuring out where the various system components will go. We only need one return grille for our forced air system, but we didn’t have many options as to where to put it. Ideally, it would be centrally located and away from the kitchen. We also wanted it to be wall mounted instead of just a hole in the floor, which would inevitably get clogged with dog fur. But who wants to see a return grille? So we decided to incorporate it into the base of the stair cabinet. Essentially, the two cabinets on the right have an open area underneath that acts as a plenum. Eventually, we’ll put a custom grille/toe kick over this opening and air will travel through that and then down into a hole in the floor and through the return duct in the basement back to the furnace. The toe kick cover will be removable so we can periodically get down there and vacuum out any errant Bailey fur.

4. With the framing inspection complete, it was finally time to insulate! Our house may look like some version of Smurfville now, but it’s so gratifying to finally have a fully insulated house. With the hot temperatures this weekend, we noticed a perceivable difference right away (even though we tend to think about insulation during the winter time, it also helps to keep the heat out during the summer). We used recycled denim insulation from Ultra Touch (purchased at Ecohaus). It’s a bit more expensive than fiberglass but, 1) it doesn’t make your skin itch like crazy, 2) it’s not damaging to your lungs if you inhale it (although we always wore a mask because really…who wants blue boogers?)and 3) it’s the dream product for old or remodeled homes, where the stud spacing is nowhere near consistent and so there’s a high level of “customization”. We ended up buying a couple of bundles each of 16″ and 24″ batts and the scraps were easily incorporated into other areas or shoved in various cavities here and there so there’s virtually no waste.

We also insulated all of the interior walls for sound attenuation. It certainly can’t hurt and acoustic privacy is one of the few hard-to-solve challenges of living small. (We did buy some r-30 fiberglass batts for the attic side of the vaulted ceiling, but the rafter bays were consistent and they came in a plastic sleeve which made handling a bit better.)


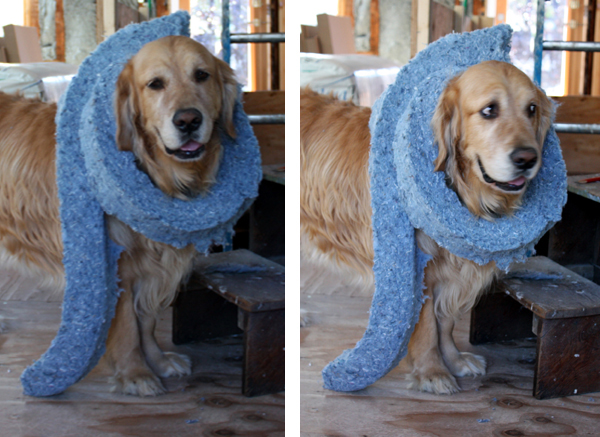
Bailey, what do you think this is? Fashion week?

That’s it for now…stay tuned for part two where we dive into the world of reglets and bead board!
More more more! Also, I would love to see more photos of Bailey on the cat walk.
May I asked what you paid for the FSC VG fir trim? What size is it? Are you using the same size for your bases as you are for windows and doors? We are considering salvaged fir, but want to look into FSC stock if we can find it at a comparable price. We are considering using square 1×4 boards for all.
Thanks! And congrats for passing “GO”!
Amazing!
We couldn’t even fix and paint our front door this week. It’s a mess and looks awful. You guys are killing it with the progress. Love all the door and window wood jambs.
It’s amazing that you guys are this far along already! Seems like just yesterday you were gutting (I guess that happens when you just read about it from the comfort of your computer…)! The fir jambs, the built-in, Bailey… loving everything I see. Can’t wait for part 2.
Which R-value Bonded Logic product did you guys use on the exterior walls? I have a old farmhouse from the 1850’s with true 4″ wood exterior studs. I would love to use this product but am concerned about getting enough r-value in the 4″ dimension. Beautiful work by the way!
Gerry,
We used r-13 to fill our 2×4 exterior walls (the actual stud size varies between 3.5″ and 4″ in our house). It’s not ideal, but we didn’t want to furr out our walls or cover our exterior siding with rigid insulation (and it meets the code requirement to “fill the existing cavity”). And since we live in a temperate climate, we weren’t too concerned with excessive heat loss or heat gain. If you live in a more extreme climate though, you might consider spray-in foam insulation. It’s more expensive, but it gets the job done. (By the way, denim insulation supposedly has a better r-value (per inch) than fiberglass.)
Dan – it feels like forever! But thanks, I know what you mean. =)
Brick House – We were under the hypnotizing lure of drywall which made us work extra hard. Can’t wait to see the front door!
Yolanda – At our lumber store, there wasn’t FSC and non-FSC trim, there were just some sizes that only came in FSC and other sizes that were “standard”, so I don’t think there was a price difference. I’m not sure why this was, I asked one of the guys there and he seemed to think it was just a matter of what was available. It couldn’t hurt to call around and ask. Salvaged fir could be really pretty too. Usually the older stuff is from larger trees and has a better grain pattern.
So I know this post was over 4 years ago, but what kind of vapor barrier did you guys use? We’re re-insulating now with the denim insulation, and it says to use a permeable vapor barrier, but I can’t seem to find anything that’s really marked/marketed as that. Thoughts?
Hi Megan, we used to use a plastic sheeting product on the inside face of the studs as a vapor barrier but lately we’ve been using a PVA primer instead (it’s a paint primer that also acts as a vapor barrier). It’s easier to “install” and you don’t have the issue with lots of staple holes with the plastic sheeting so a better barrier. Good luck!