Work weekend #4 began Friday afternoon when Kyle came home early to get a jumpstart on the waterproofing.
Normal people go to Happy Hour on Friday afternoon, crazed homeowners apply waterproofing.
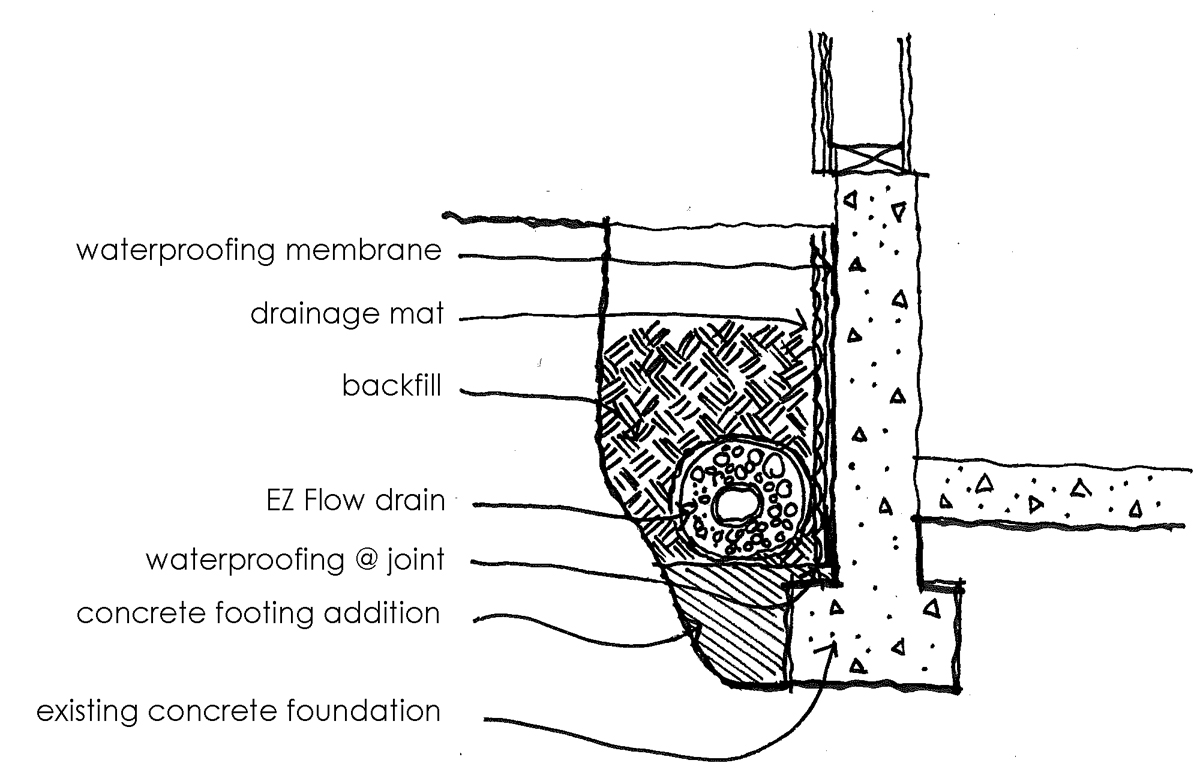
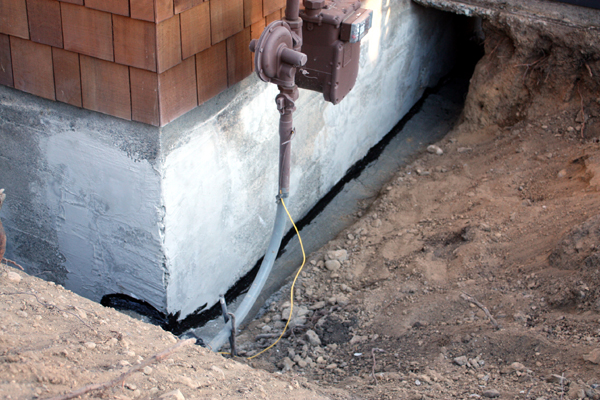
First he applied a thin coat to the cold joint between the existing foundation wall and new concrete footing “enhancement” that we poured last weekend.
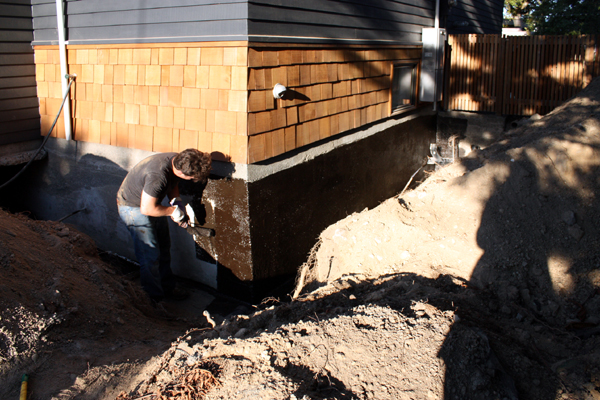
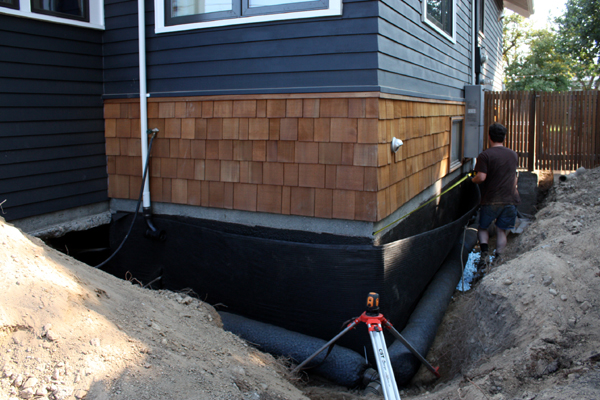
Next he used a heavy-duty roller brush to apply the thick substance to the concrete wall. A chalkline snapped 6″ below the shingle siding gave him a clean line to work with. [Apologies for the crazy harsh light, but you get the idea.]
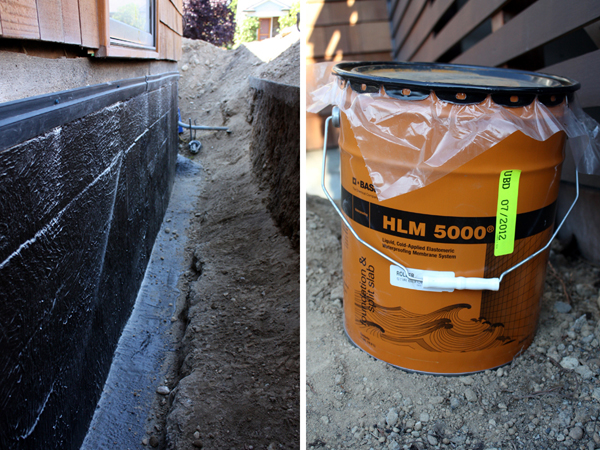
The product we used is, technically, a liquid cold-applied elastometric waterproofing membrane system. Yeah. Basically it dries to form a durable membrane to keep water out. It was thick, smelly and cumbersome to work with. By the time he was done Kyle had (without question) ranked it in the top 5 least-pleasant home improvement projects. To make matters worse, we missed a friend’s gallery show that night because he literally couldn’t scrub the splatters off until I made an emergency run for paint thinner. [Tip: if you take this on yourself, wear long sleeves. Or better yet, a disposable jumpsuit that can be thrown away when you’re done.]
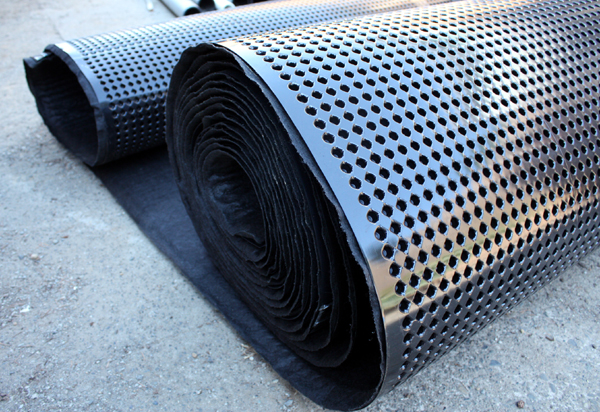
We let the waterproofing dry overnight and on Saturday began installing the drain mat. We used a produce called MiraDrain – the mat comes in a large roll with a dimpled-plastic material on one side and a felt filter-fabric on the other. The dimpled side goes against the foundation wall and helps relieve hydrostatic pressure buildup that can come from an increase in groundwater after a heavy rain. The roll we purchased is 4′ wide but can be easily cut with a utility knife.
Kyle bought a rubber cleat that gets fastened to the wall and helps hold the drain mat in place. In short, it was a pain to install and didn’t really hold the mat in place so we removed it and let the pressure of the backfilled dirt do the job instead.
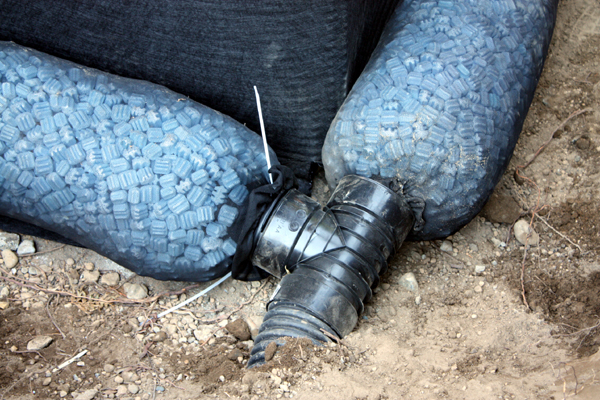
With the drain mat in place, we installed our EZ flow drains and connected them to the tight-lined pipe that we installed two weekends ago. [Water that collects in these drains will flow to a perforated pipe located 10′ away from the house in the front yard.] The pre-assembled drain can be cut to fit – you just need a zip tie (as seen in the drain on the left above) to wrap back around the netting to keep the foam aggregate in place.
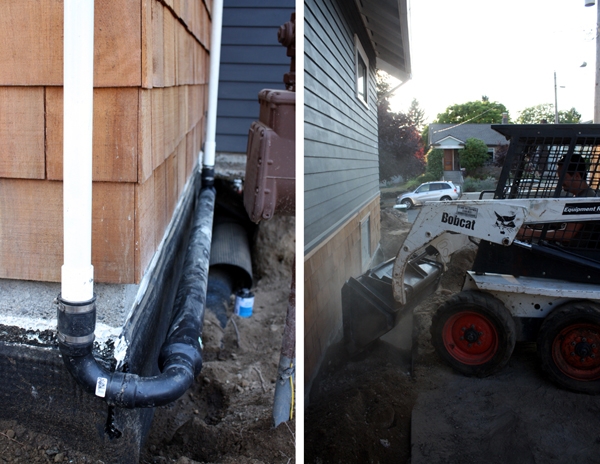
The final step before backfill was to install the drainage for the downspouts. We chose to use a 2″ white PVC pipe for the portion that would stick out above grade and then connect that to the black ABS pipe with a rubber coupling. This allows us to easily remove the downspouts for yearly maintenance or if something gets clogged. From the north side of the house, the pipe wraps around the west side and along to the south, sloped at 1/4″ per foot and tying into the porch downspouts to pick up the flow in one single run. [We have one downspout on the backside of the house that is already tied into the drainage system.]
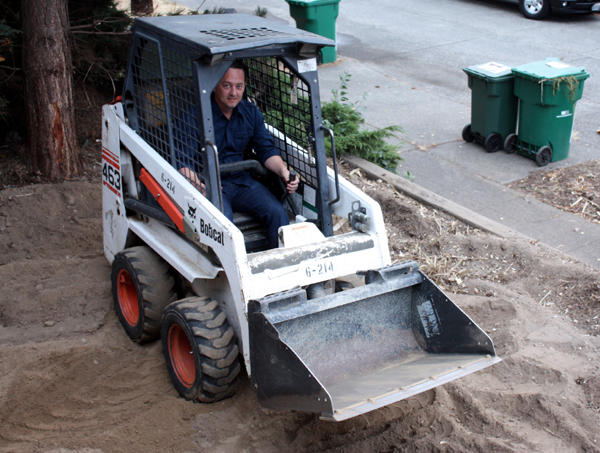
And finally – bobcat. This time we rented a front-end loader since our main objective was to push dirt back into the trenches. After about 30 minutes of work, Kyle got the sneaking suspicion that once again, something wasn’t quite right. Turns out that there was another problem with the hydraulics, but this time they sent someone out to our house with a new piece of equipment. Phew.
And no, it wasn’t all fun and heavy machinery – lots of good ol’ fashioned manual labor was employed. At some point I simply gave up and embraced the dirt. I think I need a post-drainage spa package. Spa Nordstrom has that, right?
We ran out of time to return the bobcat on Sunday evening, so Monday morning it was. What better way to start off the work week than a bobcat ride across your front yard? Good morning neighbors!
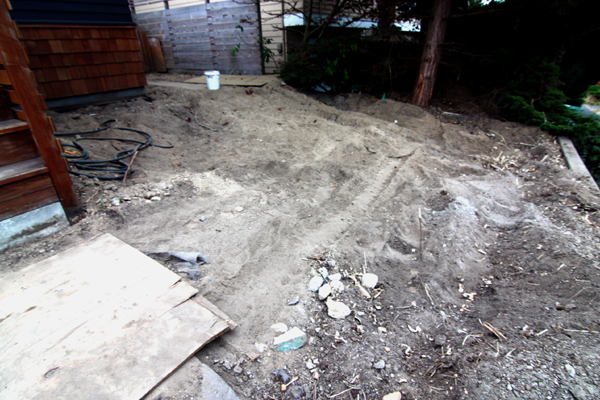
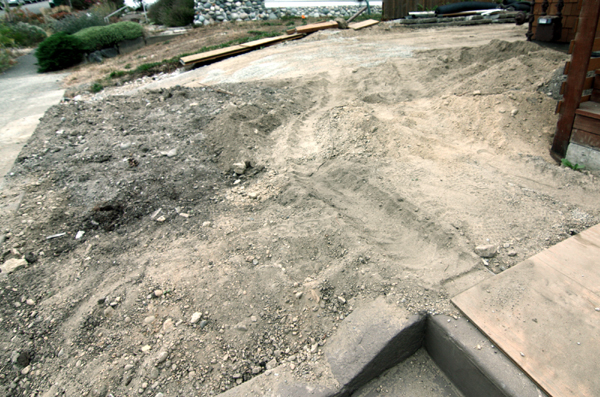
So here we are – the south yard. Are you feeling it? Can you envision a small seating area surrounded by lush native plants?
And the north yard – a blank slate for our recycled large-scale pavers and a tree or two?
We’ll get there.
We still have some “micro-grading” that needs to happen and then we’re going to focus on the hardscaping before the rainy season is upon us.
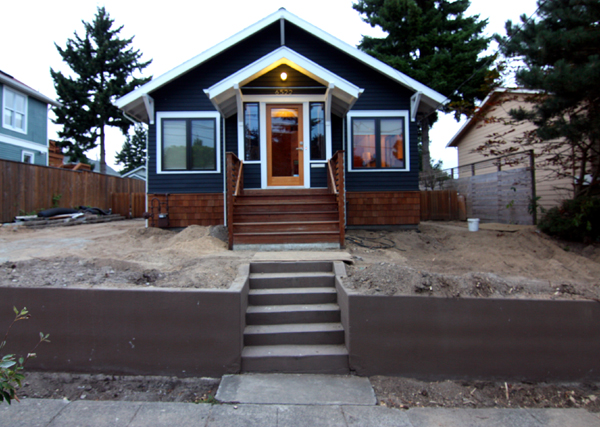
Long, hard work, but it will be so worth it!
I am surprised your dirt looks so dry and dusty – I figured the great northwest (one of our favorite places of all time – my Mom lived in Seaside, Oregon for years) would have rich, dark, loamy soil, what with all the plant life you have there. Great work on an unpleasant (but very necessary) task. The new front yard areas will look great!
haha, it will be very wet soon. It’s dry season here right now actually just turning to fall and the long wet season so the dirt hasn’t seen much rain in quite awhile.
Wow. Bravo. That does not look like a fun several-weekend project. But I guess it must be done. Great blog, and really well documented!
what an amazing job! your energy is inspiring!
Wow, you guys are amazing! It would take me two weeks to finish what you two can accomplish in one weekend. Kudos!
this is by far the hardest project I have done at our place! but nothing is better than the piece of mind that during one of those December 4-day downpours, you are not biting nails over what you may find when returning home from work 🙂 are you allowed to daylight the drainage at the street? or where is it routed to? (I may have missed that in an earlier post)
Hey Jason, I didn’t realize you guys did that at your house. The roof runoff is tied into our combined sewer/stormwater system. Ideally we would have infiltrated on site (and we may add rain barrels in the future), but with the amount extra hardpan digging that that would have required, we decided to keep it simple (for now).
[…] drainage project dragged into September (and October), thanks to a few setbacks with machinery and hardpan soil. But […]
You house looks amazing. Very nice job.
When you installed your footing drain not your downspout drain, where does your footing drainage pipes end? Do they end out to daylight or did you burry them into a dry well? Do you happen to have a picture of this?
Thank you for your time.
Brian