As we begin to work on our basement (again), we thought it might be fun to rewind back to ’06 and revisit the metamorphosis that has already taken place.
So here goes. When we bought our home in ’06, it came with a finished basement. Yep. Something like this:
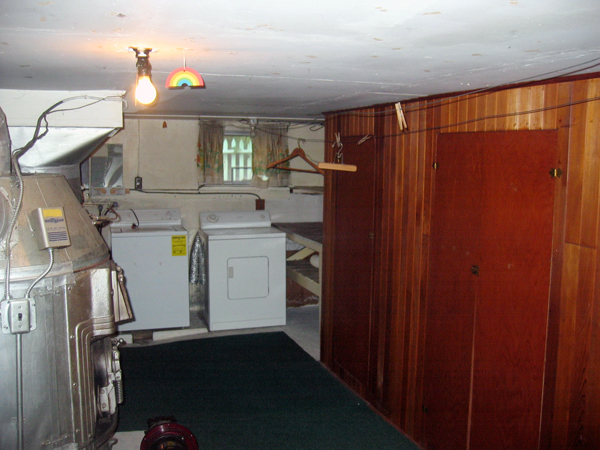
A built-in wardrobe, hunter green carpet remnants, lovely drapes and a rainbow for good measure.
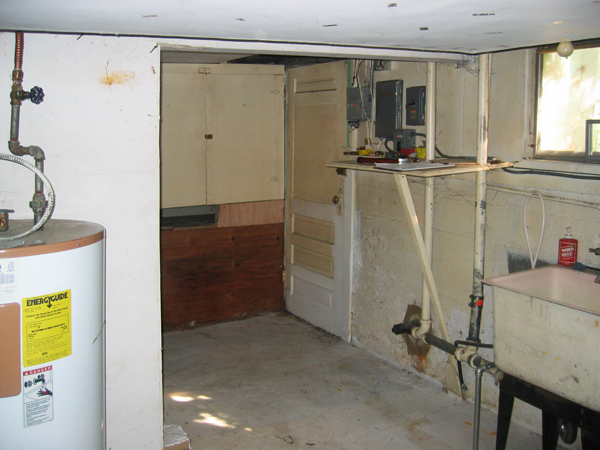
Hey there, how many fuse boxes can you fit in an old home? (Out of necessity, we had the electrical service professionally upgraded and a new panel installed before we moved in.)
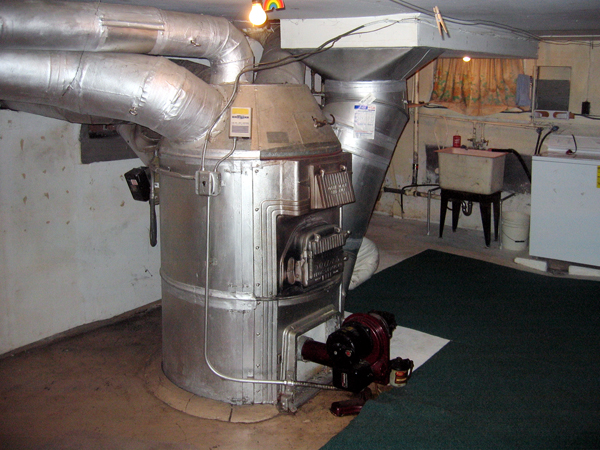
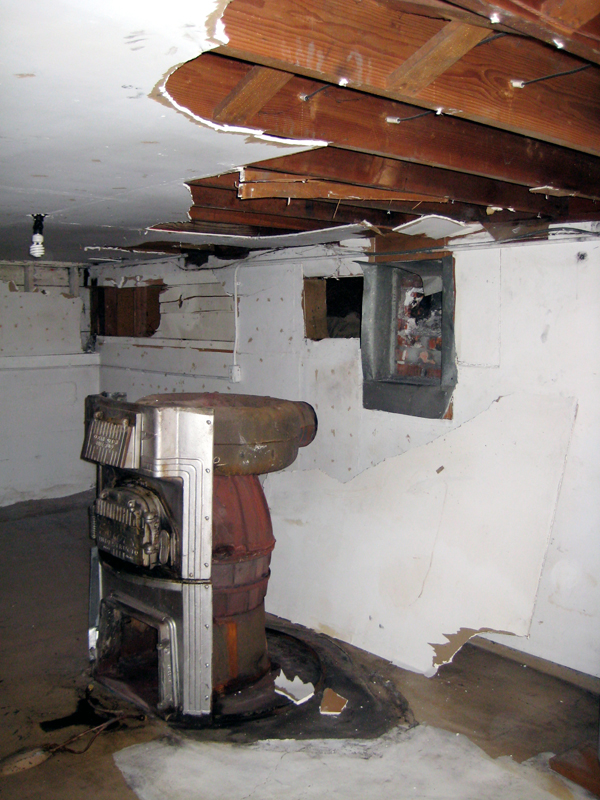
Ahh, the Indestructo. We’re guessing this was a 1940’s coal-burning furnace that was later converted to heating oil. Because there was no blower, the hot air rose to the first floor via gravity, which is why the ducts are so huge. At any rate, we never used it. Our house had been vacant for a year before we moved in and we didn’t want to sink any money into a heating system that made us super nervous in the first place. But the furnace wasn’t the only problem – our dryer vented into the basement and the washing machine drained directly into the utility sink. Sigh.
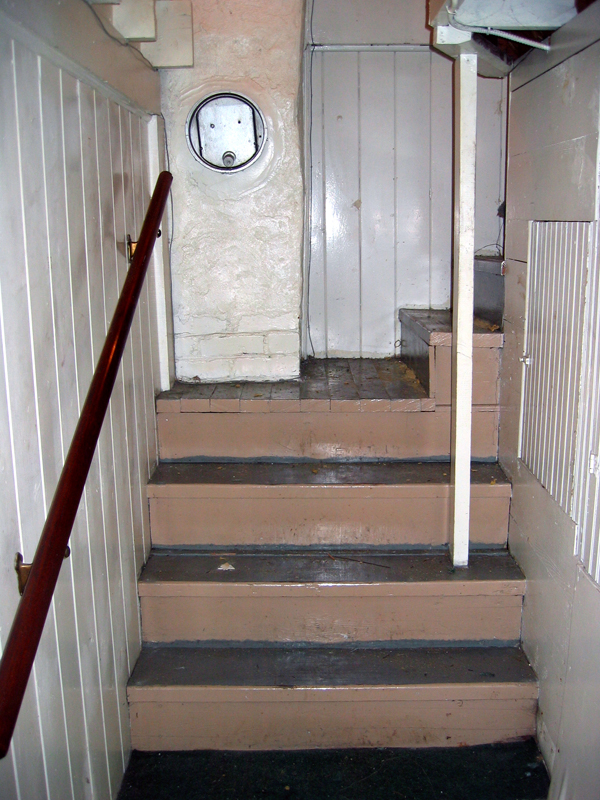
The furnace exhausted out of a brick service chimney (which originally served a wood-burning stove in the basement and one in the kitchen). During one of the home’s earlier “remodels”, an interior stair was added to connect the basement to the main floor. The landing was framed around the chimney. Classy. This made doing laundry the first couple of years a real pain in the ass.
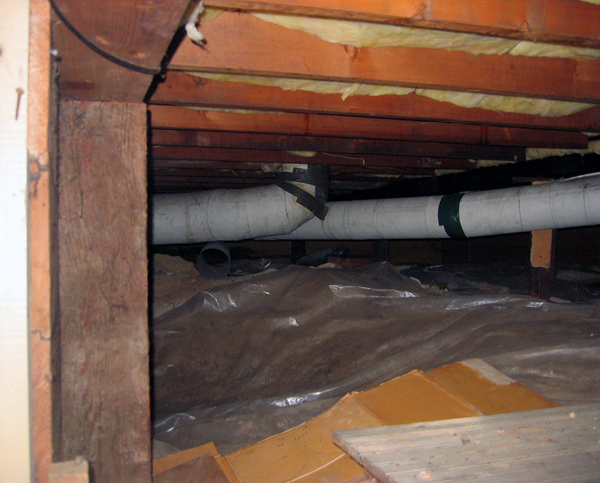
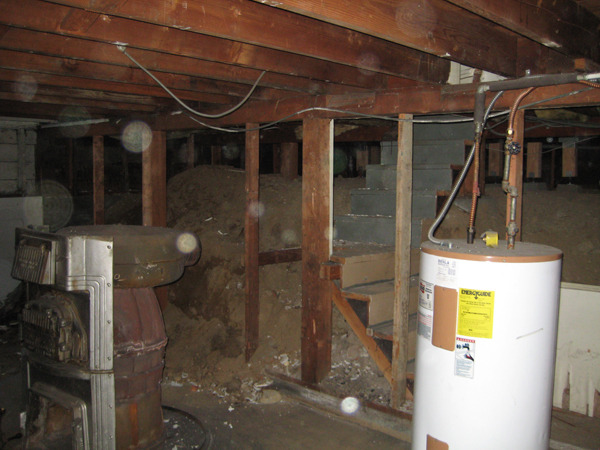
Our basement is half crawl space, which looked something like this 5+ years ago. The ductwork? Covered with asbestos tape. (Before we moved in, we collected samples of various flooring, wallboard, and duct tape throughout the house and had it professionally tested for asbestos.)
For the first year or so, we didn’t do much in the basement besides clean things up, fix the dryer vent and try to make it a bit homier. (At the time, we just had a desktop computer that we set up in the basement “home office”. Oh the shame.) In early 2008, after we’d saved up some money we had the asbestos professionally abated. It was expensive, but not a job we wanted to tackle due to the amount of ductwork and small spaces we’d have to crawl around in. After the crew was done, we were left with this furnace carcass, which we hauled away to a scrap metal collection place.
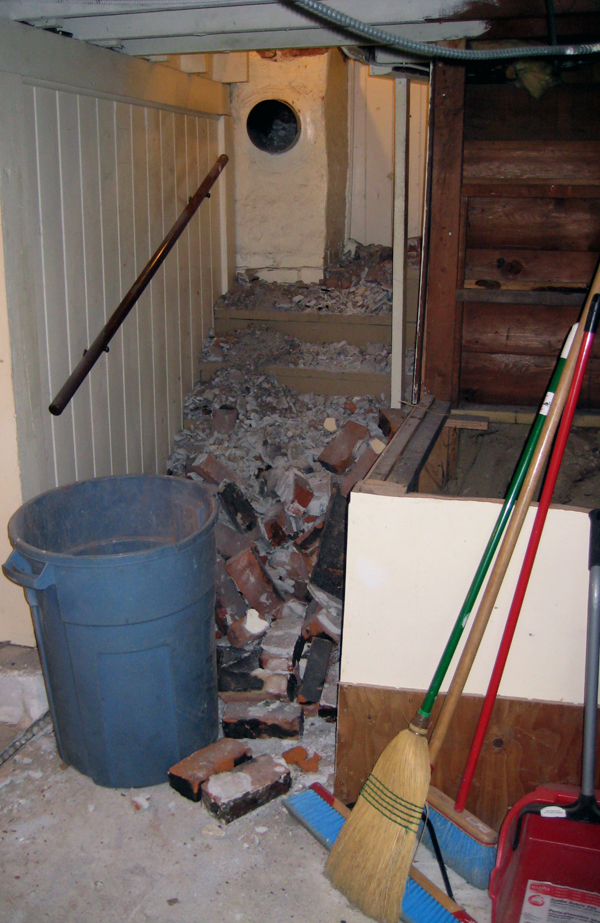
With the furnace gone, we no longer needed that pesky chimney (in fact, during the roof replacement in ’07 we tore the chimney down to the attic). The whole thing came down easily. Too easily.
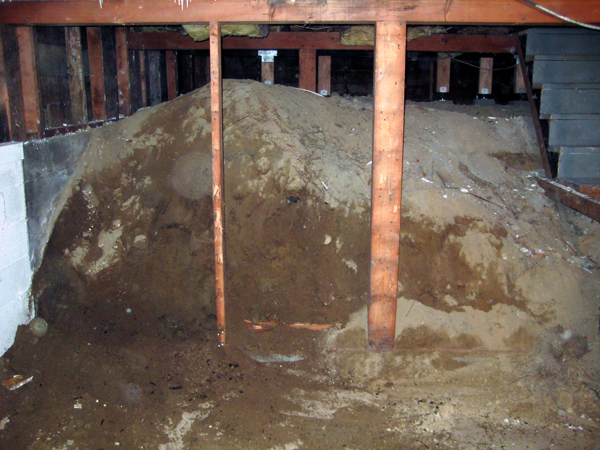
During some earlier exploratory demolition, we had discovered some interesting things about our basement. First, the wall between the basement and crawl – y’know…the one holding back 4′-5′ of dirt, was indeed made of wood! As we shook our heads in disbelief, the only logical explanation was that the basement was originally built so that the dirt just natural sloped down and that it needed no formal retaining. Sometime later (likely when the basement was “finished out”), the additional studs and wallboard were added.
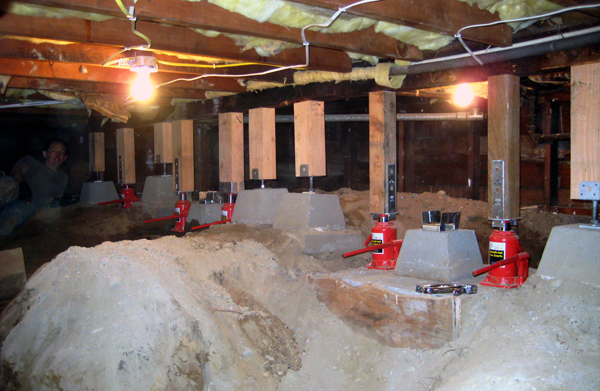
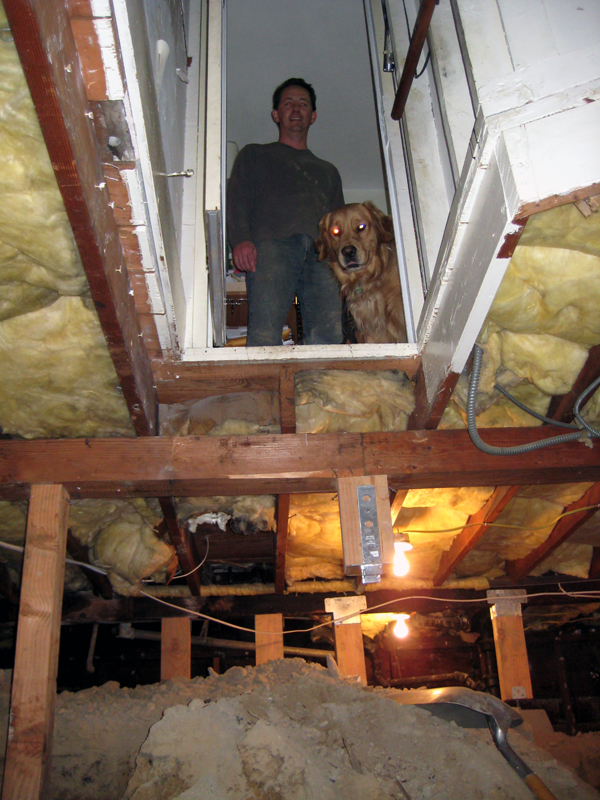
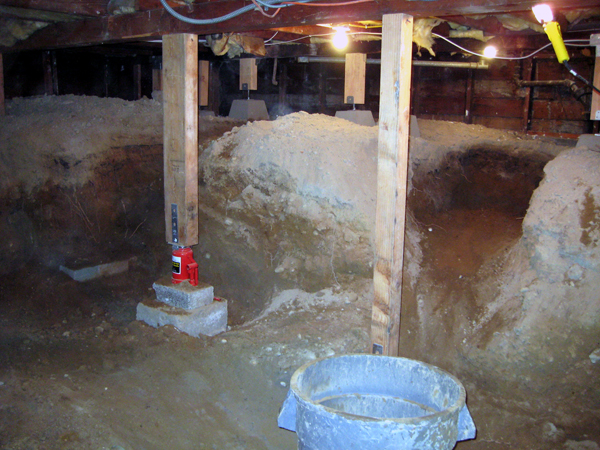
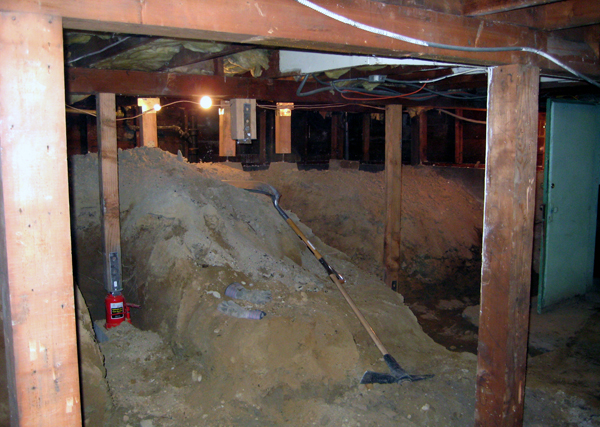
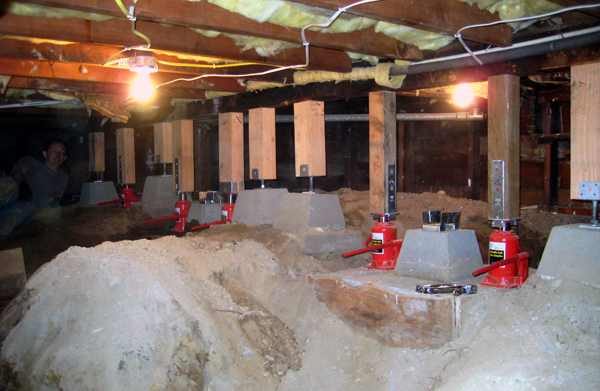
Second, the back portion of our house was sagging a bit because the beams that span over the crawl space had begun to fail. There were a series of posts and small concrete “footings” that had settled over the years and were no longer holding anything up. Before we starting the big dig fest, Kyle added several temporary supports (sitting on CMU post bases) to prevent further sagging.
Now that we were entering the zone of “substantial structural work”, we considered our options and what would be best for the long-term plan for our house. We considered digging out the crawl space to create one larger basement space, but soon realized that the labor involved to remove the dirt and underpin the entire foundation would not be worth the 300+/- square feet that we would gain. We also considered leaving it a dirt crawl space (but still fixing the structural problems), but decided that in such a small house, the space was too valuable to not use. The compromise? Short basement.
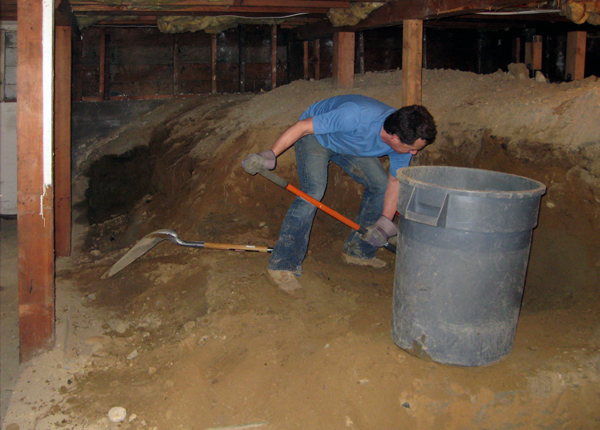
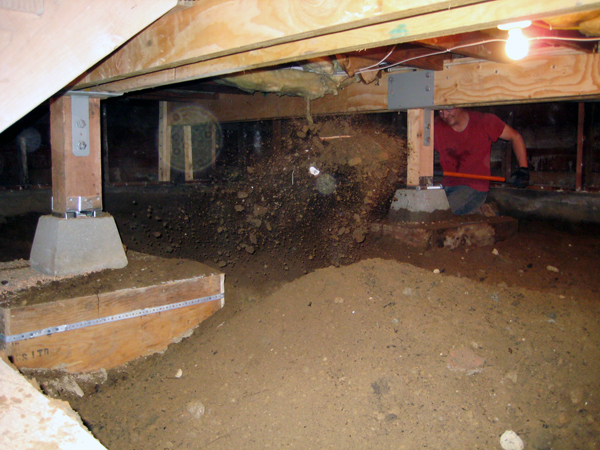
In order to convert the crawl into a useable space, we needed to remove a good deal of dirt. This was the beginning of Kyle’s worst nightmare. Good thing he was only 29 at the time. I think we’re now too old (or maybe just too wise) to do this type of thing again.
So he dug and dug and dug. In addition to removing dirt entirely, he also had to dig giant holes for new concrete footings that would support the new enhanced beams.
And as you know from our drainage project last summer, we totally hit hardpan soil. When the pick ax came out, it was a tough day.
OMG WHAT HAVE WE GOT OURSELVES INTO?
To complicate the process further, the only way to get the dirt out was to shovel it into buckets that got carried up the exterior stairs and dumped into wheelbarrows that got carted into the back of our truck. I don’t remember how many trips we had to make, but it was most likely about 10x more than we originally thought. (And now you know why working with dirt makes us so bitter.)
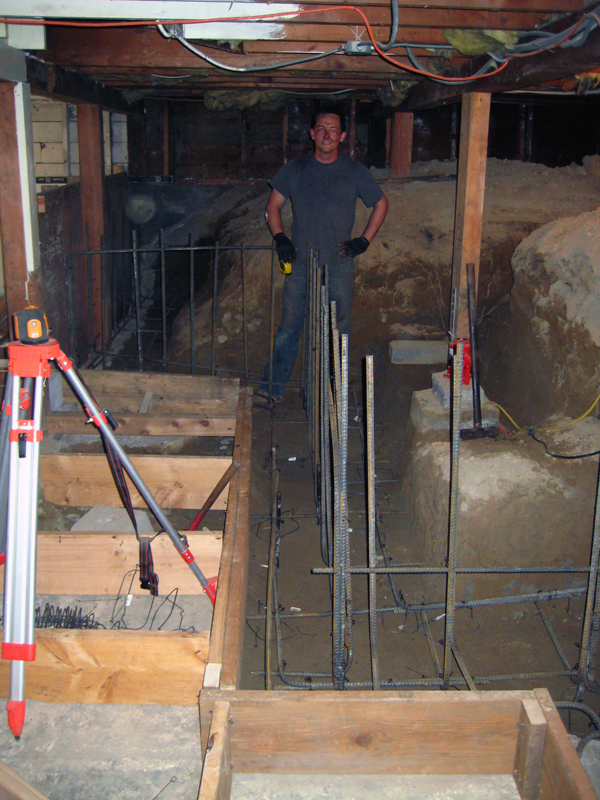
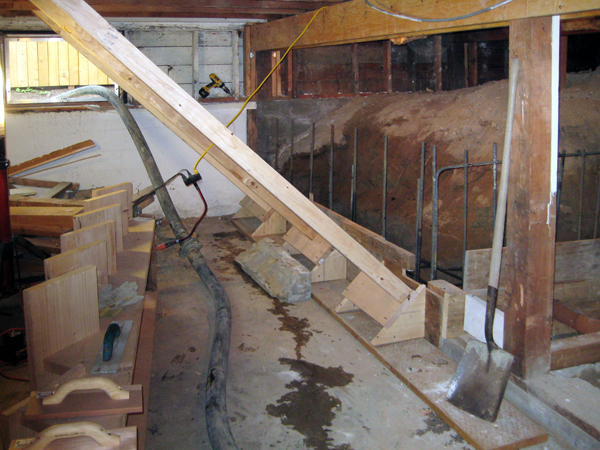
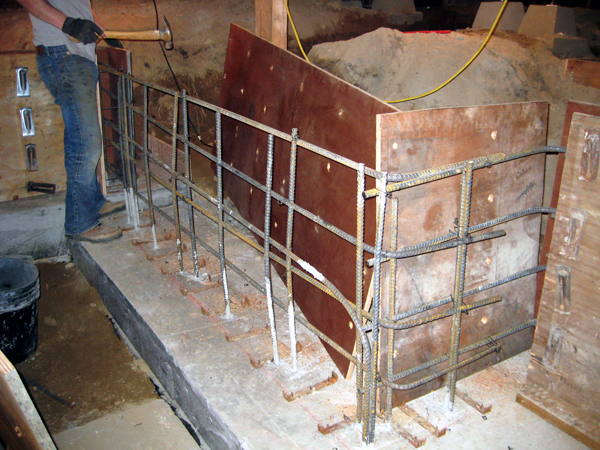
But after a few months, we were ready for concrete. Kyle had never really worked with reinforced concrete, but that didn’t stop him. We bought some rebar off Craigslist that was leftover from a job site and got busy. Kyle even built his own rebar bending jig.
Craigslist turned out to be a great source for concrete supplies in general – we found most of what we needed for formwork that way and then we resold it after we were done. Since we were doing this on the weekends, we scheduled the concrete work in three different pours. The first weekend was the footings for the new retaining wall.
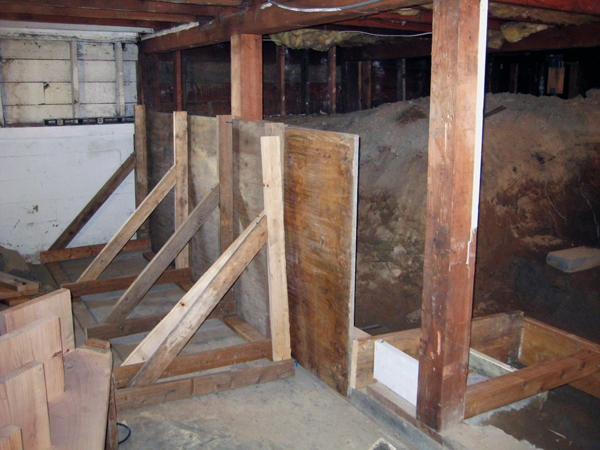
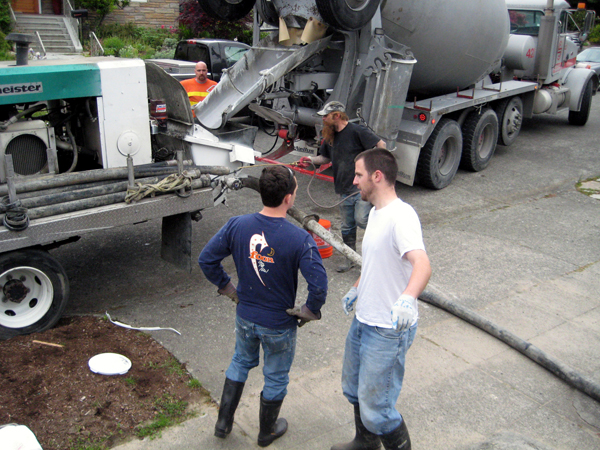
We used 2x’s as temporary shoring to prevent any blowouts during the pour. The concrete was pumped in through the hose coming through the window, a technique that actually worked quite well.
With the footings in place, Kyle finished up the formwork for the walls.
And the next weekend the pumper truck was back again.
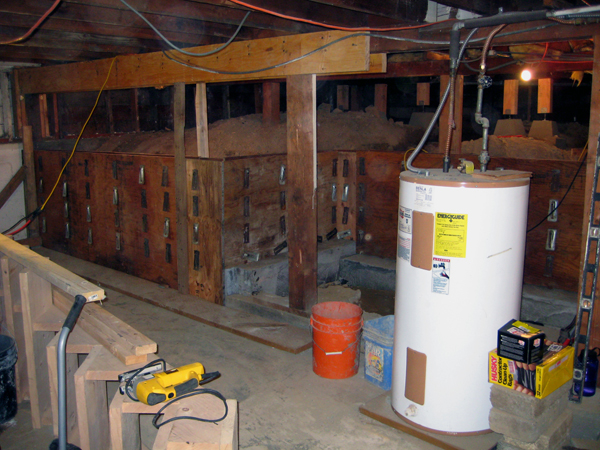
With the concrete wall in place, it was time to fix the beams. Kyle used the red bottle jacks and a laser level to raise the existing beam back to where it should be. During this time, I was on the main floor doing damage control. With each crank of the jacks all you could hear was the sound of plaster cracking throughout the back half of the house. And this is exactly why we knew we had to fix the floor framing before we did anything on the main floor.
After the beams and floor joists where level again, Kyle sistered on LVL’s to each side of the original beams and installed new posts on top of the new concrete footings. With plenty of hefty connections and bolts, it was like finishing up reconstructive surgery on our elderly house. Sadly, the digging wasn’t done just yet. Kyle still needed to level out the remaining dirt so we could pour a thin concrete slab over the entire crawl space.
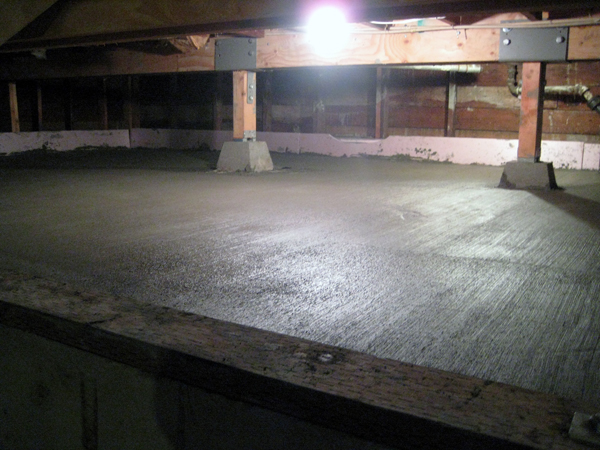
After the dirt was level, we added a vapor barrier, welded wire mesh reinforcing and a new slab on top. We also added a layer or rigid insulation along the perimeter to provide a thermal break between the foundation wall and slab.
This project took us nearly a year from start to finish. In between adding the new beams and the crawl space slab, we also gutted and remodeled our bedroom and bathroom. To further add to the insanity, during this time we were also taking the first 6 (of 9) architecture registration exams. Oh 2008, you were so painful.
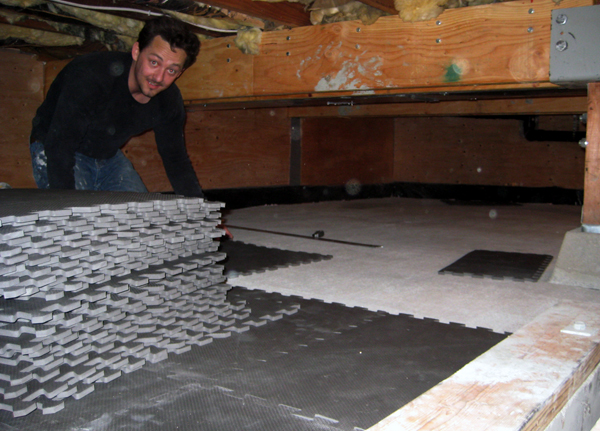
The final step in the crawl space was to move stuff back in. To save our knees, Kyle found these used interlocking rubber tiles off Craigslist which work like a charm.
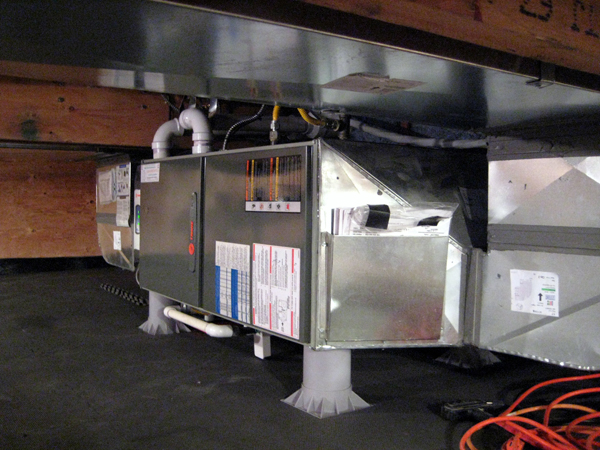
After two years without a heating system, we finally were able to get a new furnace! To free up space in the basement, we chose a model that could fit in the crawl space. The ductwork was also designed so most of it stays in the crawl space (which will come in handy during this next phase of basement work).
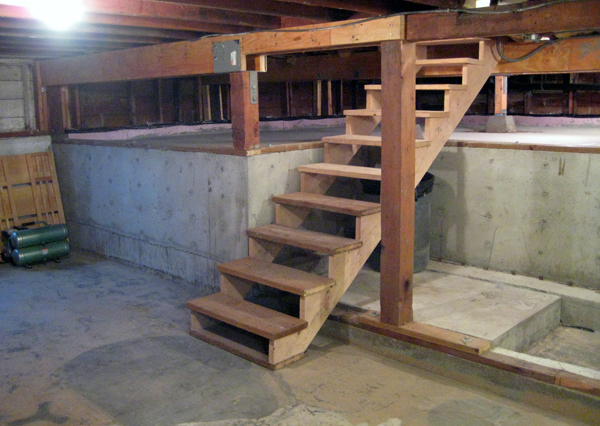
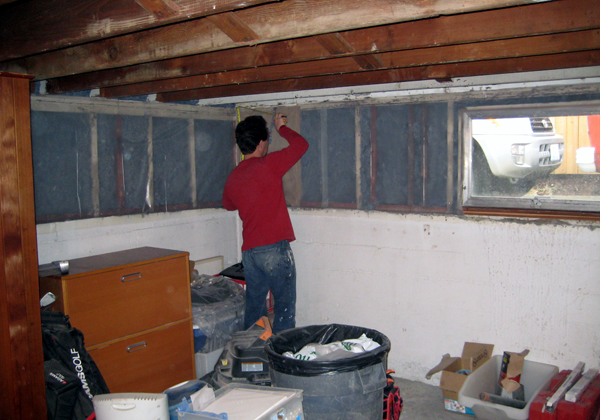
In 2009, we completed a seismic retrofit to our basement. In old houses like ours, the wood framing was not properly connected to the concrete foundation walls. This becomes a weak point during an earthquake, something akin to hitting someone in the knees with a bat. So to remedy the situation, Kyle installed hold downs and anchor bolts along the perimeter to tie the framing to the foundation. Then we insulated and added a vapor barrier.
Finally, we added plywood to create a more structural shear wall.
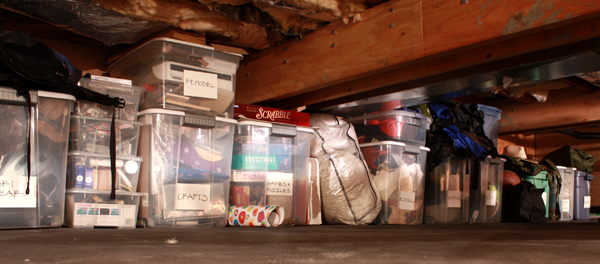
During this time, our “stuff” had been shuffled around from one location to another, but I was finally able to implement my obsessive organizational skills in our new short basement. (We call it a short basement because it is a conditioned space and does not require any type of venting.) We use the short basement mostly for out of season stuff, like decorations, ski gear, camping gear, luggage, etc. It’s also been an invaluable space for various other storage needs as we’ve tackled different rooms of the house.
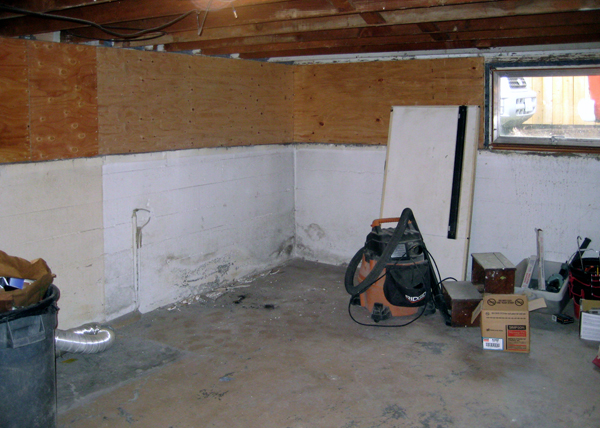
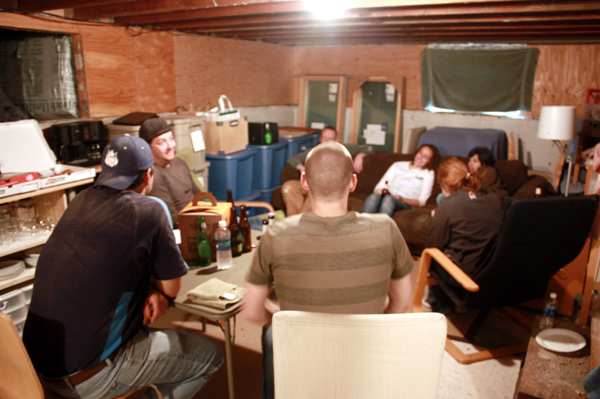
In the early part of 2010, we started packing up our belongings on the main floor and moving them down to the basement. A few months later, we moved our furniture down and set up our temporary basement apartment. It wasn’t stylish, but it was functional.
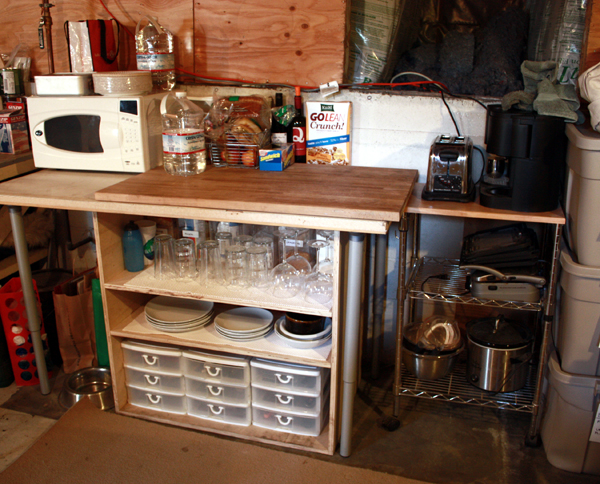
For the kitchen we went with industrial chic. This was our kitchen for about 7 months.
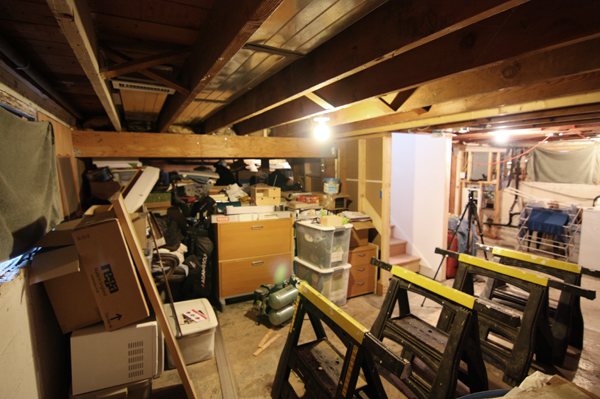
When the big remodel of 2010 was done, we moved our furniture back upstairs, but the basement had become a total disaster area, filled with building materials, empty boxes and who knows what else. Over the last year, we’ve been able to reestablish order to the space and purge what we no longer needed. (Which is good, because now we’re ready to tear things up again.)
And that’s how we deconstructed and reconstructed our basement over the course of 5 years. Now it’s time to actually finish something (no more sad basement?). More details coming.
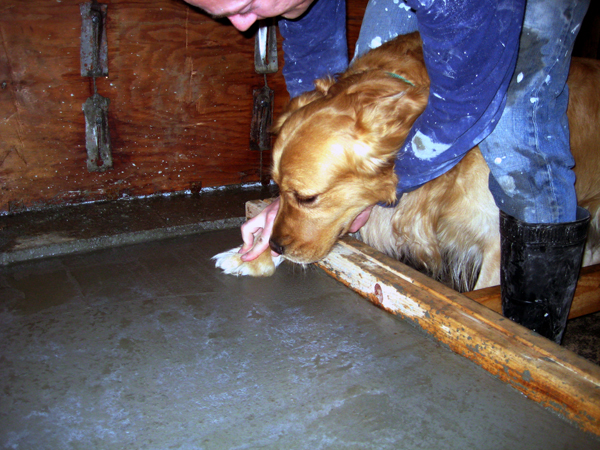
First of all, Kyle clearly is working too hard. Secondly, where’s the pic of Bailey’s post-paw-print???
this is epic.
This makes me so tired, just reading it. You two take DIY to an impressive level.
Very Impressed! You saved a ton and did it better than anyone else would have.
I really look forward to watching your projects come together. Good luck with this next (last?) phase of your renovation!
I’m glad to see I’m not the only one who’s life revolves around fixing and remodeling my old home…. great job on the basement… i’ll be turning my crawl space into a “conditioned” space in the next year… should make a huge difference in my heating/cooling/draftyness coming in through the original hardwood…. http://www.midcenmod.com
Ummm…kinda speechless. That’s a crazy amount of work you’ve done down there already.
I am so impressed. Wow. Just. Wow.
I agree with previous commenters – I am exhausted after reading about work YOU did. The thought of doing all that such a confined space makes me nauseous. I can barely face the thought of cleaning out and finishing the garage, for crying out loud. Well done!
The most amazing part of this is that Kyle was actually smiling in the pictures!
I just wanted to say “ditto.” Very impressive; this is why I love your blog. 🙂
I love your blog. Thanks for all of the hard work you do to share your projects.
I live in Ballard and have a very very similar basement. I can’t wait to be inspired! By the way, what is the floor to ceiling height?
Sarah, our slab slopes from from north to the floor drain at the south and varies between 6′-2″ and 6′-8″, We’re currently trying to decide if we should jack hammer out the slab and do new lower inset footings then pour a new insulated slab. Or to just pour a leveling slab and then finsh the sub floor with a product called Dri-core. We’re not going to completely cover the floor joists to give the feeling of a taller space but in general I think it’s going to be a short basement used as a media room/extra bedroom.
yeah, I remember cursing a lot, somehow lauren makes me smile on command;)
I second this;)
yeah, as a part of conditioning our crawl we still kept the insulation in the floor between the crawl and house. The crawl stays about 60 while the house is usually around 70
That’s awesome Kyle, I really think converting our crawl has been one of the best moves we’ve made.
Thanks Heather, it made me tired to write it! =) I’d forgotten how much we’d done down there.
Haha, I don’t think we have one…but there is a picture of the two handprints and paw print on our basement page (under House Tour).
Wow. You guys are AMAZING!
Oh my god! I will never call our messy basement a project from hell again 😉
Congrats, you guys did an amazing job!
Cheers,
Swenja
My back hurts after reading this and I’m only 5’4! How does one swing a pick axe in such cramped quarters and live to tell the story? I’m super impressed!
Wow! i’ve been rendered speechless! xx
Unbelievable amount of dedication! There are too many moments when I would have broken down in tears. Great job at sticking it out, can’t wait to see it all finished!
If it’s possible, include a laundry chute from the main floor to the basement, which is super convenient and hides the dirty clothes until laundry day.
P.S. My laundry chute terminates on the basement ceiling in a box with a hinged bottom so the laundry stays corralled until wash time.
I like this idea alot! stay tuned for a laundry chute;)
I miss the indestruct-o!
Holy Cats! That is amazing. In an old house I lived in as a teenager we had a weird area the appeared to have been used for coal storage. It was just dirt built up like your crawl space and “retained” by wood. Super spooky! It is always amazing to me that these old homes survive all their owners put them through. I love that you’re completing this space for use.
Oh, and in a fit of nostalgia, I have to ask, do you still have the rainbow thingy? My best friend’s mom had one in her little orange 70’s model Datsun station wagon. Ah, good times!
Hey Tara, the crawl space was pretty creepy. We kept expecting to find something…unexpected.
Sadly, the rainbow is no more, but we did keep the door of the furnace. =)
We should have invited you over during that demo. 😉
We’ve thought about adding one, but unfortunately the laundry area is under our living room so it would actually be faster just to throw stuff down the stairs. =)
[…] week we shared with you the work we’ve already done to our basement over the last 5+ years. After completing the structural work in 2009, we began […]
This is a really great blog page. I have been pouring massive amounts of time and cash (for supplies and equipment) for my own basement in my house that was built in 1905 in Massachusetts. Biggest initial (and somewhat ongoing) issue was dealing with water. I dug up parts of the yard and installed drain tubing for the runnoff of all gutters (4 total) to go underground and to the swamp in the woods (probably about 200 feet or more). Dug out, cut and removed boulders (the hardest thing I have done since moving here), created and installed 2 sump pits, installed 3 sump pumps (primary, secondary with battery-powered backup pump) in one location of the outer room of the basement. Partial perimeter drain from the main source of watter in the main basement running under the wall to the outer basement room where the sump pits are. Created forms and poured concrete (walls and floor) and scrubbed out mold in outer basement room (about 90 bags of concrete – bought and used a concrete mixer). Removed old old fiberglass insulation and sheetrock (with asbestos??) from the ceiling of the outer room. Now am digging out the main basement floor to create more vertical height so I can reduce the number of times I bump and cut open my head on ductwork when walking through the basement (I work in the outer room and main part of the basement. Next project will be to install a toilet and sink connected to the septec system and water well. I loved you blog and learned a lot! my biggest scare is about what to do about the supports as I dig out the house. Additionally, what to do about each concrete slab that the oil tank, oil burner, gas water heater sit on and what to do about both chimneys that do not extend to the lower floor (one chimney is used for the oil burner and the other for the propane water heater). I see you jacked up your supports. Boy would I love to learn more about how you did that and how you replaced with permanent new supports.
– Jeff
Wow, you are definitely not afraid of hard work! Nice job, should be very proud of all you have accomplished.
Holy crap, I thought my basement was sad. But wow, what a hella job you people have done!! I have been working alot on mine lately; always doing somethin’ around….oh the joys of homeownership! All my best to you.