Had we not decided to add the loft, I think this week’s post would have shown us finishing up the framing. But alas, that’s not the case. The good news is, we did make some major headway converting the west part of our attic into a cozy 200 SF loft space.
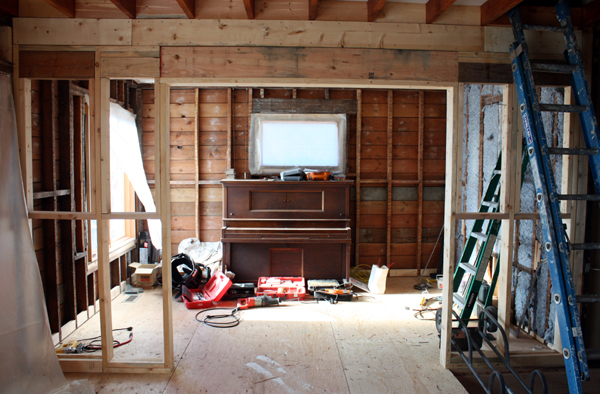
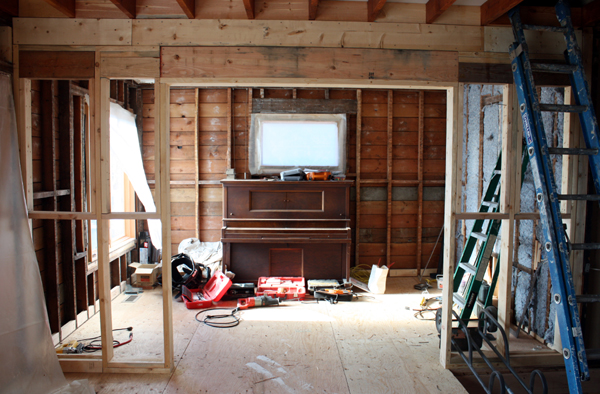
1. First though, we finished framing the opening for the 2nd bedroom. All the seemingly superfluous framing at the top will be blocking for the barn door track. The piano continues to be stubborn.
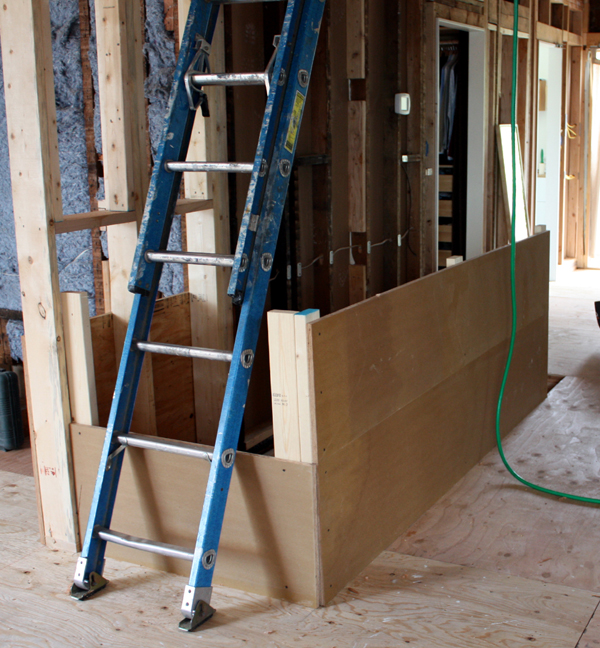
2. We finally built a temporary guard rail at the stair, using scrap pieces of MDO and 2×4’s. The blue ladder is more or less where the future loft ladder will go.
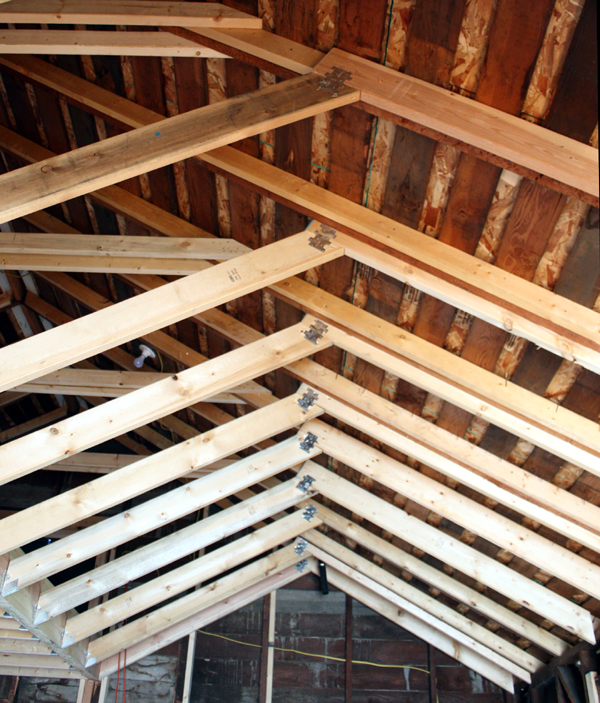
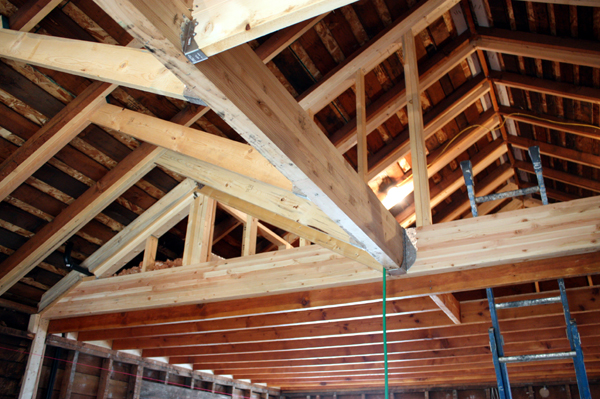
3. We finished framing the vault over the kitchen/dining area!
4. Next, we moved on to loft framing. Not only did this involve working in tight spaces and lots of ladder climbing, but it was ridiculously stuffy (even though it was only in the 60’s outside).
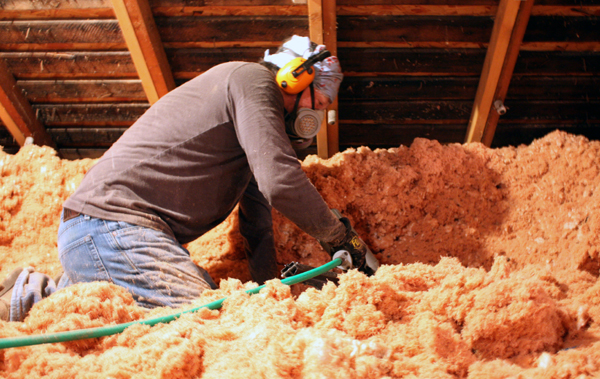
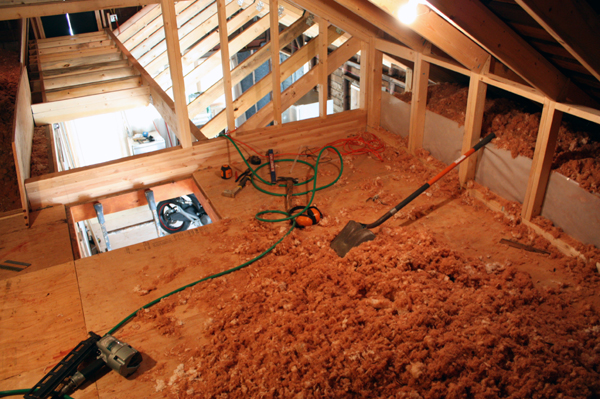
Oh, and there was also the insulation. Before demo, Kyle and Dustin spent a grueling afternoon shoveling all of our loose attic insulation over the north side of our house (the part that wasn’t about to get obliterated). Now that we’re adding the loft, we needed to move even more insulation in order to put down a new subfloor and knee wall. By the time Kyle was done, he was drenched.
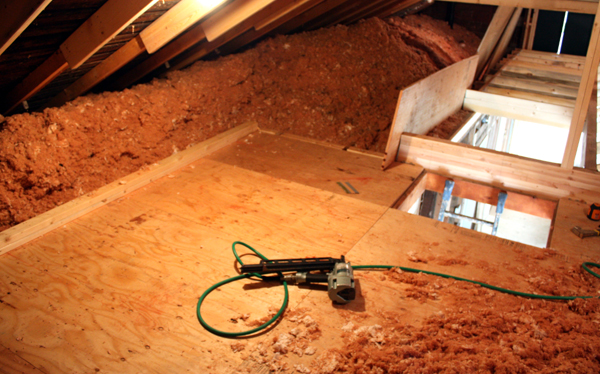
Fortunately, Kyle had the foresight to install some plywood insulation shields that would keep the growing pile of insulation from further blowing down into the space below. After the drywall is up, we’ll fill the flat portion of the kitchen ceiling (upper right corner) and then lay the plywood shields/sheets down over the joists so we have a walking surface from the exterior attic hatch. The photo below also shows the extents of the floor area and the sill for the north knee wall.
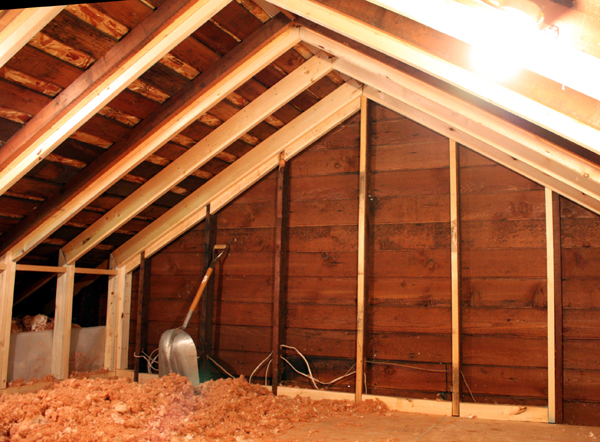
In addition to framing the surrounding walls, we also had to sister new 2×6’s to the rafters in order to get enough depth for r-30 polyiso insulation. I think we have officially doubled the amount of wood that was used to build the original house. Also, I have no idea why we own a snow shovel, but it has certainly come in handy around the house.
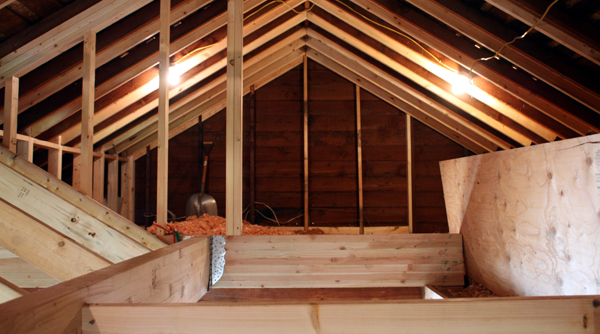
We transferred some of the extra insulation into the triangular space behind the knee wall (the plastic sheeting holds it in place until we get the drywall up). We’ll do the same thing on the opposite side, and the remaining pile will provide a super-insulated ceiling over the bedroom and bathroom. Good thing we never got around to adding more attic insulation!
Here’s a glimpse at how the loft is coming together. We’ve thrown around a few ideas on how we’ll furnish the space, including low chaise-like daybeds on each side with a desk in the middle and maybe some low slung shelving. We’ll also be installing a rather large skylight (more on that later).
This week we’ll finish up the north knee wall and start framing the “light well” that will visually connect the loft down to the space below. The framing fun just doesn’t stop. Also, check back later this week to see what happens when you combine a gutted house, a ramp and a motorcycle.
Looking great, guys. I’m really impressed and love seeing it come to fruition. Framing is always my favorite part, seeing all the spaces come to life. I’ll try to drop by one of these days when I’m in the area and see it in person! Nice Job!
looking wonderful – love these weekly updates.
was wondering if you wouldn’t mind passing on the name of the barn door hardware mfr? or will you be custom fabricating it?
thx
Yeah, you can really see it start to come together and imagine what it will look like completed! Keep up the good work 🙂
Thanks Cary, stop by anytime!
Sure! We haven’t bought anything yet, but we’ll probably use the flat track hardware from Crown Industrial (looks like this: http://www.crown-industrial.com/frames/Graphics/fltclose.jpg)
[…] This post was mentioned on Twitter by Houseblogs.net. Houseblogs.net said: [chezerbey] progress report: week 6 http://bit.ly/bL8dh9 […]
glad you decided to go forward with the loft – it looks like it will be a great space.
ugh, i don’t even want to imagine what it was like trying to move all of that insulation…