Lots to report this week!
1. When we bought the house, we were so excited to find oak floors under the yucky green carpet. Well, they’re getting covered again! Even though the floors could have been refinished, we would have had to deal with a toe-stubbing threshold between the oak and the new cork and the location of the transition would have been awkward with the new floor plan.
And how about that sweet blocking at the base of the wall? A big thanks to Dustin for giving up his day to help us out (again!).

2. Dustin and Kyle also built the new basement stair and installed most of the side wall framing! It is now entirely possible for one to carry a basket of laundry up the stairs without ducking or turning sideways!

We’ll keep the stair like this for a while, so we don’t have to worry about mucking up the finish treads and risers (which will be installed when we do the rest of the finish work). And even though the basement is a project for another time, we’ll also go ahead and sheetrock and paint the inside face of the side walls too.

3. Next on the list – finish sanding the living room joists!

After Kyle was finished, he took off his safety gear and smiled at the wonderful mess he had created.

4. On Saturday we got down to business and installed the two glu-lam beams (which will support the new vaulted ceiling). The shorter one (shown behind the ladder below) went up fairly easy…

…but the 20′-0″ one was more of a challenge (not to mention a bit wet from laying in the yard).

Fortunately, we devised a strategy that involved the careful placement of ladders and muscle…which resulted in a lot of back and forth between ladders until the beast was fully seated.

Finally, Kyle installed a series of nails and we were golden.

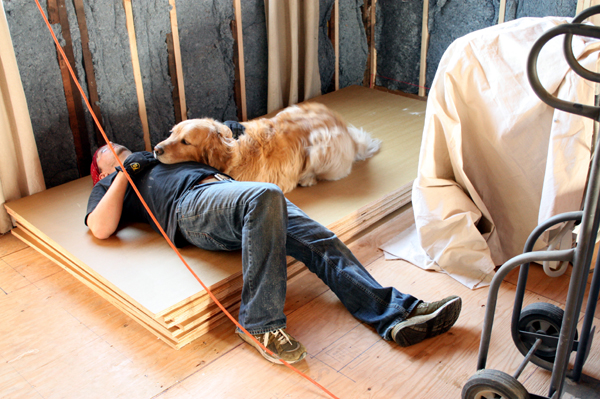
Break time! (We moved the MDO inside since priming and painting time is coming up.)

5. Sunday morning we woke up early, too early…to the sound of the compressor powering up. (We had forgotten to unplug it the night before.) So Kyle got up and put a coat of benite on the joists.

The benite helps fill the pores and harden the wood, prepping it for the final finish.

6. After the benite was on and breakfast and coffee were consumed, we headed down south to IKEA. That’s right, we bought our cabinet package!

We went ahead and bought everything now in order to take advantage of the 10% off kitchen sale that ends this weekend. During the design process, we used IKEA’s free kitchen planner program to lay everything out. The program also creates an itemized list with prices that we printed off and brought with us. After handing the list off to one of the salespeople, an aisle-by-aisle shopping list was created for us (almost everything was in the “self-serve” area). Fortunately, the system worked pretty well. They arrange the aisles so you pick up the largest, heaviest items first, then work your way up to the small things like hinges and legs. As instructed, we aligned all the bar codes to make the check out process a bit easier. The image above is the smaller of the two flat carts we had.
In fact, we were a little skeptical it would all fit in the car…

…but the RAV was a champ! Suffice to say, we were pretty exhausted by the time we got home, but it went about as smoothly as could be expected. We’ll see how the assembly part goes. (Also, we were told that IKEA will give you a $10 gift card if you bring in a “before” and “after” photo. Ha…if they only knew!)
On our way back from IKEA, we stopped by Ecohaus again to look at more cork. We’ve been giving more thought to a through body product (rather than a veneer) and now that we’ll have a nice even subfloor to work with, the glue down option is more appealing. But more on that later…

Lauren Zerbey is a Seattle-based architect and principal at Studio Zerbey, specializing in custom homes and residential remodels. With over 20 years of experience in the Pacific Northwest, she writes about the relationship between thoughtful design, creative problem solving, and the livability of the homes we love.
I just recently started reading your blog and it is fascinating! You guys are amazing. Can’t wait to see which Ikea cabinet door you decided on. Quick question…is the Ikea kitchen planner something you do with a salesperson in the store or is it online (or both)? I have a kitchen remodel coming up soon and have been impressed with Ikea cabinetry. Thanks!
It really looks like things are coming together nicely. I can’t wait to see everything done. I wish my husband and I had to know how to get all this done. When we were doing our house, we ended up hiring a lot of the work out to contractors we hired from eContractorBids.com. They did great work and knew their stuff, just wish we could have done more.
Thanks Martha! We chose the Abstrakt door/drawer finish – gray for the lowers and white for the uppers.
You can download the kitchen planning software from IKEA’s website (this allows you to input the dimensions of your room and include things like doors and windows). After you have it how you want it, you can either print it out and bring it with you to the store or (we didn’t know about this) you can actually save it to IKEA’s website. This way the salesperson can pull up your file on their computer, which saves a little time since they don’t have to input everything by hand. The salespeople can also help answer questions or will let you know if something doesn’t work about the design you’ve come up with. All of the different choices can seem overwhelming at first, but once you really study everything it’s a pretty simple system. Good luck!
you guys are making quick progress! i love the photo with the dog, our dogs would do the same thing.
seems like the ikea kitchen purchase went smoothly. and 10% off always helps. i haven’t downloaded that kitchen planner yet because our project is so far out, but it’s nice to know that they make it so easy.
You guys are amazing! So much work done in a short amount of time. I simply can’t imagine doing everything you are on my own (that is to say, without an expert contractor!).
I hope you had structural calcs checked by your friendly professional engineer! 😛
p.s. You guys are nuts — you need more pictures.
Ryan, I’ll send you my shear-moment diagrams for review 🙂
Thanks Laura, it definitely consumes a LOT of our time right now, but we know it will be worth it. We’re starting to see the light at the end of the tunnel and it is keeping us motivated!