With no real deadline to finish this project (besides my b-day in September…which seems like so far away!), we didn’t sit down and hash out a week-by-week schedule like we’ve done for other endeavors. And it’s a good thing too, because we know it can be hard to adhere to schedules created under ideal circumstances. Take last week for example – things were off to a good start and by Wednesday night Kyle had installed all of the new subfloor in the old kitchen and porch space! Then he caught a stomach virus. We were able to get a few things done over the weekend, but it wasn’t the marathon weekend we had been planning on. Plus, yesterday was gorgeous – the kind of day where you can literally taste summer (the ice cream may have helped). Which had us thinking…we should really try to get a lot done before the warmer weather is here to stay (which is still a few months away here in temperate Seattle).
But back to the weekly re-cap:
1. Kyle installed most of the 1/2″ plywood subfloor. This job was made 100x easier by the purchase of a screw gun. A tool well worth the modest price tag, it had us saying, “how did we not already own this??”. And because we’re geeky architects, Kyle laid out different panel configurations in cad to determine which would be the most efficient use of materials.

2. And now that we no longer have a sink on this wall, Kyle busted out all the old galvanized pipe and installed new ABS vent pipe connecting to the washing machine in the basement.

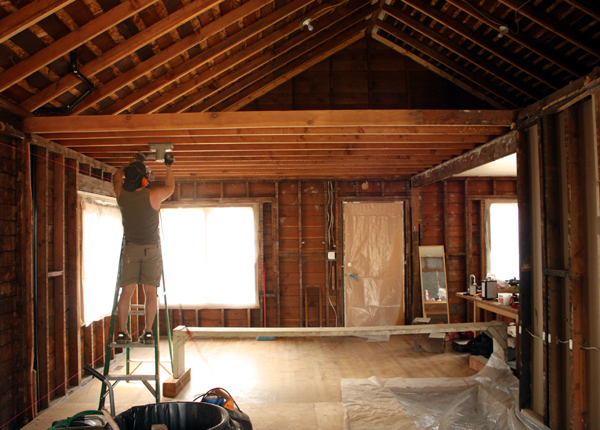
3. I pulled all the nails out of the living room joists so they could be sanded. I also yanked or hammered in most of the nails at exposed walls. Kyle then sanded the bottoms of all the joists and a few of the sides, which is not on our “fun to do!” list. To be continued…

Here’s a before and after shot, they do clean up nice!

4. We also marked off the location for the kitchen cabinets and island (enhanced via Photoshop). We then moved the refrigerator and dishwasher to their future homes…mainly to get them out of the way of flying sawdust and also to get a feel for what the space will be like. We also decided we should go ahead hook up the dishwasher soon.
I miss you dishwasher. A lot.

5. Finally, we worked on the loft design and came up with some strategies to deal with thermal convection. [We’ll cover that in a separate post this week.]
And in life-without-a-kitchen news, we’re surviving! We’re eating out a little more than usual, but we’ve come up with some microwave-friendly meals that are relatively healthy. So far, the favorite is frozen Amy’s mac’n’cheese with a bag salad. We’ve had it at least once a week…and we may have it again tonight.
hey.. I had this thought during the demo party, especially after finding the framed opening on the headboard wall of your bedroom, but, did your living room/dining room (old) used to be like a front porch area? what makes me finally ask is the plumbing image in your latest post. it shows that the sheathing is definitely newer in the dining room, and older in the kitchen… but if i remember right, the roof material all looks the same across this threshold? does this make sense? so the wall separating your bedroom from the living room used to be an exterior wall?
Rock on, Zerbeys, rock on.
Jason, I’m wondering if the house wasn’t moved to our site at some point, I know this was the case with our older rent house before this one. Looking at the 1930’s photo we have the front room was already added. I think you might have a point. Remember the ceiling joist in the living room that Says Carkeek? Evidently that carkeek saw mill was shut down by 1929 when it became Carkeek park. http://www.seattlepi.com/getaways/161088_carkeek19.html
I think you are right. The original house was basically what is now the master bedroom and kitchen. I think the front room and back porch were both added after that which is why we had to tear all the shiplap sheathing off of those walls. They used to be exterior.