First of all, a big thanks for all the positive feedback last week! Seriously, it made those six months of eating in our basement totally worth it.
Some people had questions about the innards of our kitchen, so we’re back to share the dets. In addition to the custom shelving units that we made, we also made some modifications to the IKEA units themselves, and thought we’d share those tidbits here as well.

But first, the view inside our fridge. It may only be 2′ wide and counter depth, but 98% of the time it’s enough space for us. Usually we just buy food and eat it the same week so we don’t need a lot of space for extras. The freezer portion below has 2 full size drawers and a half drawer at the bottom (to make room for the compressor). Our freezer mostly consists of coffee, ice cream and frozen veggies so it works for us. If, someday, we have lots of little Zerbeys running around and need more space, we could always do a full height refrigerator-only unit and then do a separate freezer in the basement. But for now, it does the job. (Note: since the fridge needs to ventilate at the top, we opted not to do another custom shelf in that area. The space is still useful for storing larger trays and the like.)

In addition to our custom shelves and plywood wraps, we also fabed up our own toekicks. The matching high-gloss gray was an option, but we decided that a solid wood piece would be more durable and add a little extra pizzaz. So we bought one length of IKEA toekick material and used it as a template to make our own. This basically entailed using the table saw to kerf out a notch that would accept the IKEA clip that then snaps onto the plastic legs that the cabinets are sitting on. (We also finished the wood with polyurethane.) Since the space under the island cabinets acts as a plenum for supply air, we simply incorporated a metal grille into that toekick. This is also a very good place to stand on a cold morning. (Did we mention that we went two years without heat in our house? Yeah, love us some heat.)

For the door and drawer pulls, we went with fancy Reveal pulls which are thicker than typical top-mounted hardware and thus needed to be recessed into the doors and drawer fronts. This seemed like a daunting and potentially risky job to me, but not for Kyle. He simply fashioned a custom jig that allowed him to router out the exact shape and size. Of course.

Love ’em.


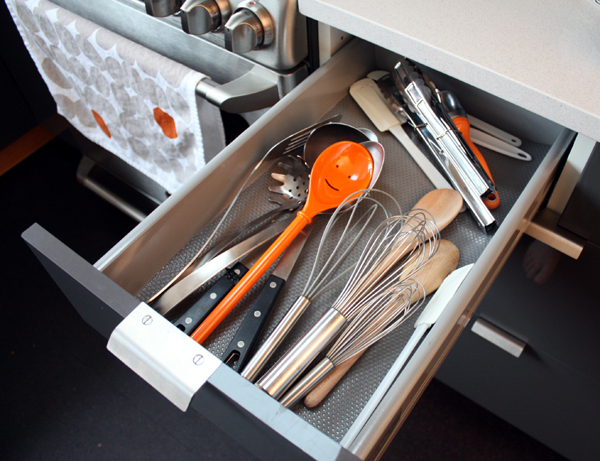
The restocking and organizing of the kitchen was my territory. During the design stages, I laid out where everything would go (mainly to make sure we’d given ourselves enough space) and I think I followed the original plan pretty closely. The great thing about going the IKEA route is all the interior fittings. Really, I feel very sophisticated now.

…or maybe not. Yes Mom, the smiley face spoon gets used all the time. Tonight, it made polenta.

Something else I love about the IKEA drawers is that they’re deep. (Even though they’re more expensive, we did all drawers except the sink cabinet. Drawers are just way more functional. Period.) In an effort to avoid countertop clutter, I decided to stow the food processor, toaster and other infrequently used items in the drawers. With full extension drawer glides, it’s easy to pull things in and out and the wider drawers come with extra beefy drawer glides.

Lid organization – just one of the many new luxuries in our lives.

Originally, we were going to dedicate several of the island drawers for food storage (an idea we called the island pantry), but with the awesomeness that is our big pull-out pantry we didn’t really need more space. Except for this one – the all important snack drawer (the white bins are IKEA too).

Lazy Susan! (Where did that name come from anyway?) This is the space where we stash our pots and pans, strainers and mixing bowls. I love it. After years of apartment dwelling, this is another indulgence. On another semi-related tangent, the one thing that we just weren’t thrilled with was the vertical gap between banks of drawers. Even though there is adjustability built-in to the hardware, there’s just no way to avoid a small gap and using white cabinet boxes with a darker front only makes the issue more obvious. Our solution – a strip of black electrical tape on the cabinet box face so it now reads as a black reveal. Architectural detailing at its best.

Finally, la pièce de résistance – the IKEA pull-out pantry! For old houses or small spaces, this is a must-have. IKEA has a few different options, but on this particular model, the top and bottom drawers are permanently attached to the door front and the intermediate 3 drawers can slide in and out independently. And like everything else, it has soft closing dampeners so you only have to give it a light push before it retracts back into the closed position. In the small cabinet above, we store things like vases, the crock pot, and the ice cream maker. We also weren’t afraid to use those handy end panels. By installing one on the exposed side of the fridge, it gave the assembly a more buttoned-up look.
So there you have it – the kitchen tour, MTV Cribs style.
You forgot the bottle of Cristal for the frig. 😉
Love. everything. about. this. kitchen. It’s a little annoying, actually. Stop it with all your snazziness!
That cutlery drawer makes me weep. And the slide out pantry makes my knees give out beneath me (well, if I were standing up I’m sure that’d be true). And those drawer pulls! Flawless.
I hope by “lots of little Zerbeys” you’re referring to more puppies that are even 1/4 as cute a bailey! LOTS AND LOTS OF PUPPIES. They can live in the loft. Think about it.
I love your kitchen so much… Hoping my own kitchen remodel is not too far off. We’re going to use IKEA as well. I hope you won’t mind a few emails from me once we get to design stage. Yours is absolutely gorgeous. I love the gray and wood look. Love Love Love.
This is SO. AWESOME.
I especially love that pull-out pantry. Love.
Sweet tour. Those freezer drawers must be great at keeping everything organized. Like you said drawers are the best at that.
You mentioned that the pull out pantries are good “for older homes and small spaces.” But I’m so looking forward to having a pull out pantry someday even though we have a huge closet sized pantry now! In big pantries stuff always seems to get lost or forgotten about. We’re going to completely tear out the pantry to have more counter space and cabinets.
Hi! I found you through YoungHouseLove, and as soon I saw your blog I fell in love! Your kitchen is amazing! Thanks so much for sharing all the details. I especially love the narrow tall fridge/freezer, the pull out pantry, the pot lid storage, using deep drawers to store you small appliances & the skylight you added! I really can’t wait to be able to stop renting and own our own place. If I can ever find a place to buy here in Tacoma, I just may have to hire you guys to help me re-model! 🙂
This is really amazing… We have two 1′ wide drawers in our kitchen, so I am just drooling…
As a side note, coffee is actually best kept in an air-tight container at room temperature…So there, I just freed up some more space in your freezer! 🙂
I feel your pain! We had one bank of 1′ drawers that we took out to install the dishwasher when we bought the house. In the interim, we had 3 sets of plastic drawers that sat on a shelf. Classy, I know.
Good tip on the coffee, I’d actually heard that but haven’t been able to find an air-tight container that I like. =)
Thanks Valerie!
Thanks Nat, definitely send us an e-mail if you have any questions.
HA! But the loft is going to be the one dog hair-free zone of the house! (We actually had a similar loft in our previous rental and one time we convinced a young (but heavy) Bailey to climb the ladder. Unfortunately, we did not take into consideration how we would get him back down.)
Love your kitchen! This blog post is perfectly timed as we’re just finishing our kitchen reno and we were trying to figure out how to do the toe kicks for our ikea kitchen. We’ve cranked the cabinets up as high as possible and the toe kicks that came with the kitchen are too narrow to fill the space. Thanks for all the insider tips:o)
Forgot to ask one small question, how much counter top overhang do you have over the back of your kitchen island(where the high gloss ikea panel is)?
Love all of your drawer organizers… can you believe I’ve never bought anything Ikea? You may have convinced me. Also, nice router jig!
I laughed when I saw the smiley face spoon. : ) Mine is also often used.
Hey Heather, are you talking about the side where we have the barstools? If so…that’s about 12″-13″. The overhang on the other 3 sides is only about 1/2″ or so.
That’s crazy! Proximity to an IKEA was definitely a requirement when we were trying to figure out where to move post-college.
Great Post. Love your kitchen so much. I noticed that in your resource section, you use Ben. Moore Super White as your Kitchen & living. may I ask what finish you use? Flast? Eggshell? Semi-gloss.
Thanks