Aww, Labor Day weekend. Three days of camping in the San Juan islands, cooking over an open fire, playing fetch with your favorite golden retriever on the beach…
Well, It would have been great.
Early last week we decided to cancel our weekend travel plans and instead power through on the foundation work. In other words, we labored.
This remodel has certainly had its high points, but sometimes it is simply about putting on your homeowner pants (or jorts) and getting.work.done.
Did anyone else spend their weekend in the sweat equity department? To help ease the pain, we treated ourselves to a bottle of wine and dinner at Cuoco on Sunday night. So good. SO GOOD.
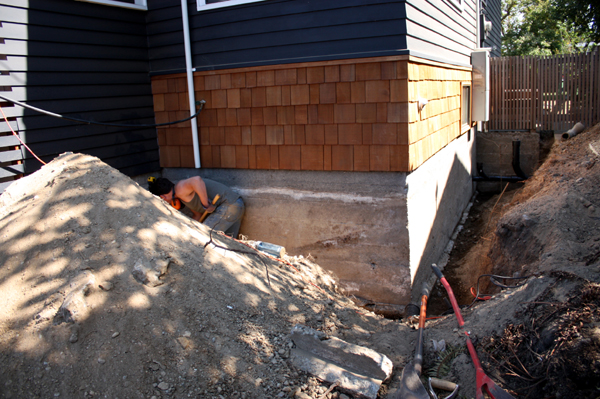
Anywho. Hey look, it’s our foundation wall again! That nubbly bit of concrete at the bottom of the wall is our footing and trust me, it was no small feat to get there. True story – after two weekends of Bobcat-assisted digging, we still spent almost a full day hand-digging to expose the footing.
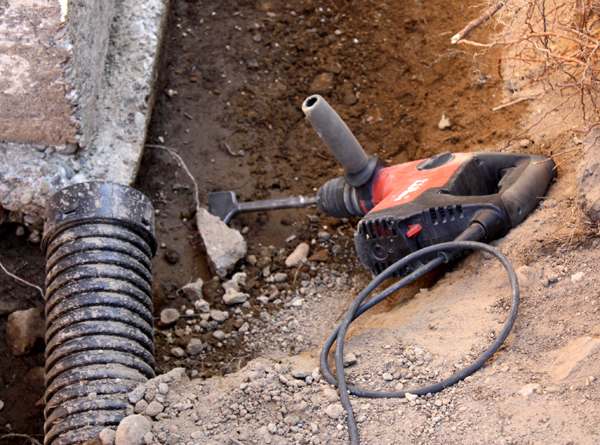
In addition to a pickaxe, we also used our hammer drill with a spade bit to break up the hardpan soil around the footing. Kyle tackled the south end and then I took over for the north end. The Advil bottle was emptied that night.
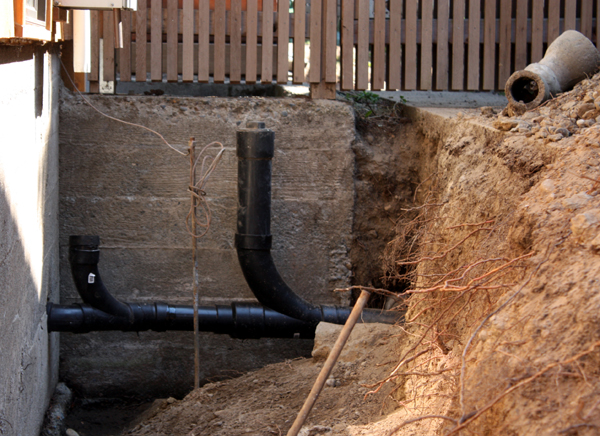
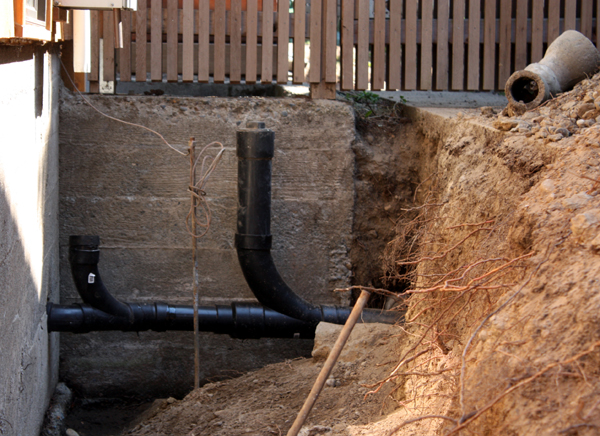
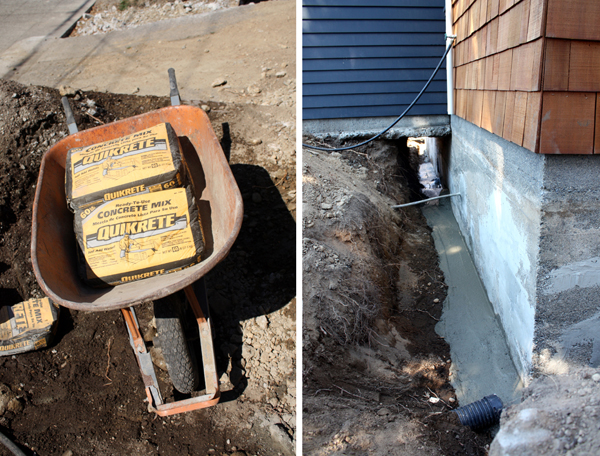
In the spirit of “while we’re at it” we also decided to redo the plumbing from the house to the main sewer/stormwater line. The pipe on the left will tie into the downspout above and the pipe on the right will remain as a clean out. The previous assembly was a janky mix of concrete pipe, rusted out cast iron and plastic. We also increased the capacity coming out from the house (in other words, a bigger pipe) so that we can maybe add a second bathroom in the basement someday. [The rod and wire in the foreground is the grounding rod for our electrical panel.]
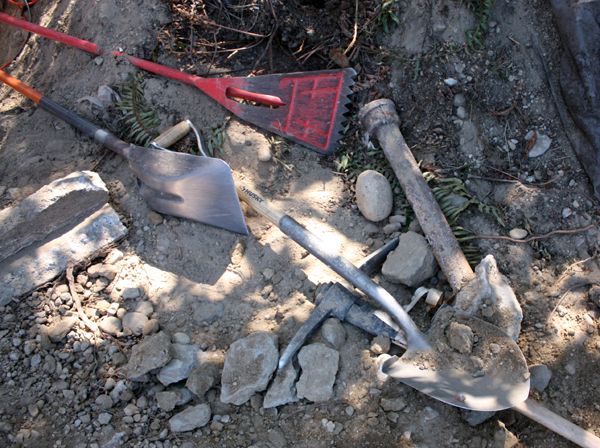
For the hand-digging we found that a variety of shovels worked best. We even tried our shingle-removing tool (the red rake-like shovel) to loosen the soil along the concrete wall.
And just like the early settlers of Seattle, we used the ol’ garden hose to sluice some areas into submission.
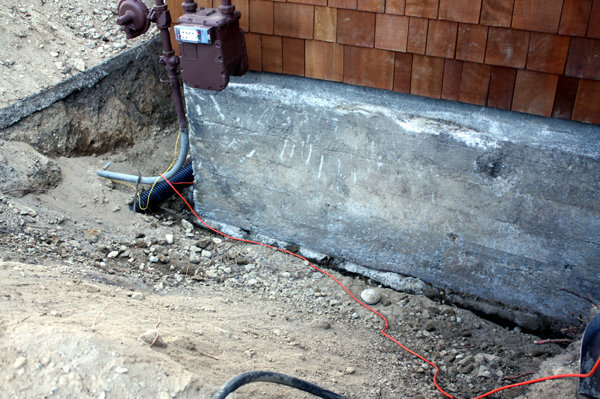
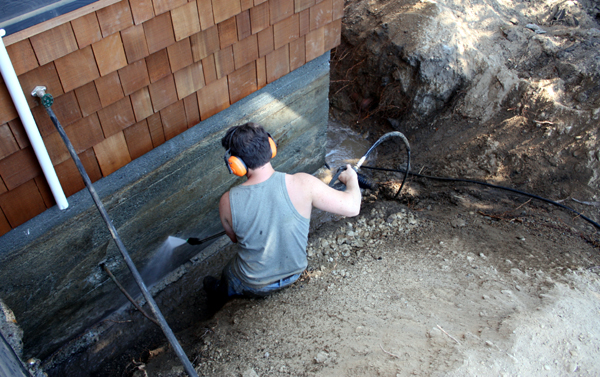
Once we were finally, finally done digging, we rented a pressure washer to clean the concrete for waterproofing.
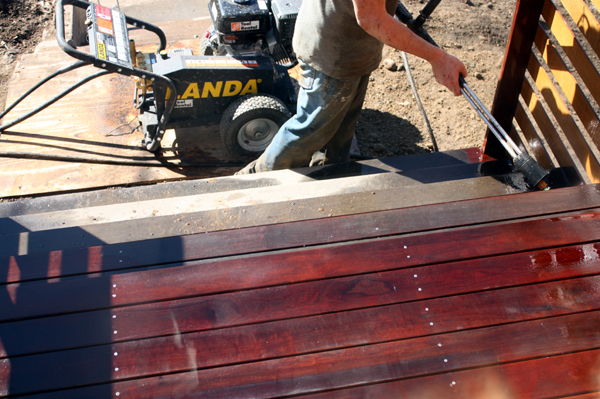
Since we had the washer for 4 hours and the concrete portion didn’t take too long, we cleaned up the front stoop too. It was shocking how much gunk was stripped away! [It’s been two years since we put a coat of Penofin on the wood and it’s due for another, but the pressure washing alone was a vast improvement.] Oh and hey – Kyle also washed the gates, the sides of the house, the new back deck and the patio furniture! It was a scramble at the end, but we loaded it back in the car and I backed right up to the tool rental door with 1 minute to spare. After doing this remodel thing for 5 years now, we’re nothing if not Home Depot savvy.
Did I mention that we also had to tunnel under our porch foundation? You can see that the footing at the porch is much shallower than the main house, so in order to provide continuous protection from water we dug out an 18″ wide canyon to access that portion of the basement wall. The goal of course was to dig out enough soil without compromising our porch’s foundation so we called up one of our friends who is a structural engineer to get the green light on our approach. I have to give Kyle credit on this one, he dug most of the tunnel himself and entirely by hand. If I ever need to dig myself out of prison, I hope Kyle is my cellmate.
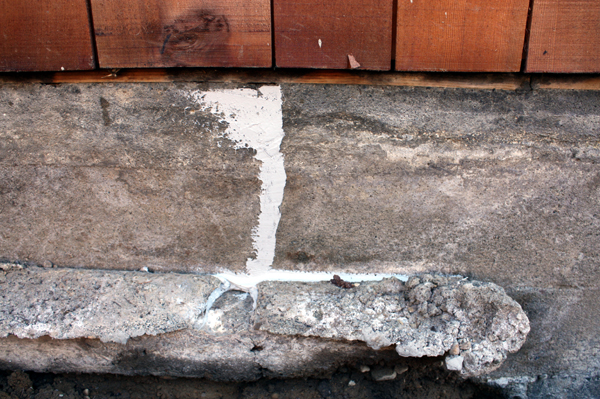
Concrete mix? Concrete mix! Standard practice is to put the drain right next to the footing, but with our hardpan-apalooza and some questionable 1910 details, we decided to instead fill the small trench with concrete. There were also a series of holes where the footing meets the concrete wall which were likely leftover from the original formwork. At any rate, we were concerned that water would find its way through the holes and up through the basement slab (which is above the top of the footing). So just to be sure, we plugged it all. This step was not part of the original plan, but it’s better to be safe than sorry, right? The new concrete will also make it easier to install the waterproofing and drains since we won’t have to work around the old wonky footings.
Even though our foundation is over 100 years-old, it is actually in fairly good shape. For the few minor cracks, Kyle used an elastomeric polyurethane expansion joint caulk to keep unwanted water out.
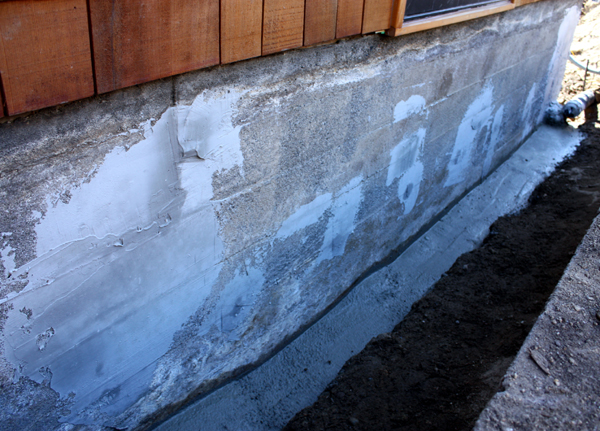
For smaller holes or other imperfections, Kyle applied a cement skim coat(which he later grinded smooth).
To summarize the weekend: BELTS + SUSPENDERS.
This week is all about the liquid applied elastomeric waterproofing, gutter drain pipes, foundation drainage mat, footing drains, and then finally backfilling. For real. It’s go time.
best. written. post. yet. you must be on a role. i was in the sweat equity shack last weekend as well… just not quite as deep.
I think I slept a lot last weekend. So I took care of that for you. If I was still there I woulda brought some cookies & lemonade 🙂
You guys are just amazing, no half measures at all, when you guys do something you do it properly. Well done, and you continue to inspire the rest of us home renovators/ procrastinators LOL! 😉
Wow! I can’t believe what you guys get up to. Seriously agreed with Sammi, when you do something, you do it properly to the tee! Excellent work on a job well done once again!
In our area, they are deliberately trying to decouple stormwater run-off from the sewer system. Are they not doing that in your region?
I’m surprised that you are connecting your down spouts into the sewer system! Here in Canada, it’s not allowed anymore as the water becomes chemically treated and thus less environmentally friendly. Soak away pits, rain barrels, or even overland flow is preferred.
Oh, my back hurts just reading this! Great job. 🙂
Looks like a very thorough job and well done. Nasty work and then you cover it all back up, but you’ll be gald you did it. At least you didn’t uncover any huge 100 year old surprises!
Hi Eric,
Our downspouts were originally tied into our sewer with concrete and clay pipe but the pipe had clogged and hence not draining. We’ve heard arguements on both sides. It still happens here in Seattle. It’s also common to see people daylight their downspouts into the street where it goes into the sewer from the street. We installed filters in our gutters to cut down on debris getting into the sewer line and clogging it. Originally we were going to run the downspouts to dry wells in our yard but after digging and finding less than well draining soil we deciding to just keep them tied into the sewer. We struggled with this decision for awhile. One of the major issues with connecting downspouts to sewer is that in heavy volume rains the sewers can be come overloaded. Our rational is that we don’t have a very large house/roof and we’re pretty sure if we went with splash blocks we could still wind up with water in our basement. I think in general the city would prefer for people to dissconect their downspouts from the sewer, we just didn’t have a good place to run the water too.
Hi, Kim, please see my response above to Eric. I think you guys share the same concerns. Thanks for the tip. It does make sense. The problem on our particular yard is that during the winter rains our soil never gets a chance to dry out so the soak away pits just become quickly overloaded. I just did think of a new idea in which you do the soak away pits but then have a pipe at the top of the pit so if the pit becomes overloaded any overflow could then go to the sewer. This way you wouldn’t put any water into the sewer unless it was absolutely needed. I’m not sure if this method actually exists though. Thanks for the discourse.
I know I’ve been thinking the same thing. It’s a bunch of work then you just pile dirt on it 🙂 the real test will be this winter when the rains come. follow up post on this one for sure.
Here’s it a city policy to decouple downspouts from the waste sewers. In addition to the reasons you mentioned, another is that it simply adds water that needs to be processed by the sewage treatment plant for no reason. Before entering the sewers, the rain water is “clean”. It becomes dirty by mixing it with the actual sewage, and then needs to be cleaned. In other words, there’s no problem with tying into the storm drains, but there is a problem with tying into the waste sewers.
However, it sounds like you are not mandated to do so and that you have no good options to do so.
Correct, not mandated here but definitely encouraged if your topography and soil support on site dispersion.
so impressed with your work and inspired (rent now but dream of a home someday).
[…] First he applied a thin coat to the cold joint between the existing foundation wall and new concrete footing “enhancement” that we poured last weekend. […]
that would be like a mini swm (storm water management) pond idea. interesting thought will have to look into it.