When Avery started crawling, we bought a baby gate for the top of the basement stairs. At the time, I was looking for the least ugly option that would fit the opening. We realized later that not only are compression gates not the best option for top of stairs, but our stair width (36″) was at the upper limit of the gate’s adjustability. This meant there was a large amount of exposed all-thread, enough to make us nervous.
So, when I was at a friend’s house a few months ago I noticed they had a nice plywood custom gate. Fortunately for us, they also had an extra one. Perfect, I thought, we can get a custom gate without spending a crazy amount of time making one!
Of course, nothing is ever that easy.
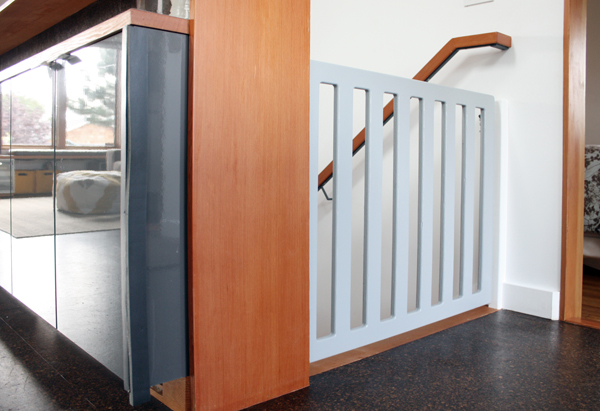
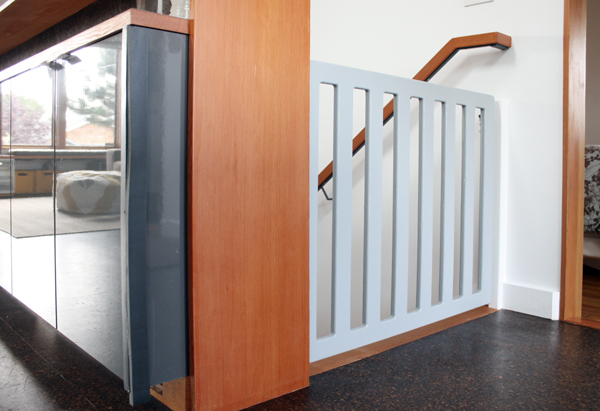
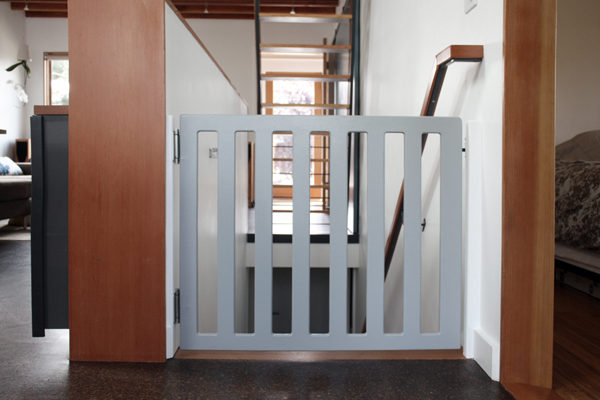
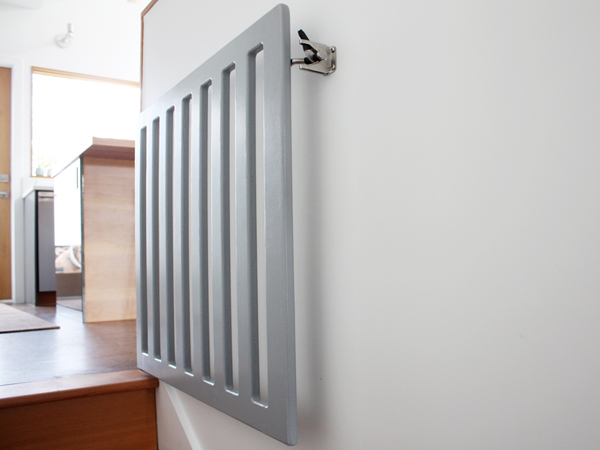
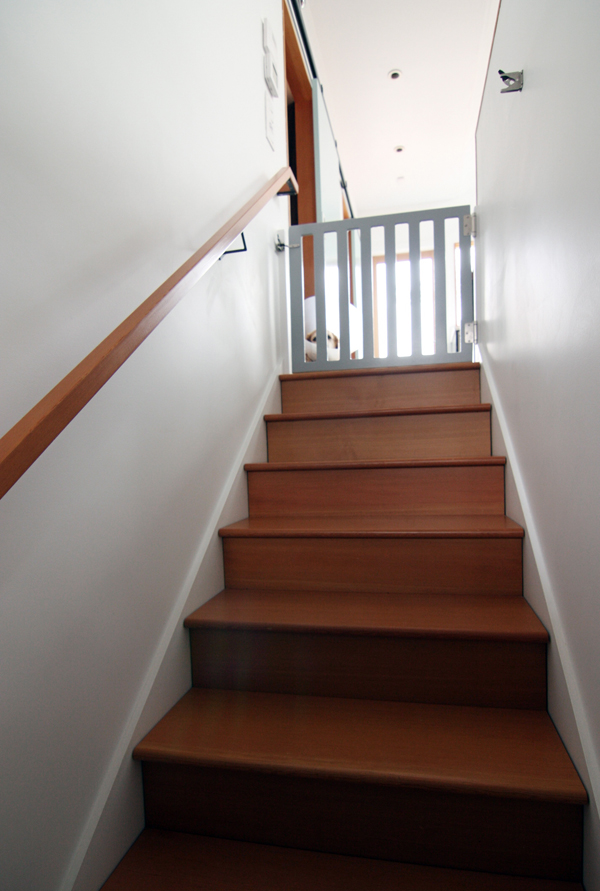
First of all, the gate we came home with was really just a piece of routered plywood. It was also a smidge too wide for our opening, so Kyle had to trim it down (which also meant re-rounding the corners). Then, Kyle installed 2×2 trim on both ends (screwed into the wall framing and painted white) to mount the hinges and latch to.
The plywood had some blemishes and imperfections so we decided to paint it. Originally I voted for white and Kyle the dark gray of our interior steel, but ultimately we landed somewhere in between. (We were concerned that the white would show too much dirt and handprints but that the dark gray would become too much of a focal point.) The color is “Del Ray Gray” (Benjamin Moore). I like it enough. It looked slightly lavender at first but I think we’ve gotten used to it (or over it? Kyle says he’s still not a fan). At any rate, we’re not repainting now.
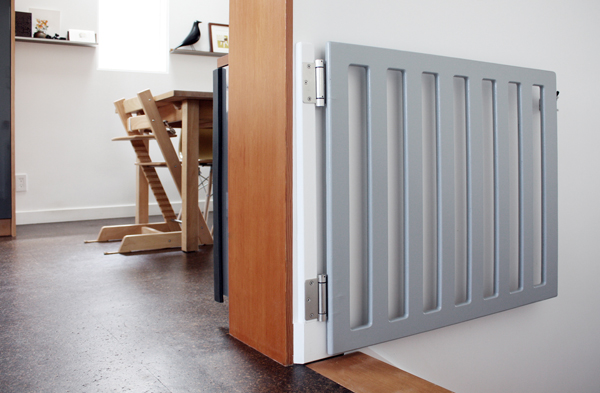
The hinges are stainless steel and self-closing, so we don’t have to worry about manually closing it each time.
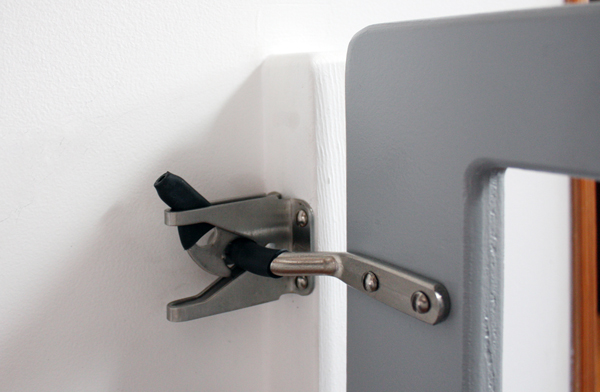
On the latch side, we used a simple stainless steel gate latch. (We realize there may come a point when she can unlatch it herself and we’ll modify if needed.) The only downside to this latch was that with the self-closing hinges it was pretty noisy as the gate swung back into place. So, latch hack! Kyle had the clever idea to install heat-shrink rubber tubing (commonly used for electrical work) to dampen the noise.
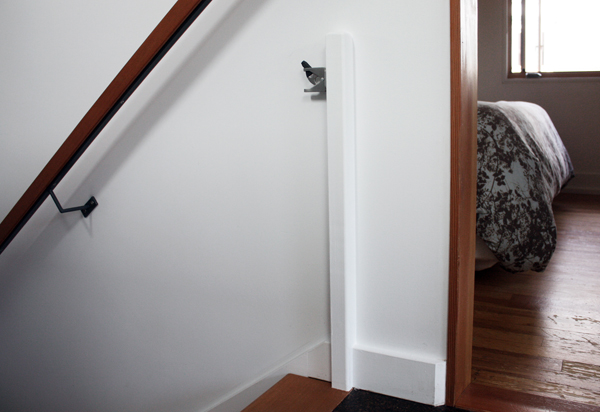
The vertical trim on the latch side also provides enough of an offset for the gate swing to clear the handrail.
During the initial installation, we debated adding another latch on the opposite wall in the event that we wanted to keep the gate open. We didn’t love the idea of our pristine white stair wall having a latch wart on it (or the possibility that someone might accidentally leave it open) so we decided to wait.
But, after a summer of having someone sleeping in the guest room almost every weekend, we realized it was nice to have the option of leaving it open (and since it only happened while Avery was asleep, it wasn’t a safety concern). So we added the other latch.
Yeah, it’s kinda dumb looking, but we’re over it. The important thing is that we now have a nice-looking and safe gate that only took way too many hours to fabricate and install.
We still don’t have a great solution for baby-proofing the loft ladder. We currently don’t have any issues with Avery trying to climb it (she just likes to throw her toys down to the basement), but we know it’s something we’ll have to deal with at some point. If Kyle didn’t go up and down the ladder multiple times a day it would probably be less of a design challenge, but as it stands we need something that restricts her use but not ours. So, we’ll keep brainstorming.
Bonus! Can you spot the two photos with a cone-of-shame photobomb?
for the loft ladder, what about something like the acrylic ikea uses to keep people off the ladders on the bunk beds? but, on hinges, with a latch too high for avery to reach. not sure how to attach it, but y’all seem pretty clever at hacking things. 🙂
Wendy’s idea was similar to mine – I immediately thought store bunk bed displays.
The gate looks great, and I love the color. First thing I noticed.
For the loft ladder, I suggest something that roll (I don’t know the word in english), please find an image here :
http://media.poussette.com/media/catalog/product/cache/15/image/9df78eab33525d08d6e5fb8d27136e95/k/i/kiddyguard_avant_jhg.jpg
You don’t have it open and disturbing in the middle of the room, it rolls on one side. One brand that makes some is Kiddy Guard.
I like very much your creation, and find the color matching the wood and the white wall : perfect !
What’s wrong with Bailey???
Great looking gate! I need a gate at the top of our basement steps that somehow allows our cat through. He’ll jump over it coming up, but not going down. I’m afraid enough floor clearance to let him slither under would be enough for a baby to get hurt. Our solution with the first baby was to block off the landing at the top of the steps on both sides, but that’s very intrusive to the flow of our floor plan. Oh well, it’s really such a brief time you need them.
As for the ladder, ladders on stadium light posts have little cages around the bottom few rungs. Could Kyle make a small one out of matching metal with horizontal bars to mount on the bottom of the ladder? He could easily step over it going up and coming down, but the baby couldn’t climb it?
It’s like you read my mind…just last night I was looking up baby gates, dismayed that so many of them are functional but ugly. I think I’ll put this on Jon’s to-do list. 🙂
We’ve had this thought too – I think it might be the least obtrusive, we’d just need to figure how to attach it. I think the easiest thing would be to have it clip on somehow and then Kyle just steps over it to get up the ladder.
Thanks Jub, we considered something like that too – the only problem is that we can’t attach anything to the wall on the side where the sliding door is because the door itself is in the way when in the open position.
Oh he’s fine (these photos were actually taken a few weeks ago), he just had a hot spot on his tail so the cone was to keep him from getting at it.
Thanks Kara, hmm…the cat dilemma is a tough one! Maybe if there was enough of a ledge on the top of the gate he could jump on it and then down?
I think the step over solution is probably the direction we’ll end up with. I’m sure one or two times of us sliding down the bottom portion of the stairs will be enough to teach us to step over. 🙂
Thanks Jen, there’s also a Munchkin one that’s not too bad looking (we discovered it after we bought ours). I’ve heard the latch can get a little sticky, but it is nice looking. But yeah, seems like such a simple thing to design and build, right? 😉
Bailey is in the last two photos. One looks like a reflection on the side of a cabinet door. Poor Bailey.
That is one snazzy looking baby gate! (I was really happy when we could take ours down.)
Looks good. Ours is really similar but we bought it at Target. It’s called the Munchkin Loft Aluminum gate. I’d recommend it to other style-conscious parents that need to mount a gate on their stairs.
Yep, somehow I missed that one during my initial search. I’ve heard a few complaints about the latch sticking but still seems like a good option!
It looks great! Definitely could use a couple of these here soon. The little one is starting to crawl and she thinks the stairs are the place to be.
That’s gotta be one of the best looking gates I’ve ever seen! Almost makes me want to have a baby.
Almost.
You guys are awesome!
Hahaha, thanks Jeff!
I need to hire you to do mine when I’m ready…That’s high quality construction man!
thanks daniel 🙂
Love the baby gate! I see work starting on the Msla building!!!
Hi Janna, re: missoula building, Joe and his crew are doing some demo, construction starting soon hopefully!
What about cloth on the ladder on the bottom couple of rungs , in a similar to the acrylic panel idea, It could be a long piece of canvas type fabric, that velcros together at the top really tightly, and prevents the munchkins from climbling, but allows the adults access.
I love this! I sent it to my dad, the router-er in the family, to file away for future reference. We currently have a baby gate installed for our dogs so that they stay in the living room when we’re gone. It’s one of those expandable wood ones that is “installed” with eye hooks. It’s fine – it swings out of the way and tucks in next to our entertainment credenza thing when not in use. But long term, our plan is to have all of our bedrooms downstairs in what is now our too-short basement (to be raised ~30″ in the near? future), so a more attractive and functional solution will become necessary. I think this one adds to the charm of your kitchen. The shape + the wood + the gray + the white = sleek but warm.
But OMG gray paint. I was all about a gray kitchen with our white cabinets and butcher block counters (based on Restored Style’s Portland one), so I painted a whole coat in the same color she used (BM Rockport Gray). And it was just purple. After pulling my hair out with samples and another gallon of paint that didn’t work, I finally found Martha Stewart’s Cement Gray and it worked for what I wanted, but I hate Home Depot’s paint, but I wasn’t about to have someone try to color match it, for fear that the undertone would be off. Then I wanted to paint our bedroom a few days ago, and worked with swatches and samples and in the end decided to go with what I thought would be a known entity – BM Moonshine, which Young House Love uses in almost every single room in their house. So I went for it, and it’s a bad 80’s baby blue color in our house. It’s pretty terrible, but our bedroom will eventually become our living room and so I’m not very motivated to change it until then. Ugh. If y’all ever find grays that that work in Seattle, and specifically Ballard (mostly kidding, but I feel one can’t be too specific when it comes to gray), shout them out here please!
That could work…I would just worry about it getting dirty quickly (from us inevitably rubbing against it as we went up and down the ladder). But if it’s easy to remove (and wash) that might work. THanks for the idea!
Thanks Paige, grays are hard! (The outside of our house looks anywhere from navy to black depending on the light!) We’re probably going to repaint the bedroom a gray (similar to the nursery but probably not as dark) so we’ll be sure to write about selecting colors!
I’m in the middle of a renovation of my own, and I’ve actually been looking for a nice, simple handrail bracket just like yours… might you be able to share the product info? So many great ideas here, and the results look beautiful! Thanks for sharing!
Thanks Paul, Kyle actually fabricated the handrail brackets himself!
This is so effing clever! And a million times more stylish than any other baby gate I’ve seen!
Where did you guys get your hinges?
keep up the nicework, as usual!
Great gate! I’ve seen a ton of DIY gates & this is a perfect fit for our house! Well done!
Where can I purchase these hinges? Thank you
Hi there,
I love what you’ve done, and am adapting it ever so slightly to accommodate a cat hole at the bottom. You gate seems perfect for our needs: prevent baby and dog, but not the cats from going up and down three sets of stairs.
I’ve started cutting the plywood and have all necessary parts except the hinges, which I will have to order from home hardware here in Canada.
My question is what size exactly are the hinges? 3 inch, 4 inch? Is the radius 1/4 inch or 5/8?
How’s the whole instalation holding up?
Thanks for the great write-up and your response.
Louis
Hi,
Thanks for posting the gate photos!
Could you tell me the width and length of the openings in the gate?
We’re going to attempt our own version and those measurements would certainly help
The gate looks great! I am looking to build one similar. Mine will need to mount to a banister, so I’ll have to do a couple design changes, but I had a few questions:
1. As other people have asked, I was curious what thickness plywood you used. By the pictures it appears to be 1/2″ maybe 5/8″?
2. Again, as others have asked as well, I was curious what width the slats and gaps are? By estimating myself (based on the 36″ total width you gave) it looks roughly like you did 2.5″ gaps and 2″ slats. That only comes to 33.5″, but then you’ve got about 3 inches of fabrication on the walls I think…either way, just curious if you could share that info!
3. Also, what size are the hinges?
I greatly appreciate your post and will look for your response! All-in-all, I love the gate and proportions it has and would like to replicate it as best as possible to keep my kiddos safe as well!
Thanks,
Nick
Any idea where this plywood gate was made/purchased? Would love to create something similar. Thanks!
Hinge source?