Sure enough, after the last marathon weekend of working in the basement Kyle caught some type of flu-like funk and was out of commission for a week. But by last Monday he rallied enough to pour the concrete footings and finish prepping for our plumbing inspection.

On Friday, the inspector came out to sign off on our rough-in. Despite Bailey’s skeptical expression, we PASSED! (Phew.) Afterwards, Kyle got to work covering up all his hard work in preparation for the slab pour.

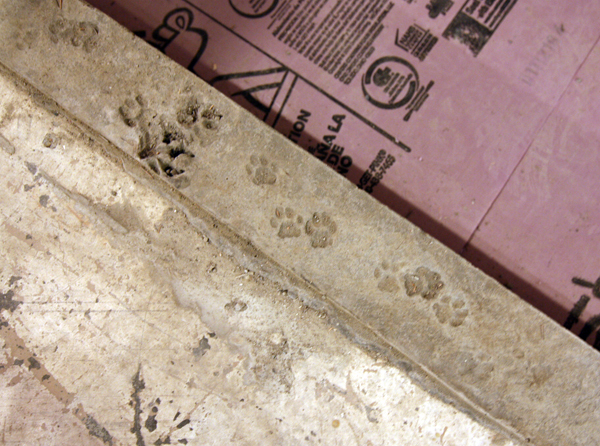
Earlier in the week, Felix performed his own preliminary inspection.

Anyone who has done their own plumbing knows how complex it can be. We’re visual people, so Kyle created this color-coordinated plumbing diagram to help figure it all out (and serve as a shopping list of sorts). All this for one modest-sized bathroom. Crazy town.

By Saturday morning, the basement was a hot mess of tools, empty boxes and misc. items that needed to be moved to the crawl space. So we took an hour or two to organize and reassess. Bailey and Felix supervised.

Laundry center turned work station…

…and stair wall turned temporary tool storage. It felt good to get organized and did wonders for our motivation.

Ahh, much better. Along with the new concrete slab for the bathroom, we’ll also be pouring a thin slab over the future media/guest room floor to create a level surface. (Nothing says “basement” like a sloped floor right?)

After cleaning the space out, the next step was to install sill plates and rigid insulation to the concrete walls.
But first, a Saturday evening trip to Home Depot to pick up supplies.

1 cart, 2 carts, 3 carts, 4! I hereby give Kyle the award for home improvement store endurance (he single-handedly loaded everything onto the carts and then into Orange Crush, our old work truck). For large trips like this, we typically order supplies from our favorite local lumber store, but Kyle was motivated enough to start framing on Sunday so our options were limited.

Our poor truck…oh hey, our new Japanese Maple!

In addition to the wall insulation and framing lumber, Kyle also picked up the DRIcore, an interlocking subfloor with a dimpled plastic on the underside to protect against any moisture that might come up through the slab. (We are definitely taking a “belts and suspenders” approach to the basement because the last thing we want are any moisture-related issues that can be so common to these types of spaces.)

Before we add 2x furring over the concrete foundation walls, Kyle installed 1 1/2″ rigid insulation. This serves as a thermal break between the concrete wall and wood wall and has a higher r-value per inch than batt insulation. (In the end, we’ll have a combination of R-7.5 from the rigid plus R-13 from the batts, equaling a code-compliant R-21 for basement walls.) The insulation (which was installed with a special adhesive) is going in now so Kyle can pour the new slab up against it.

At the juncture between the media/guest room and the “hallway” at the bottom of the stairs, Kyle installed a couple of stacked pressure-treated 2×6’s as a curb for the concrete and sill plate for the new wall. Even though our existing slab slopes about 6″ from one end to the other, creating one level slab throughout would have significantly reduced our ceiling height. So we decided a better strategy would be to create different floor levels for each zone – the three zones being the guest room, hallway and bathroom. (For the rest of the basement we’ll keep the floors as they are.) There will be a slight step between zones, but nothing that will be annoying or a potential tripping hazard.


Kyle knocked out most of this work on Sunday, while I was upstairs hosting a bridal shower brunch that had been planned for a few months. The muffled sounds of drilling or the compressor firing was somewhat comical, but no one seemed to mind. Bonus – there’s nothing like leftover croissants and mini cupcakes for a little construction break snack.
So, next step – concrete pour! For this one we pre-ordered a fresh batch of concrete for Saturday morning….because what other way would we start a 3-day holiday weekend?
I’m so excited, it’s looking good. I keep showing my hubby Sean what your doing and I get comments like, “hey he’s got his own welding set up. Guess who went and bought a welding set up off Trademe (like a Kiwi ebay) and I love being up when the U.S. is asleep, it gets me here first, what fun. I have friends that live in Wallingford, I think you must be not too far from there? I love Seattle, one day i’ll get back there.
You two DO know how to have fun, for sure!!! (I’m kinda jealous of all the fab things you accomplish!) BTW I love how Bailey is ever present, and of course, the kitty 😉
Happy Memorial Day…
Love reading this! We just finished pouring our own basement floor and are getting ready for framing. So great to see what you guys are doing. Love the paw prints.
You two are either insane, or sheer genii, that amount of work you are doing is mind blowing. I love the blog and am always excited when you have a new post. I love Kyle’s attention to detail and the way he thinks the projects through. My sister in law & family live in Wallingford, and I must admit if I ever see the Orange crush loaded down with lumber, I will be tempted to follow you home and introduce myself. Keep up the good work and try to stay on the sane side of the line.
Looks good. Why not insulate with the rigid foam from floor to ceiling? Also, curious about your decision to use the tiles on the floor. What about:
http://www.cosella-dorken.com/bvf-ca-en/products/foundation_residential/floor/index.php
or other alternatives? Keep up the blog.
haha, actually bailey and I are having some fun today. we’re doing a dog costume charity event, he is dressed up as deputy dog with his red bandana, lil cowboy hat, and even a holster for his six shooter, photos to come;)
hey JME, well we’re actually going to do a continuous shelf around the basement right above where the rigid insulation stops, which also happens to be right about where grade is outside. The plywood walls above that you see were already insulated when we did the seismic retrofit. I did price out the dimple mat sheets but it wasn’t that much cheaper and I think this install will go a lot easier. Time is money at this point;) thanks for the support.
thanks kirk;)
Haha, watch out – tool buying is a slippery slope! =) Yup, Wallingford isn’t too far from our ‘hood.
Oh yes my man has a shed and its full…
You guys make me feel so laaaaaazy
Haha, we definitely go through fits and starts with the remodel. The beginning of the year was much lazier. =)
I am constantly in awe of what you do! Can’t wait to see it all come together: )
Thanks for sharing this. My partner and I recently started to address some problems in our basement with our foundation wall wicking water into the space. I believe your house now has a water barrier on the outside of the foundation. If addressing the water issue on foundation walls wasn’t possible on the outside, do you know what is recommended as best practice for water that comes in through foundation walls because hydrostatic pressure forcing water into the concrete?
Looking forward to seeing the finished result. Thanks again.
Hi Brian, sometimes you can apply a waterproofing membrane to the inside face of the foundation wall (usually it’s a paint-on type product). Another strategy is to do an interior footing drain…this involves cutting out part of the slab but might be better than messing with the outside. It really depends on your circumstance, but in general the “quick fix” options aren’t as guaranteed. (However, if you just want to keep water out but don’t plan on finishing out the basement, the waterproofing option might be just fine since you can keep an eye on how well it works.)