I really hope this is our last post about concrete.
Yeah, I suppose there’s the initial thrill of the pour (or “placement” if you want to be all technically correct) – working against the clock, crossing your fingers that everything goes according to your carefully laid plan. But really, it’s just a lot of work and it’s messy.
So let’s begin.

We stayed up late on Friday night doing final preparations for our Saturday morning pour. Because we couldn’t waterproof under our existing slab, we opted to put down a plastic vapor barrier between the old and new concrete. Kyle also ran a string line around the perimeter to use as a guide for how far we should pour.

Next, Kyle installed the rebar and welded wire mesh for the bathroom slab, with a series of 2×6 planks to walk across during the pour. (The new concrete in the bedroom was just to level things out and didn’t require reinforcement.) He also made a frame out of pressure-treated lumber to box out around the future bathtub so we’d have some wiggle room with the actual drain installation.
Our friends Chris and Julie offered to help out on Saturday and were at our house at 8:30 a.m. to make the trip to the rental place where we’d be procuring our “mud”. About 30 minutes later, Kyle called to tell me that the rental place had lost power temporarily and thus there was no concrete. So he came home and we waited…for about five hours.
Fortunately for us, Chris was also working on his house that day and was able to shuffle his schedule and come back to help in the afternoon. By 2:00 or so, all systems were a-go.

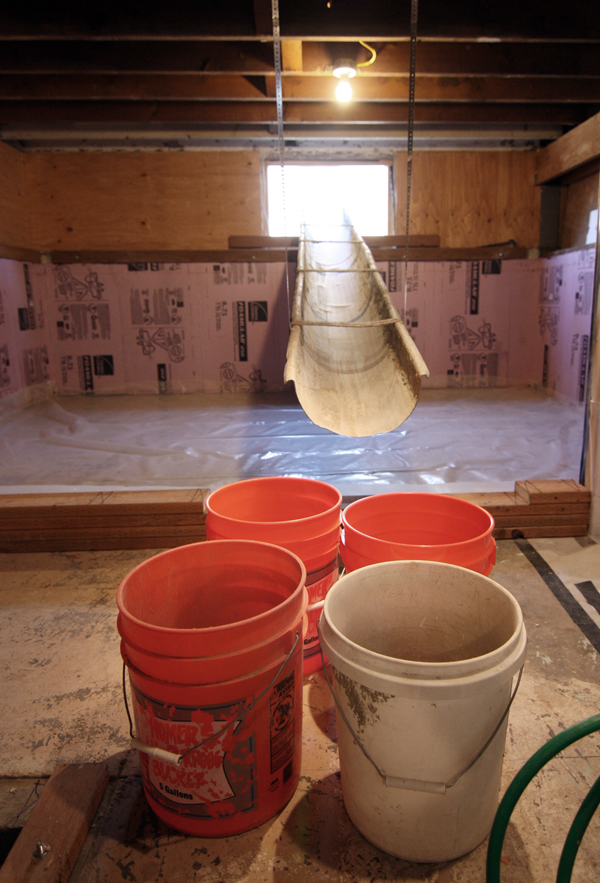
We rented a metal concrete chute that went from the concrete mixer in the driveway, through the window and down into the basement. We hung the low end with a loop of plumber’s strapping fastened to the joists.

The initial idea was to fill 5-gallon buckets and then transfer them to the two slabs…

In the end though, we reconfigured the chute so it dumped straight into the bedroom slab area and then later repositioned it for the bathroom pour.

We started out with a 3/4 yard of concrete that came pre-mixed in this cute little trailer. There’s a small door at the back that opens up and allows concrete to pass through with a little human guidance from our friend. Once the wet concrete arrived there was no time (or clean enough hands) for photographing, so you’ll just have to pretend. The mix didn’t flow quite how we hoped, so we came up with a method where Chris would push it down about 1/3 of the way with a trenching shovel and then Kyle and I would pull the remainder down the chute before spreading it across the space.

The boys were way too dirty to take photos, but I did manage to snap this one with my iPhone during a quick break (31 weeks!). There was no way I was fitting into my normal paint-splattered work jeans, so out came the ol’ track pants tucked into black rubber boots. Stylish!

After the trailer was empty, Chris and Kyle got to work spreading and leveling out the wet mix and I was able to peel off my gloves and take some action shots.

Wet concrete has to be worked into place and we found that metal rakes were the most effective.

When the concrete was fairly level and even, the boys troweled the mud for a smooth surface. To better distribute their weight and keep from sinking in, they knelt on pieces of leftover rigid foam as they worked their way across the space.


We picked up another 3/8 yard for the bathroom slab and repeated the same process, only this time we relied more on filling and dumping buckets since the chute wasn’t long enough to reach across the basement (no heavy lifting for me, I filled the buckets and Kyle dumped them).


We had a little bit of concrete leftover, so we filled in the area around the sewage ejector pump (the cardboard tube you see below acts as a form that is later removed after the concrete cures).

Done! (This photo was taken Saturday afternoon and by that evening it was cured enough to walk on.)

As Kyle and Chris finished up and returned the equipment, I rinsed all of the tools, buckets, boots and gloves before the concrete had a chance to harden.

So what started out as a morning project turned into an all-day affair but we’re just relieved to be done (and incredibly grateful to have had some help!). Kyle did some framing and picked up more supplies yesterday, but today has been largely unproductive. And we’re ok with that. Next weekend.

Lauren Zerbey is a Seattle-based architect and principal at Studio Zerbey, specializing in custom homes and residential remodels. With over 20 years of experience in the Pacific Northwest, she writes about the relationship between thoughtful design, creative problem solving, and the livability of the homes we love.
Seriously, it just astonishes me what you guys will take on. (And pregnant, to boot.) If I had to do something that involved a giant chute and cement, it would be like an I Love Lucy episode.
I love that you’re maximizing every square inch of that house. I can’t wait to see how it looks finished!
Amazing!! I can’t remember if you’ve said what you’re going to do for floor finishes, but we used Soycrete in our basement, and love it. I even did the staining myself at 7 months pregnant.
Thanks Sara, we plan on doing carpet tiles over the DRIcore subfloor…just to make it a bit warmer down there. (I do love stained concrete though!)
Haha, it very well may have looked like that with us too. =)
what an amazing feat! that is pretty incredible. and all this excitement while prego! impressed.
So impressive what you are capable of doing. I’m curious if you considered putting radiant heat into the concrete, either electric or water, and why you decided against it?
Hi Christa, We will be putting electic radiant heat cable in the bathroomsince we dug down to insulate that slab. It will go underneath the tile which only takes up about 1/8″. We decided against radiant heat in the bedroom because the slab is no insulated and therefore would have been much less efficent if we were to put radiant in that slab.
WOW, this is such a crazy project. Kuddos to you guys!!
Thanks so much for your generosity and detail with your blog. I absolutely love reading it. I’ve done a little work with self-leveling underlayment for setting tile on, but nothing of this scope. I’m curious what the leveling and troweling was like, and how you figured out the what the set up time would look like. I’ve always felt a little intimidated by that process.
Hey Miachael, with actual concrete (vs. self-leveling compound) you have more time before it starts to set so that wasn’t an issue for our relatively small areas. I think in general the key is to have as much prepped and ready to go beforehand as possible. It also helps to have a few people on hand so that you can delegate tasks if needed. (For instance, concrete is going to dry and harden on tools a lot faster so you need someone to rinse stuff off regularly.)
Looks so great! I can’t believe you did all that yourselves. Really looking forward to seeing it progress — thanks for sharing so many details.