[A quick note to say thank you all for your support and votes in the Small Cool contest. Even though we didn’t win the big prize, we’re glad Daniel did and can’t wait to see what kind of awesomeness he creates with all that moolah.]
Ok, the basement. It’s been a while since we’ve given you an update but that’s not to say there hasn’t been some major progress. Get comfy, because we’re about to dive in.
Back in early April we talked about getting a new washer and dryer to help with Kyle’s allergies and the upcoming onslaught of baby laundry…
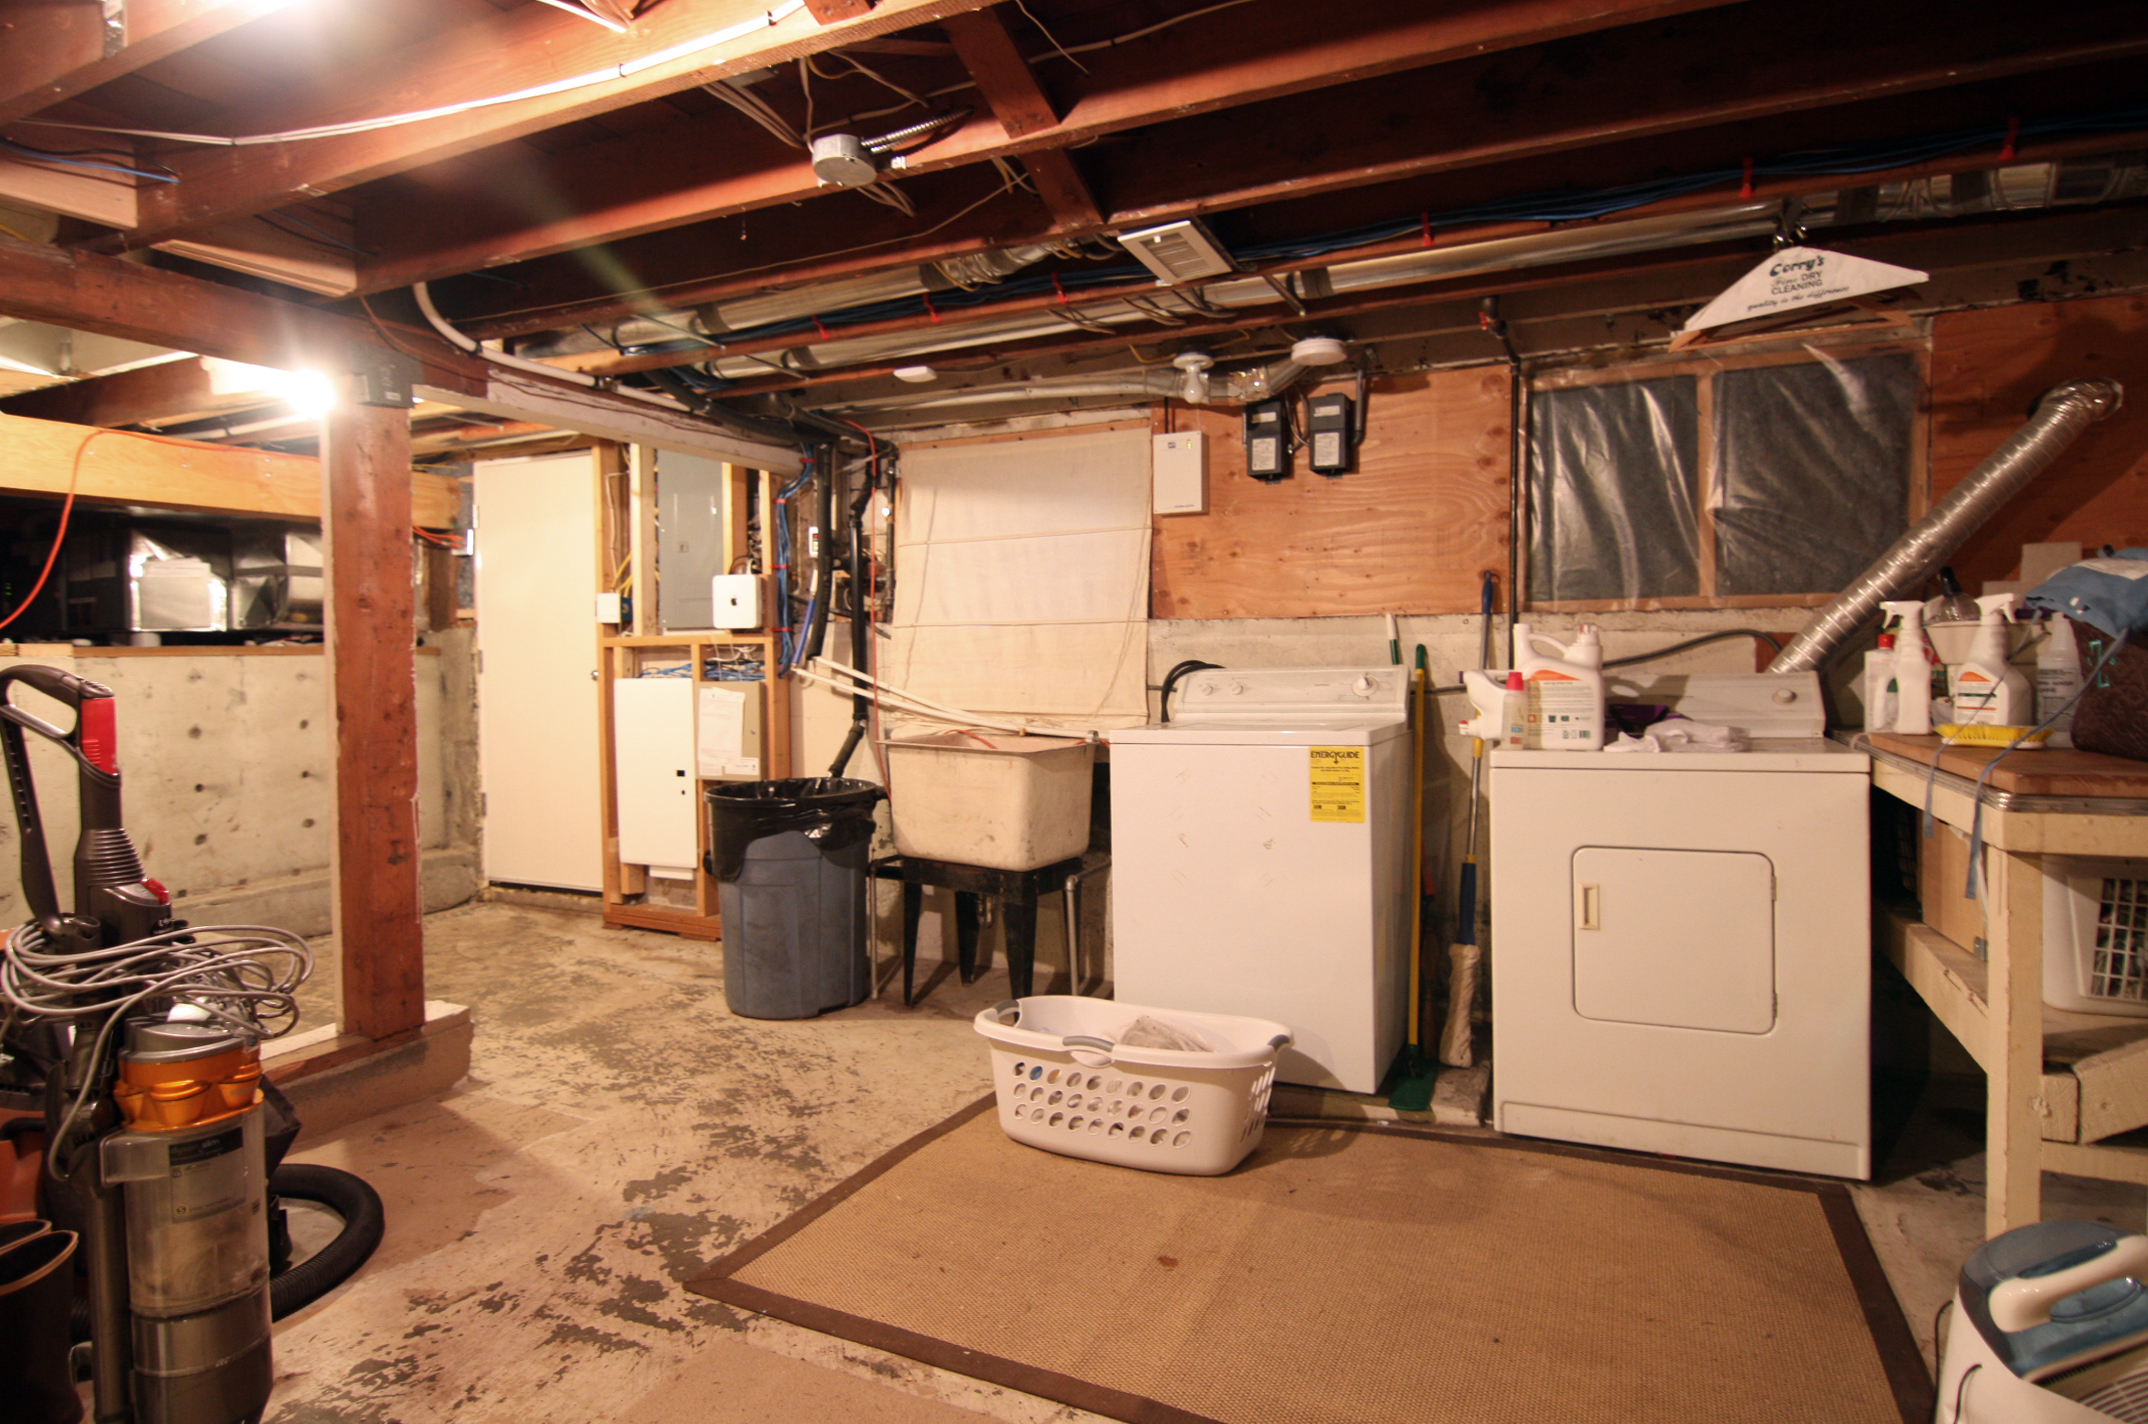
…and while I was out of town the following weekend, Kyle did just that.
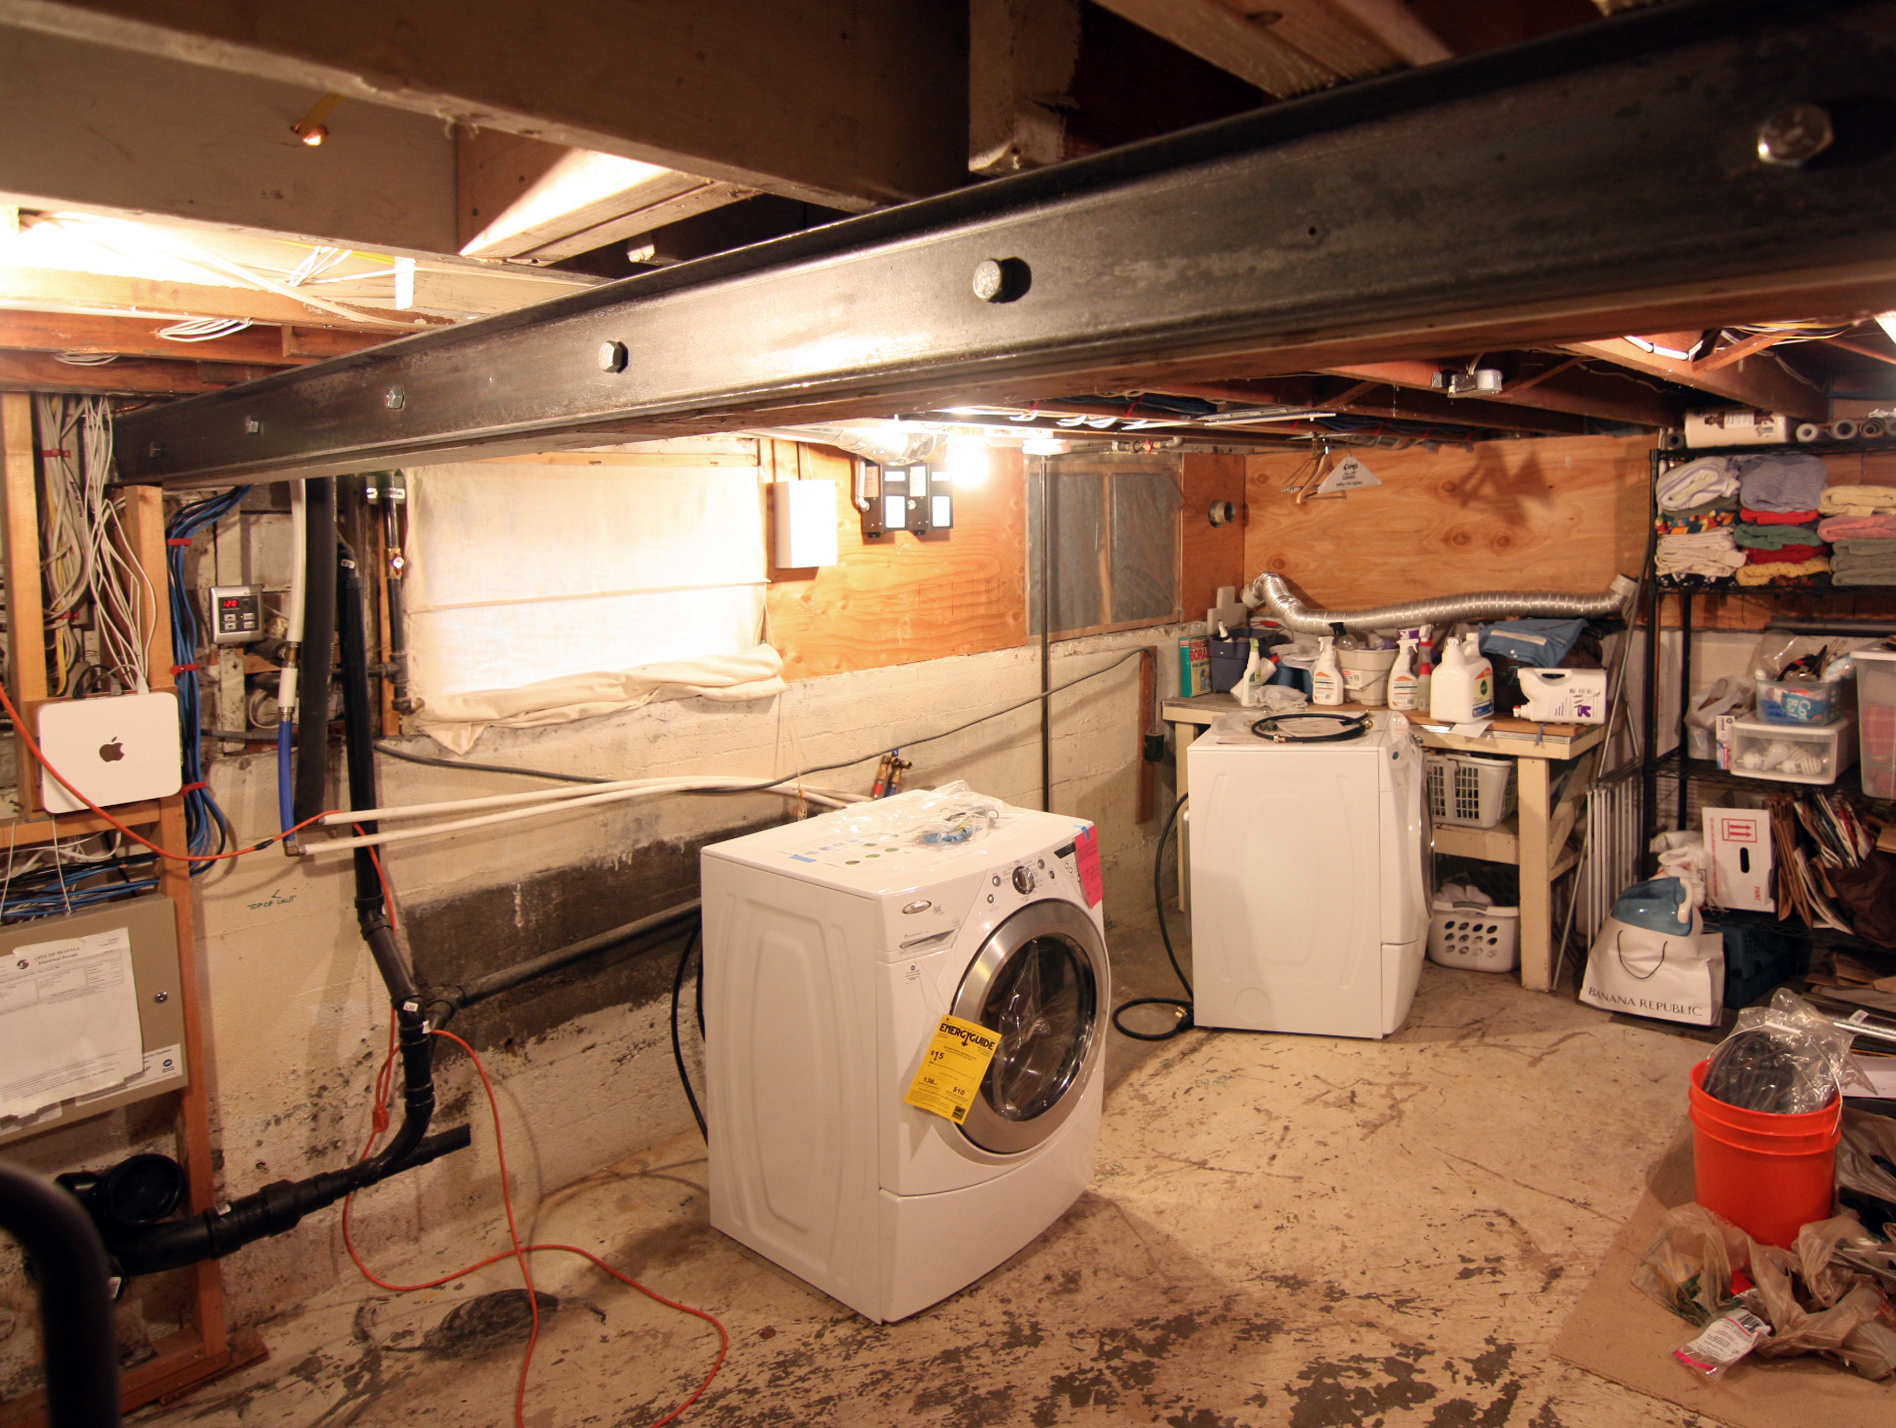
But as that post alluded to, buying the washer and dryer was the easy part – actually installing them involved new plumbing, electrical, framing and for good measure – concrete. (Because what’s a project without a little concrete pour?) To jog your memory, we last left off with the installation of that steel channel (that you see in the photo above) and the removal of a pesky interior column that was getting in the way of a more efficient use of the space.
Column gone, concrete curb still there. How was that for a blog post cliffhanger?
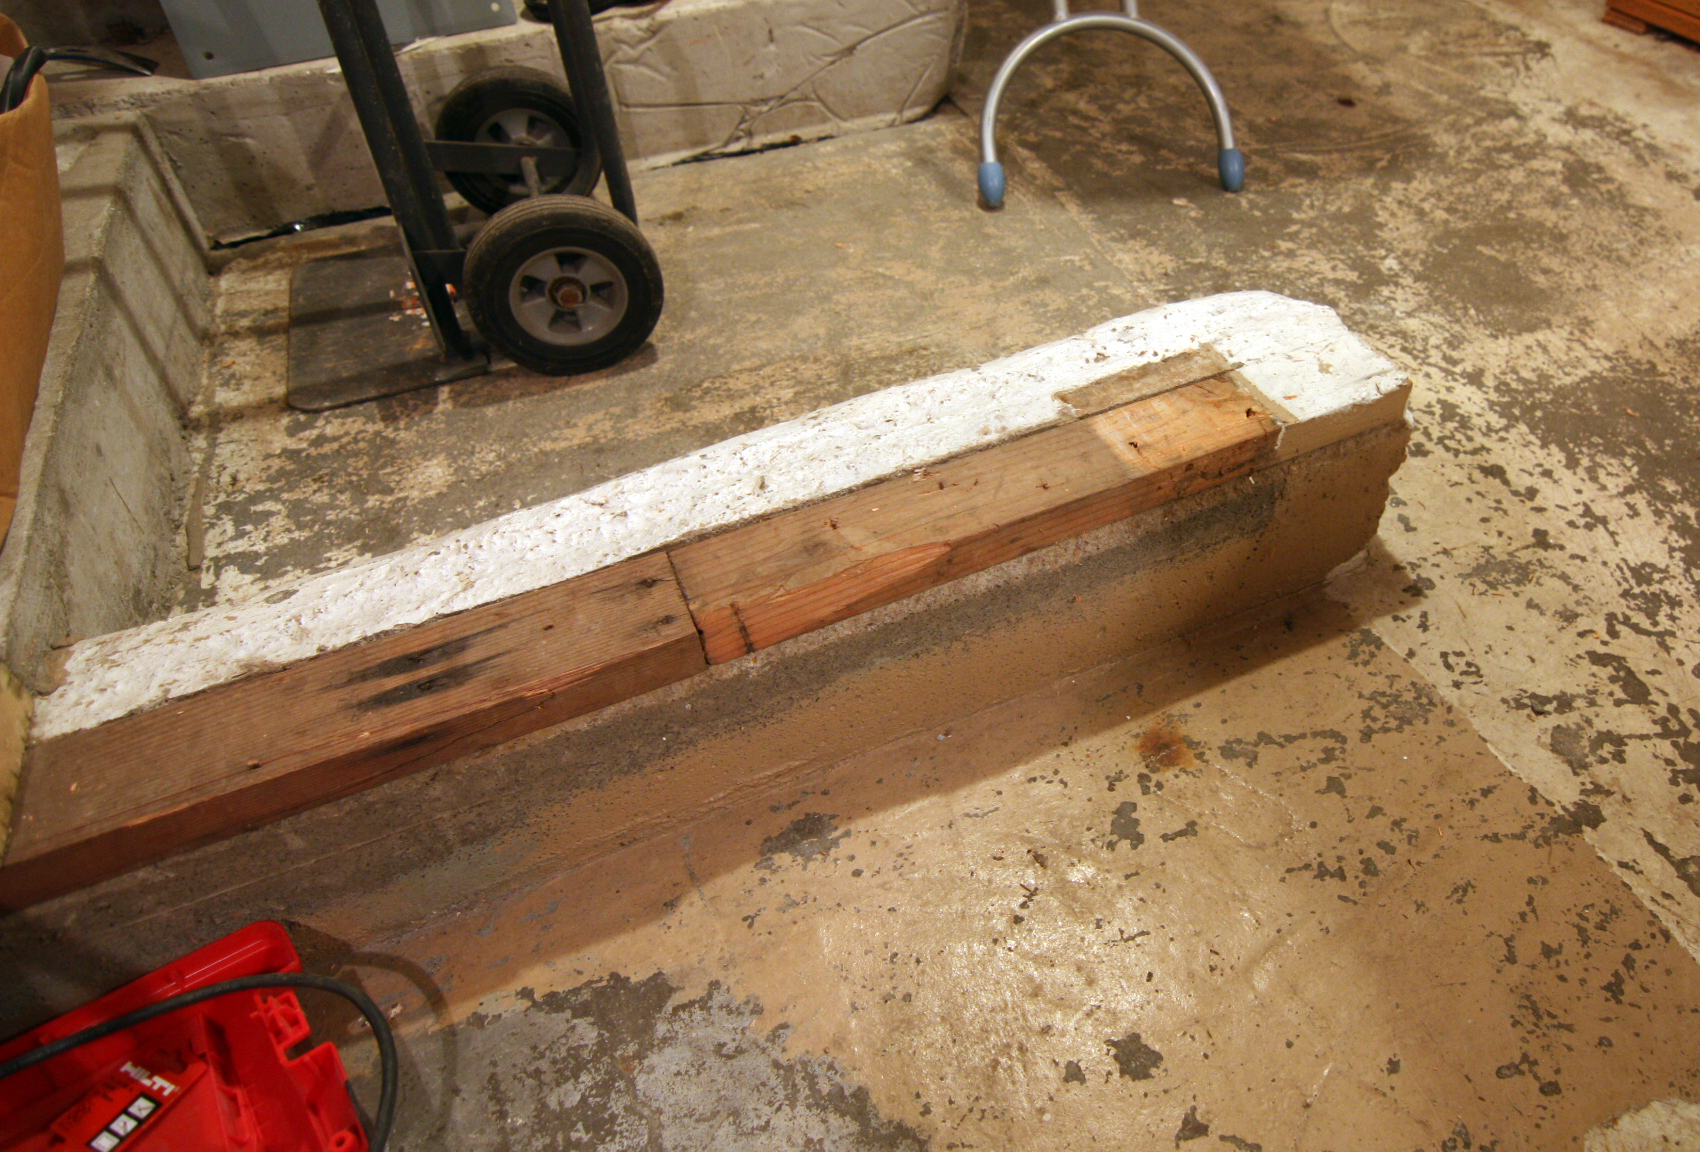
Nothing a little jackhammering couldn’t take care of though. (We later filled the hole with fresh concrete.)
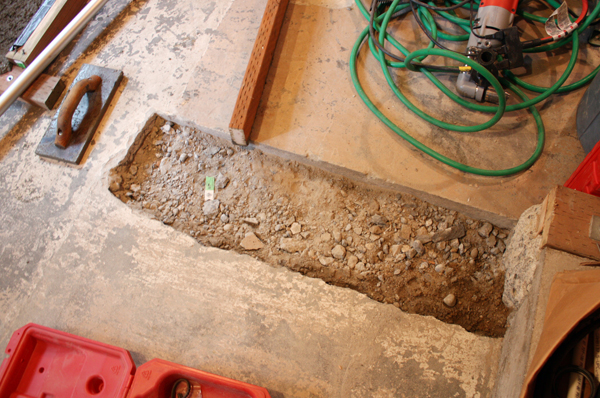
Next, to create a level surface for our fancy new appliances to sit on, Kyle poured a concrete plinth (using welded wire mesh for reinforcement). The washer and dryer come with adjustable legs, but we had too much wonkiness in the existing slab.
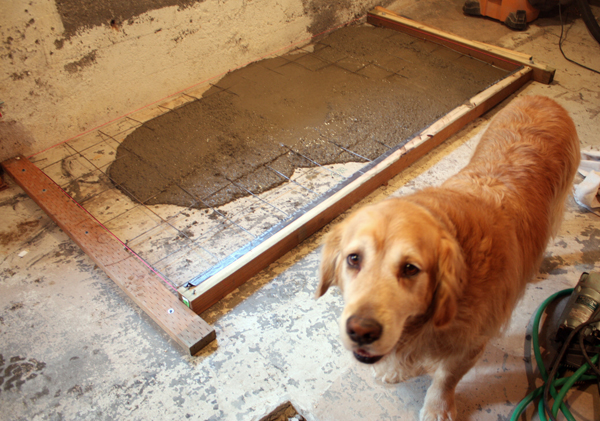
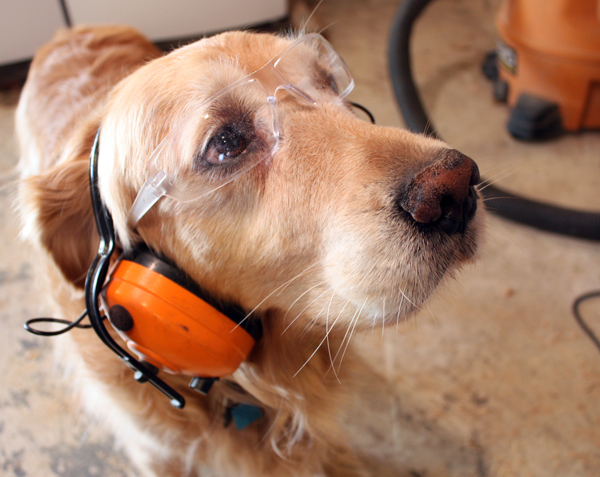
Oh Bailey…we know. It’s your “what the hell guys?” look again, but just trust us on this.
For the formwork, Kyle used some scrap pressure-treated lumber that we had on hand. We also had an old floor drain (covered by the concrete above) that we decided to plug. The drain was more of a nuisance than anything, especially since our sewer line tees into our neighbor’s before connecting to the main line in the street. A few years ago, when a bunch of college-aged guys were renting the house, they had a back-up in their basement bathroom which resulted in a back-up into our basement. Not cool. Actually, it was pretty disgusting.
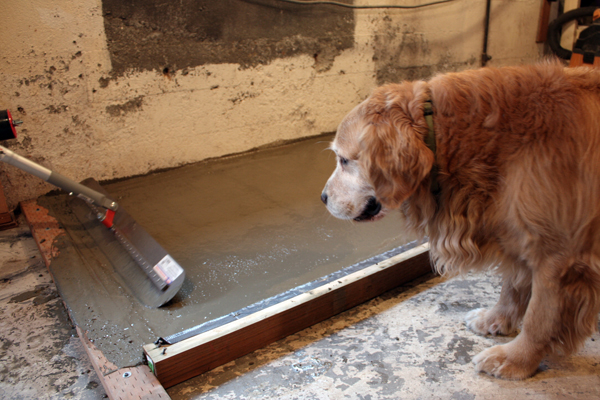
To deal with the indentation of the slab where the drain was, Kyle used a strip of flexible black sticky flashing to keep concrete from seeping out between the old slab and formwork. A quick float, a little canine supervision, and it was done.
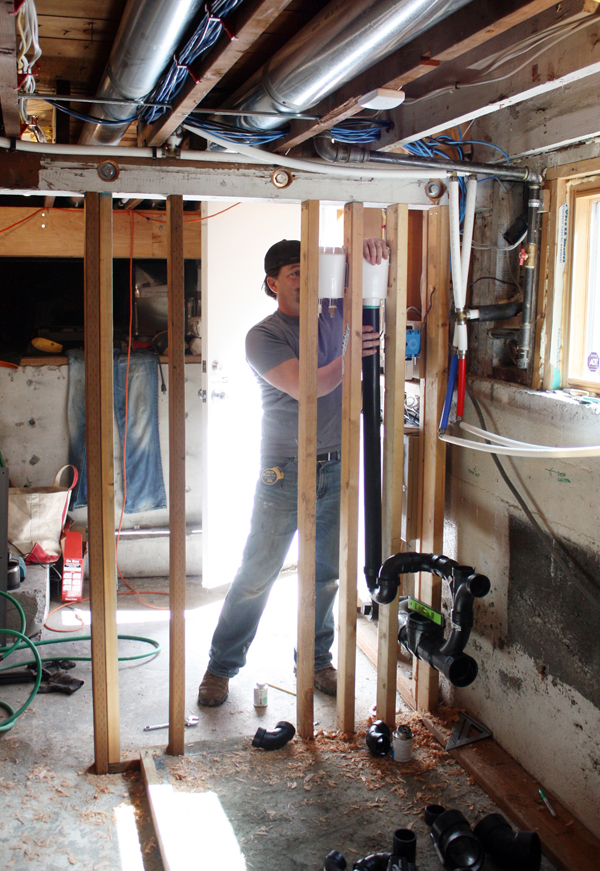
With the slab in place and cured, it was time to frame up some walls and start on the plumbing. We eventually want to semi-finish the laundry space, so it only made sense to run all the new plumbing through a framed furring wall instead of the willy-nilliness that existed before. Because of our shared sewer line, Kyle also installed a backflow preventer in the main line (it’s the thing under the neon green level). Basically, it’s a one-way valve that lets our drain water flow out but keeps our neighbors’ (or anyone else’s) from flowing in.
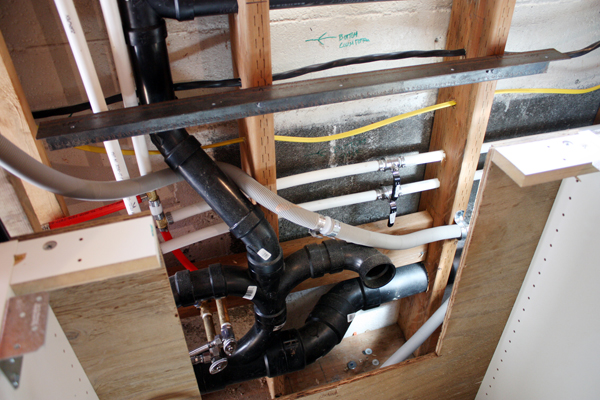
Before all this magic could happen though, there was a lot of researching, diagramming and code checking. And I have to give full credit (and a huge THANK YOU) to Kyle for being both the brains and the brawn behind this operation. We generally take a tag team approach to remodeling, but with the baby timer ticking we’ve delegated out entire projects between the two of us and are on a go-go-go schedule till d-day.
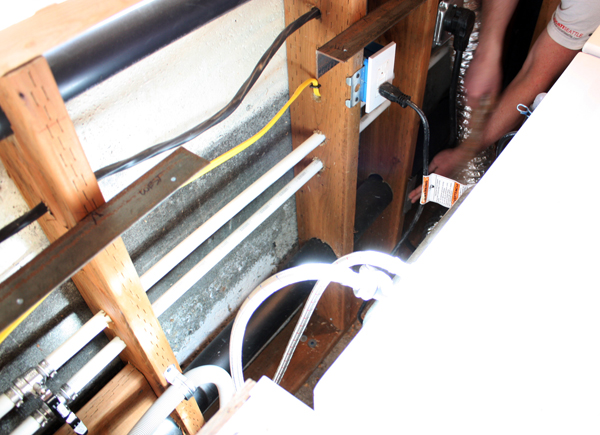
That being said, taking on plumbing as a DIYer is no easy feat. Not only do you have pipes that supply hot and cold water, but you also need pipes to vent out of the house and pipes to take the waste water away. Of course, you also need power and a way to vent warm, moist air from the dryer. Oh, and all these things must coexist within a relatively small space. A washer and dryer are one thing, but since we were already subjecting ourselves to this level of complication and head-scratching, we decided to also plumb for a utility sink…
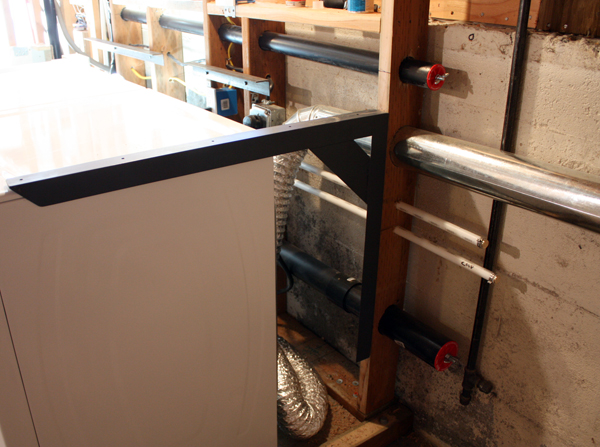
…and a future bathroom(!) (Hello scope creep!) It was quite an effort to coordinate everything, but we’re glad we did. It might not seem like it now, but planning ahead will save us time, money and sanity.
To support the new countertop, Kyle installed some steel angles along the back wall and then welded up this steel bracket support for the end. (We needed to be able to pull the washer and dryer out periodically, so the countertop couldn’t sit directly on top.)
As usual, Bailey was on hand to provide support and supervision.
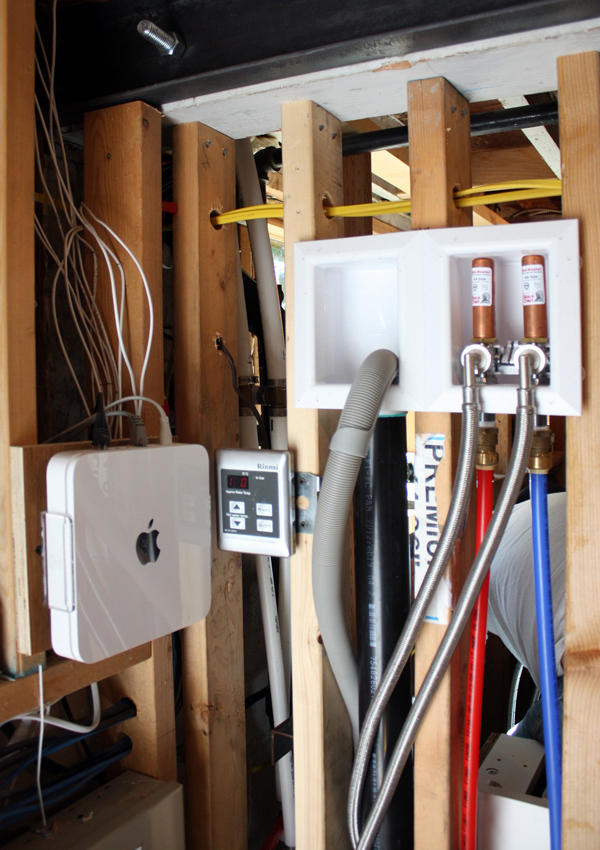
The small portion of basement next to the exterior door is quickly becoming our mechanical/electrical room. Kyle installed the supply lines and drain hose for the washer in this zone so that they could be easily accessed after the laundry room walls get covered up. Hot and cold water (the red and blue pex lines) tie into water hammer arresters, which are common to laundry areas and act as shock absorbers as water flow starts or stops abruptly within a cleaning cycle. Flex lines then run from the arresters to the washing machine and the gray hose is a flexible drain line that runs from the washer back to the black drain pipe which connects to the main sewer line.
In a nutshell, clean water in, dirty water out.
(He also relocated the thermostat for the tankless hot water heater. It’s the small box between the drain hose and Apple Time Machine.)
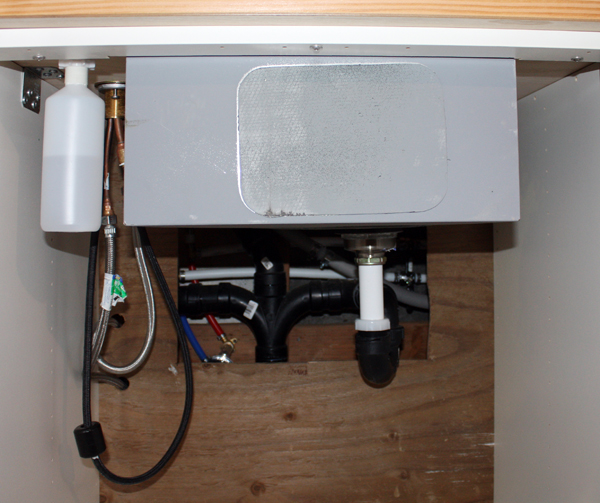
For the utility sink, we bought a basic 36″ IKEA cabinet box. The stainless steel sink was actually purchased a few years ago as a maybe kitchen sink (we ended up finding another one on Craigslist that was a little bit better quality), so we were glad to finally find a home for sink #2. In lieu of the flimsy cabinet back that comes with the unit, Kyle used a piece of plywood with a generous cut-out to allow room for the sink p-trap and access to the plumbing beyond if we ever need it.
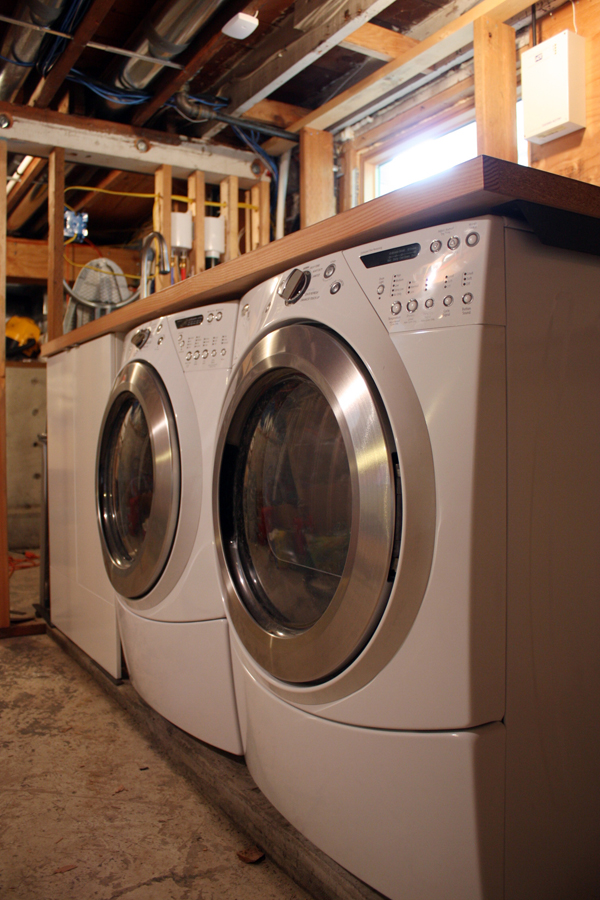
With everything finally in place and all systems a-go, Kyle installed the cabinet doors (we used the affordable Applad line from IKEA). As you can see, the washer and dryer are quite a bit taller than a standard counter height of 36″, so Kyle built a wood plinth that the sink cabinet sits on top of. To give everything a more seamless look, we purchased an extra drawer front, trimmed it down a bit, then glued it to the front face of the wood plinth.
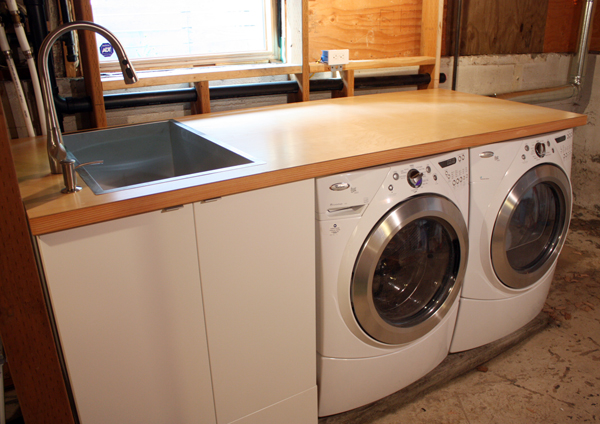
The countertop is a 3-0 x 7-6 birch door that was cut to fit and then coated with a few layers of polyurethane. A space to fold clothes that’s not our bed? Winning!
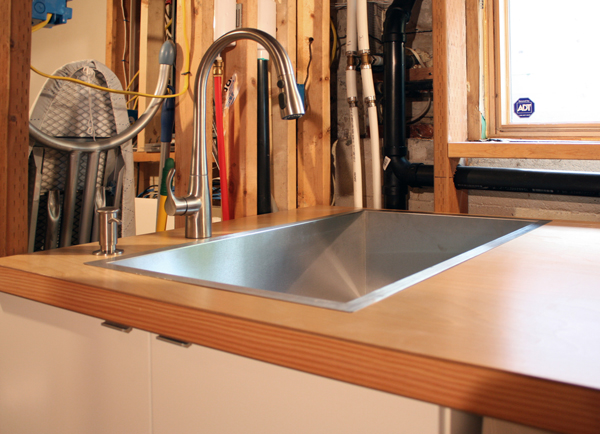
The faucet and soap pump are Kohler (the model is Simplice). It’s a great faucet that’s well-made, affordable and has a pull-out spray for hand-washing clothes or ornery cats. We considered it for our main kitchen sink but I could never come to terms with the slightly flared handle. For the basement, it didn’t seem to bother me as much. As mentioned earlier, we bought the sink a few years ago off Craigslist. It came from a generic supply store south of Seattle and actually has no brand or product name on it. The whole thing seemed a little sketchy, but we bought it anyway. Because we had plenty of depth but were crunched on width, we decided to install it perpendicular to how you normally would. We’re crazy like that.
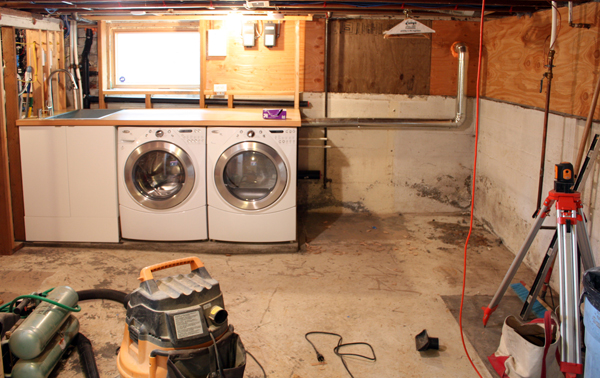
So here’s our “finished” laundry space, for the time-being at least. Of course it all took longer than expected (which was especially challenging for me and my limited wardrobe options), but after a week or so we finally ran the first load. Bailey and Felix both made an appearance for the inaugural run, mesmerized by the swishing and whirling behind the clear plastic portal. I was just happy that I would not have to resort to wearing sweat pants to work.
But we’re not done. OH NO. I couldn’t cram everything that Kyle’s been secretly working on into one post, so we’ll be back later this week to talk about our current endeavor. Hint: it involves busting up concrete and digging dirt – inside our house.
Oh yes we are!
It looks awesome! Can’t wait to see what else you’ve been up to!
Looking great. Can’t wait to see what you’re up to next.
Also, as an FYI, water hammer isn’t caused by your washer or any other fixture turning on and off; it (like steam hammer) is caused by plumbing lines sloping incorrectly. The slight cooling that inevitably occurs within the pipe leads to a sort of stratification within the pipe, with the cooler part seeking the lowest point. (Steam hammer is easier to visualize than water hammer, IMO.) If that lowest point isn’t in the same direction as the flow, it can create a slug that eventually gets shot through the pipe as the pressure of the hotter flow builds up.
This is what I get for being an architecture person dating a mechanical engineer.
This looks all too familiar! We had our basement poured a few weeks ago and have been sorting out HVAC/mechanicals since. Planning to refinish, too- and I’m most excited for the laundry space, so I was excited to see your post! So nice to have a fresh, clean space to um, make clothes fresh & clean!
Well done, but MAN! Am I exhausted on Kyle’s behalf!
Haha, wait until you see the next post! 😉
Haha, yes! Maybe it’s psychological but a nice laundry area feels so good!
I like how you installed the sink the perpendicular to the normal installation. Good use of space. I will be using that idea!
The laundry room is looking great. I love a well done laundry room. Have you considered adding a laundry shute? Is it too late? Why carry dirty laundry down the stairs, although you’ll have to carry the clean laundry up. Oh, maybe install a dumb waiter instead and solve both problems. LOL. Seriously consider a laundry shute. I have to go down two flights of stairs to do laundry. So sad.
Kyle is a power tool all by himself! Lauren, you seem like a killer planner, you are such an efficient pair, parenting will be fun!
Very nice job !
Maybe it’s just me, but the photo of your Time Capsule sitting on the wall with two constantly pressurized water sources pointing at it makes me a bit squeamish.
haha, I thought the same thing;)
not to mention we have about 60psi water pressure
thanks mariane 😉
not a bad idea, unfortunatley our bedrooms are on the opposite side of the laundry, I’m going to thing about his more though. Maybe could hide a laundry shoot inside the fauxdenza which would go straight down to the laundry room. yes, I’m liking this idea.
im exausted for myself too;) over did it last weekend, now paying the price
I rent and have no control over my laundry. But for you, with the missus expecting and soon enough a baby that wants to be carried everywhere, it would be nice not to have to juggle laundry baskets down the stairs. We had a laundry shute when I was a kid and threw all of our toys down it too. Lots of fun. Regardless of what you do, your basement is looking fantastic and you bought my fantasy machines.
I am curious about the dryer vent hose. We recently purchased a gas dryer (our old dryer was electric, but we had an existing line for a gas dryer – which the folks who owned our house before had cobbled together using two short lengths of gas pipe with still wet, 5 years later, pipe dope in the fittings – yeah, they were smart folks, so kudos for taking the time to do things the right way) and when we fixed the gas pipe issue, the dryer was taking fooooorever to dry a load of clothes. Called in the repairman (sometimes is really does pay to buy the extended warranty) and he said the number of bends in the vent hose was increasing the time it took to dry. It looks like your dryer is electric, but I imagine the principles are the same. Are longer dryer times something you’ve experienced with the current set-up? Our “run” of vent hose was under 4′ in length – but had to turn at an angle at one point to fit through a cabinet to vent to the outside. I was sure as heck surprised that a simple bend like that could add 20-30 minutes per dryer load. We fixed the “angle issue” and the loads of laundry went a lot faster.
Ahh, home ownership and the things we now find fascinating to chatter on about!
Gaidig might be able to answer this better than me;) I always like to see rigid duct instead of flex duct and minimizing the total lenght of pipe and bends. If a run gets really long I would start to look eliminating 90 degree turns in the pipe and doing them out of 2 45 degree turns instead. I would be very surpised if a 4′ vent pipe with a couple turns was causing the issue. Is it possible that it was pinched somewhere like near the back of the dryer?
also, we haven’t had any problems with ours
This gives me hope for my short, little basement. And one of my favorite design terms is “scope creep”. LOL! I like it on my personal projects only though.
Hmm. It was really weird. But once we bought the rigid pipe (I guess I should have said that before) and knocked out as much of the angle as possible, it dried much faster. I just always wonder how other folks solve issues with home related things, so thanks for putting up with long stories and weird questions. You guys are such a good source for doing DIY the right way, in my opinion.
[…] this week we showed you how replacing our old washing machine and dryer turned into this epic project and now we’re back with round two of “Zerbeys Gone […]
From what I know, everything you said is right Kyle. 😉 There’s a pressure drop across every bend, and it’s greater for 90º bends, and I think that two 45ºs don’t add up to the pressure drop of a 90º. I don’t remember exactly what the pressure drop is, though. I’d have to ask Scott. I’m much better at remembering concepts than numbers! Also, rigid duct is much better than flex duct, and even the shape of the rigid duct can impact the pressure (though that really only matters for HVAC, not dryer vents).
You should have seen the crazy ducting we uncovered when we tore out the strange entertainment center the previous owner had built in the basement. He had taken out the original duct and replaced it with over 8′ of flex duct that wrapped around the main 270º around the main line, drooped down, and was resting on the plywood “entertainment center”. Horrifying — but not as bad as the unsupported gas lines we found in the basement kitchen/bar.
that sounds like a nightmare;)
[…] laundry room is fairly straight-forward and as we showed you in this post, the new appliances, cabinet, sink and countertop are already in place. On the opposite wall, we […]